Mask Tips
Hello, I'm Laiyara and i'm going to show you how i usually use masks to make my life a little easier.
Some of the example are more basics, then i go more in depth using mask for cool effects
Layer Mask: The Basics
For the first example I'm going to use the LAYER MASK, that you can find above the layers, near the button "combine to layer below"
This function allow you to isolate a part of your work and modify it without touching other things, and generally to create a clean artwork.
We are going to use it to color very quickly our line-art, I personally use it to have a clean work without losing my mind.
1. Create the lineart
2. Now you can start to color very loosely, don't pay much attention to the border. The mask will help us later
N.B. : If you use more than one layer for this part (which i do); you have to put all them together in one folder , leaving the line-art outside.
3. Select the selection pen and start filling your drawing, paying attention to the edges this time
4. Once all the drawing is selected, select the color folder we created before and then click the LAYER MASK icon. Now on the side of the folder we can see pop up the mask we just created.
5. And you're done!
If you notice you missed a spot, or the edges don't feel right, you can select the mask by clicking on it and then use the pen tool or the erase tool to clean the drawing; like you would normally do when painting
Layer Mask: Effects and blending mode
You can combine the previous technique with stock images to create really cool effects.
For this example i downloaded some picture from the NASA website, because they are in really high resolution and totally free.
1. Download the image and import on your work space
2. Use a selection tool of your choice to create the form you want.
For this one i wanted to create an aureole around my character head, so i'm just going to select the ellipse selection tool
3. Click on the image layer, then click again on the "Layer mask" button, like in the section before. You will have something like that
4. Go on the blending mode and select "Add(glow)".
You can play with all the blending mode to see what suit your artwork best.
If you selected "Add(glow)" too, you will have something like that
5. Create a new layer and move it under your masked layer
6. Add a circle with the circle tool, selecting the first icon of the "line/fill", this will create a circle without the border. If you want the border instead click the last icon.
Use the color you think will fit best your work, I'm going to use this yellowish color.
After that you will have something like this.
Since the circle layer is below and the one on top is with the blending mode "Add(glow)", your image will take the color of the layer below, giving this kind of goldish effect.
(close up look)
7.I'm going to blend the edges a bit, to give more a natural look, using the blend tool.
You can skip this part if you want!
i used these settings for this work, but i change up a bit depending on what i'm looking for
once done you will have something like that
8. Next we will create a new layer to add some shadow, clipping the new layer to the circle layer.
You can skip this step if you want!
9.Move the layers you created under the line-art layer and color layers if you want to create an aureole like me, then you're done!
I did two example of finished art. The one on the left was done by skipping 7 and 8 step, the one on the right was done using all the steps, pick the one you like the most and go!
If you are more a painting kind of artist you can apply the same process to create realistic textures for clothes, skin, fur and even hair.
I applied the masking technique in this piece, applying a snake skin textures to the snakes.
I played a bit with the opacity and the blending mode until i reached this point where the skin look like is actually all painted.
You can also combine the cool decoration tool with mask to create awesome pattern for the clothes
Quick Mask: The basic
The quick mask allow you to create super quick selection that able you to modify some part of your project or adding super quick detail in a easy way
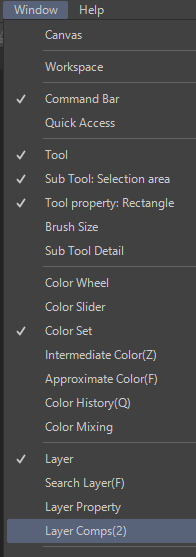
1.The quick mask is a little difficult to find, you have to click on select and scroll down.
click on it and it will appear the quick mask layer, that you can easily recognize for the pink symbol
the percentage near the symbol represent the opacity of the color you will use to create the mask (just like the green color you see when using the selection tool) , i suggest to leave it at 50%, so you can still see what you have under
you can select using normal tools, like the pen or the brush , and you can change the size of the brush like you would normally do
you can see i selected the hair because of the same pink color as the icon
2. Once you're done selecting repeat the passage you did to activate the mask.
Go to select and click "Quick mask" again
The layer you just created will disappear along with the pink color, that will be replaced by a selection
3. Select the layer you want to work on and then start editing, add color, saturation, create highlight and everything you need
In this example i gave the hair a new color
What's the difference between the Quick Mask and Layer Mask?
You may wonder why there are so many features that allow more or less the same things, and which is better for your work.
We have to point out that the Quick mask and the Selection tool are very similar, as much as Layer Mask and Clipping are.
As you can see the two artwork i used as example are very different and that's the whole point.
The Layer Mask works better with Art that have defined line, because allow you to color real quick, staying in the edges and creating texture in a limited space.
The Quick mask is intended to work better with things that have volume and not defined edges.
For example i use the Quick Mask if i want to change the color of hair in PHOTOGRAPH, because it allows me to select hair quickly and doing a decent job in no time.
LAYER MASK
PROS:
Allow you to color the line art quickly
Can edit later the mask if not satisfied or for edit mistakes
Can create illusion of textures
don't allow you to color outside of the line
CONS:
-not very good for shading
- Have to pay more attention to the edges
QUICK MASK
PROS:
-can select really quickly
-Useful for shading
CONS:
-You can't edit the selection later
-don't have shortcut, you have to search it
-You will have to create the new layer to work on, is like the selection Pen with some more advantages


Kommentar