Offset a layer by half (for working on seamless textures)
If you have ever worked with other software, you might be familiar with an "offset" feature that allows you to shift a layer or canvas by its height and width divided by 2, essentially putting the edges in the center of the canvas while you work on seams.
While this doesn't exist natively in CSP (the closest thing being the material layer & tiling method), it is possible to achieve it with auto actions.
How to use auto actions
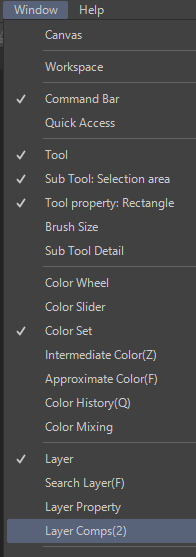
You can access auto-actions by going into Window > Auto Action.
Once opened, you can add an action by clicking on the third icon at the bottom. You can then click the red record button and everything (well, almost everything) you do will be added to the list.
Adding offset to a layer
Start by drawing something on your Layer 1 so that you can see it. I personally do a cross with 4 dots.
What we want to do is shift the layer to the right by half the size of the canvas and have the right side of that layer loop back on the left so that the seam is in the middle. Same thing vertically.
To achieve this, you will want to click record and duplicate the layer 3 times.
Grab your move tool and with the top layer still selected, move it up by half your canvas size (in this case 512 for a 1024px canvas) and left by the same amount. You can do so in multiple steps and it will count as one move in the auto actions. You can use the Shift key while you drag to only move either horizontally or vertically.
With the move done, go to Layer > Change Selected Layer > Layer Below (or press Alt + [ )
then move that layer up and right.
Repeat the Layer Change, move that layer down and left, repeat the Layer Change and move that layer down and right.
You now have one layer in each corner. Time to go and double check that all your "Move" actions only have 512s in them (or whatever your number is). No accidental 511s or 513s
Go back to the Layer Change menu, but this time do "Layer Above" 3 times to go back to the top layer.
Press the "Combine to layer below" 3 times (or right click the top layer each time and select "Merge with layer below")
We are now back to one layer.
Now the outside of the canvas still contains the content of everything we shifted so we need to delete that first, otherwise every time we use the auto action they are going to superimpose on each other and make a mess.
Press Ctrl + A to select everything on the canvas, then Ctrl + X to cut.
(if those shortcuts aren't the same for you, you can find them in the Select and Edit menu at the top, respectively.)
Once you cut the content of your canvas, deselect with Ctrl + E and delete everything on the layer with the Delete/Del key. (Don't delete the layer itself)
Finally, paste back what you cut using Ctrl + V and merge the layer down again.
You should end up with only your Layer 1. Press the red square to stop recording and your list should look like this:
And that's it! You can now use the auto action with that play button, work on your seams and then use it again to go back to normal.
Unfortunately, I haven't found a way to offset by half regardless of canvas size, so you need an auto action for each size you work with.
Bonus: Put auto actions in the command bar
You can drag items from your auto action list to the command bar (the one just above your canvas) for easy access.
You can right click and change the icon to anything you want. I made a custom one by drawing with white over a transparent background and saving it as a .png.
If you have multiple Offset actions, you can group them by Ctrl + dragging over an existing one.
I hope you found this helpful!


Kommentar