3. Flatting colors
I will flatten each part. I generally start with the layers on top and the layers with small details.
Unnecessary lines are erased or hidden along the way.
Since the line art’s opacity will be set to 50-60% to blend in the end, I lower its opacity at this stage to make sure I don’t forget to paint any surface.
[1] Flatting hair ornaments
The basic flow is to fill with the [Fill] tool > [Refer other layers] sub tool, then fill any leftover sections with the [Fill] tool > [Paint unfilled area] sub tool or [Pencil] tool.
Overfilled parts are erased with the [Eraser] tool or [Pencil] tool set to transparent color.
My tool properties of [Paint unfilled area] are shown below.
▲ [Target color] is set to [Target all colors], [Color margin] is set to [0.0].
① Filled with [Fill] tool -> [Refer other layers] sub tool. This method will leave gaps.
② I trace the gaps with the [Fill] tool > [Paint unfilled area] sub tool.
③ I paint the traced part. I fill the remaining gaps with this method using the [Pencil] tool.
The hair ornament’s flatting is complete. The color can be anything as long as it stands out. With white backgrounds, light colors make it harder to find gaps and overfills, so it may be better to use dark colors. I do the same for other parts.
[2] Flatting hair
Next is the hair.
I want to see how the bangs overlap with the skin, so I also display the skin line layers.
With parts without borders in the line art like bangs, I block paint and then use the [Airbrush] tool set to transparent color to fade the tips. This emphasizes the eyes and makes the hair lighter.
I erase overlapping lines.
I separated and flatted each part.
[3] Color adjustments
The layers are getting messy, so I added a layer folder.
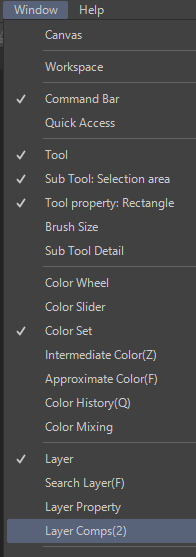
Creating folders with the [Layer] menu -> [New Layer Folder], I sorted them into three groups: “Shrine maiden (female character)”, “Tengu (male character)” and “Necessary roughs”.
(To be honest, I just recently learned about the layer folder...)
Depending on the layer blending mode, grouping layers in folders will change the range of the effect and color of some layers, so I should probably group parts at regular intervals.
Note:
By changing the blending mode of the layer folder from [Normal] to [Through], tonal correction effects and layer blending modes can be applied to layers outside of the folder.
“Through” is a blending mode that can be set only for layer folders.
For details, refer to the following TIPS.
The current colors are hard on the eyes, so I change them to ones closer to the finished image.
If you select [Lock Transparent Pixel] from the Layers palette, you can draw on existing parts without painting the transparent spaces.
I apply [Lock Transparent Pixel] to the flatted layer, and repaint the layer with the [Fill] tool > [Close and fill] sub tool.
My tool properties of [Close and fill] are shown below.
The processing range’s target color is set to [Apply open area too other than transparent], [Close Gap] is on, [Color Margin] is set to [0.0], and multiple referring to is set to [Selected layer].
I went for flashy Japanese colors.


Comment