
Coloring Clouds
I enjoy using this use oil pastel to fill in general cloud shape. It is excellent for painting skies and even crystals! Great texture.
https://assets.clip-studio.com/en-us/detail?id=1702961
Press lightly to create smaller clouds and smudges. Use white to create a base layer for our clouds.
Create a layer on top of the white cloud layer. Use the clip at layer below function. Then use the oil pastel to fill in the general volume and shape of the cloud with a light sky blue
With the oil pastel continue smudging and blending. Do not worry about going outside the lines. The clip layer function makes sure that everything in that clipped layer stays within the area of the below layer.
Refine cloud volume with a hard eraser or kneaded eraser and stronger pressure from your oil pastel, then use this beautifully textured square blender to blend in the shapes. Link to square blender:
Square T Marker / Blender
https://assets.clip-studio.com/en-us/detail?id=1692034&uuid=3685bb93d5-534f-d39e-519b-5da9f3aa43
The Kneaded eraser is found within your eraser tool as a basic sub-tool.
For the rest of the background I use the oil pastel to get the shape of the clouds, and kneaded eraser to make the clouds more painterly. Below is the effect of the kneaded eraser tool.
To fit the atmosphere I painted low saturation blue mountains in the farthest background.
To continue the development of my layers I will use a different shade of green to diversity the hue of our grass.
Every time you do this consider using a new layer. Use the clip at layer below function to ensure it stays on top of and within your desired layer.
I repeat this process for the rest of my objects.
Correction Layers
Consider using correction layers to enhance your atmosphere.
According to the rules of atmospheric perspective, the farther an object is away from the viewer, the more its color shifts towards the background color. Our background today is a blue sky, so I will shift its saturation to convey its distance in the painting.
Creating Crystals
For this background I want objects that are detailed and readable, but not too realistic that they feel out of place in this stylized environment. For this reason I will use my cartoony method of painting crystals.
The below .gif displays my process.
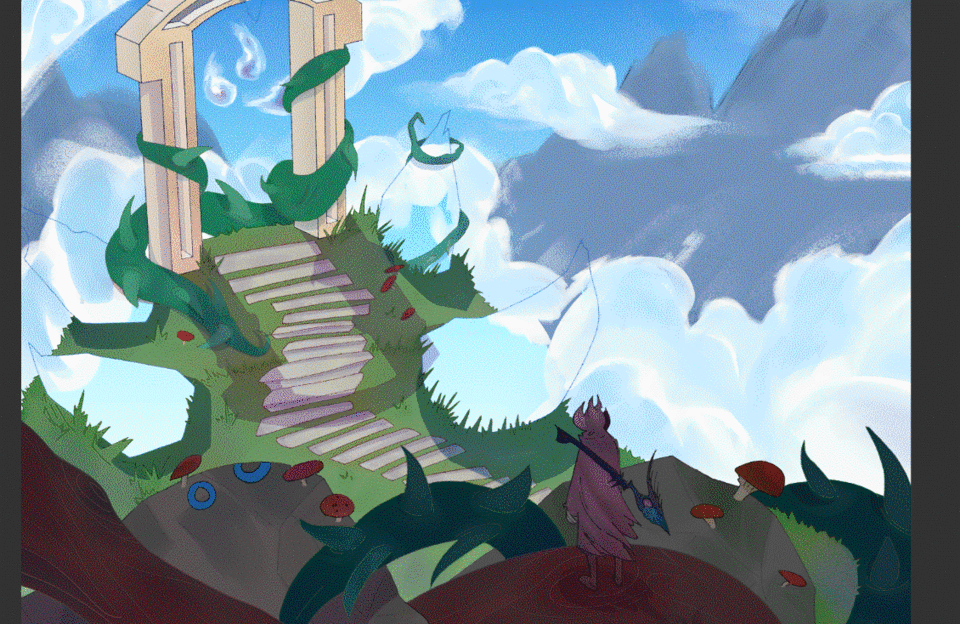
1. Use a gradient to fill in the base color of the crystal. I used the midday sky gradient.
2. Paint the facets of the crystal with white. To do this I use the dense watercolor and set it's density to 15 to capture the shiny and translucent feeling of crystals.
3. Use the lowered density watercolor again but with a different and darker color.
4. Create a new layer to clip on top of the crystal. Use your oil pastel to block in the shapes of crystal facets. Sharpen the facets with a hard eraser.
5. Once you are satisfied use the soft eraser to lighten oil pastel marks. Also consider using the square blending brush. Lower the opacity too if you desire.
6.Finally set that oil pastel layer to Linear burn. This creates a beautifully crystalline effect.
7. Creating a glowing effect: Create a new layer. Do not clip this layer to the crystal layers. Set this layer's mode to overlay. Use an airbrush set to a large size and spray it with a light color of your choosing. And Done! You've creating glowing crystals as shown in the header .gif.
Creating Shadows
The easiest way to create shadows is with multiply layers. Use a light color to make shadows in multiply layers. Consider using a bit of a hue to convey the mood of your art piece.
To save time in making shadows:
1. Go to your line-work layer, and use the auto select tool to select the shape of the object you want to shadow.
2. Make a new layer set it to multiply.
3. Fill your selection with a light color.
4. Flip the shadow upside down and transform it to fit the environment.
Continue creating shadows for the rest of your environment and you're done! I recommend using a pen tool such as the G-Pen to fill in those shadows with solid colors and multiply layers.
A final tip:
1.Go back to your line-work folder.
2. Lock transparent pixels on all your line-work layers.
3. Paint over your lines with new colors! (because the transparent pixels are locked, only the colors of your lines will be altered.)
Thank you for reading this tutorial! I hope you enjoyed it.
Users who liked this post


Comment