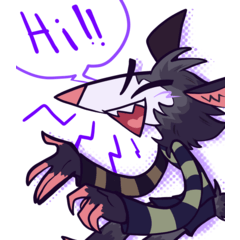
Create a traditional-looking painting with custom brushes
Introduction
One of the perks of Clip Studio Paint is its extensive arrays of brush customisations and settings which allows for a lot of possibilities for creating brushes. There are multiple ways to create your brushes in Clip Studio Paint. You can make one from scratch or you can create new ones with the pre-existing assets. In this tutorial, I am going to show you how to create custom brushes with the assets that are readily provided in CSP along with how to use them to emulate traditional paintings.
On the other hand, the original setup for brush assets and texture work quite well enough to help you create various pieces of work. However, customising your own instrument will sharpen and help you deliver the right outcome.
These are the brushes that I will be using in this tutorial. All of them are custom-made with the assets that came with CSP.
Creating brushes
To create a new brush, hit this button.
Name the brush.
Click this button to open the brush settings window.
When creating brushes, it is always beneficial to keep in mind what kind of outcome or effects you are trying to achieve. In this case, I am trying to replicate traditional oil paintings, so I made several brushes that serve different purposes. The first thing I thought of was brushes for hard edges and soft edges. Consequently, the first brush on the list was made specifically for sketching and defining hard edges. I want to keep it simple with this one, so I only enabled pressure sensitivity for brush size and opacity. However, I used drawing pencil brush tip instead of a normal circular tip to make the brush more dynamic.
The second brush, as the name suggests, was made for blending colours which contributes to more organic appearance. I enabled colour-mixing property.
The texture setting of the brush plays an equally important part in creating brushes that emulate traditional media. For this blending brush, the texture would not be that noticeable; nevertheless, sometimes subtle things such as this can make a difference.
This third brush is for making soft edges, and colour-mixing property is turned off.
The fourth and fifth will be the ones that will help us create the traditional look that we want.
As for “Painttexture”, I used the gouache01 as a tip. This is one of the premade assets that I like since it creates this 3D paint texture that would work well with our theme. Colour-mixing is disabled.
I also applied some textures to the outline of the brush like so.
The last brush serves as a touch-up textured brush. Accordingly, I enabled texture property. But to make the texture more prominent, I changed the method to apply texture to Subtract.
The sole purpose of implementing randomness and texture is to create a high fidelity touch to the painting.
Painting Time!
Now that we have already prepared our tools, let’s get started with the fun part!
Sketch
Using the sketch brush, I sketch out a quick headshot of my original character. Introducing Tee!
Next, I create a new layer which is our background. I also add hints of lighter blue to create a more varied look.
Colour Layout
Now, we are going to layout the lighting for the portrait. Create a layer between the previous two. The “BlendTraditional” brush is perfect for this step since I want to paint in base colours and shadows loosely. As you paint, always keep in mind the direction of the light and the undulations of each surface.
Then, change the sketch’s layer mode to multiply.
Refining
With a new layer on top of the others, I start refining the details on his face. Using the first brush to create hard edges, the blending and blurring brush to make soft edges, and the last brush to apply textures in certain areas.
Using Textured Brush for Final Touch-Ups
Once you are satisfied with the painting, now is the time for final touch-ups. Create a new layer with low opacity (mine is at 46%) and apply the “Painttexture” brush to create the paint-like texture. Make sure not to overdo it.
And that was it! I hope you find this tutorial more or less helpful! Feel free to follow me on Instagram to see more of my art @raedasama_art.


Comment