
Hello
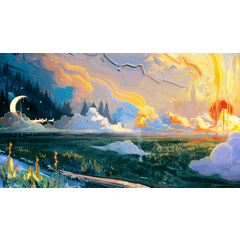
In this tutorial I will show you three skyes, two with perspective and one non-perspective. But, lets start with the parts of a day. Knowing them will help you a lot when drawing a sky.
When the sun is below the horizon it can be Twilight, Dusk, Night or Dawn, and when is over the horizon it can be Sunrise, Morning, Daytime, Evening or Sunset. Commonly, each one has its own colors, but depending on the place they will not always be the same colors. Knowing them can help you combine one part of the day with the next.
Also the types of clouds (Comulonimbus, Cirrus, Stratocumulus, Stratus, etc.) will help you to draw diferent skyes.
CLOUD
First, I will show you how I draw clouds. The brushes I use are: Dense Watercolor, Watercolor Brush and a dowloadable brush-pen called 雲ブラシ ID: 1742811 and the G-Pen for some details.
Dense Watercolor: amount and density of paint 100%
Watercolor Brush: amount and density of paint 100%
I draw the shape of the cloud with the dense watercolor brush and then I use the dowloadeble one to give it more realism.
With the brush-pen I take some parts of the cloud, The brush pen must have the color of the sky. And to give some volume to the cloud I use the dense watercolor with diferents light blues. To blend I use the watercolor brush.
For the luminous parts of the cloud I do the same as before, but using white.
I continue with the same process until I am satisfied with its volume. And for the last touch a dark blue which I blend it.
And finish.
SKY I
Now that said, let's begin with a DayTime sky with perspective.
For the sky I use the gradien tool foreground to transparent.
We continue with perspective to a point. This will give you the perspective of the clouds over the ocean, in this case, and not in the back.
These cubes mark the place of the clouds. The base will be the bottom of the cloud. For the base and the shape of the cloud I use dense watercolor brush, amount of paint and density 100%.
Once we have the botton of the clouds we draw its shape.
Then volume.
And to finish, we draw lines of action that simple clouds will follow.
And that's all.
SKY II
Our second perspective sky is the night. In this case there are tree colours for the night.
We draw the shape of the clouds.
We painted with the dense watercolor brush and then with the pen we give them more shape.
We continue with the shading and blend it with the watercolor brush.
We use a darker color and do the same process.
With the pen we made the little light blue clouds looks more cloudy and large ones we blend it with the sky.
Lastly we add more little clouds with the pen making it look like the cloud is breaking and some simple clouds very light and dark.
And finish.
SKY III
Our lasted sky, a twilight sky nonperspective. The process of painting a cloud is the same as before. But, in this case, the clouds will be at the back.
See ya!
Twitter: https://twitter.com/SL_SpaceLion
Users who liked this post


Comment