Making Your First Sky in Clip Studio Paint
1.- INTRODUCTION
Hi everyone!
It's razlert!
I want to share some Tips and Process of Cloud Sky Painting.
This tutorial uses Clip Studio Paint pro.
So let's start follow my tutorial step by step!
2.- WHAT IS SKY?
As everyone knows, the sky is the panorama that opens up to you every day.
It is the airspace, which consists of numerous layers of atmosphere, varying in density. Various physical and chemical phenomena can be observed in this space: formation of clouds, northern lights, thunderstorms, lightning and snow clouds.
This tutorial attention is drawn to the Cumulus clouds and Cirrus clouds.
The clouds at all times of the day in the looks unusually diverse, because it is difficult to find something more changeable. The clouds can be coral pink, infinitely blue, powerless gray, or dark thunderstorm. It can convey any emotion.
Sky with clouds affect the way a viewer experiences a piece.
3.- DRAWING THE CLOUDS IN CSP step by step
■Step 1
Have photos and refer to them as an example! I usually use photos, because it can help to make your illustrations look more realistic.
■Step 2 (Create a new canvas)
First, create a new canvas by clicking [New] on the upper left command bar:
But you can also create a new canvas by going to the [File] menu > [New]:
Then set the width to 4311 px and height to 2108 px. Set the resolution to 300 dpi and click OK to create the canvas:
♡♡♡♡ ⚠ NOTE ♡♡♡♡
Please read the following TIPS to learn more about creating and setting up a canvas.
■Step 3 (Create new layers)
When you create a new canvas, a “Paper” layer and a “Layer 1” layer will be created by default:
① Click the [New Raster Layer] above the [Layer] palette to add layers.
I used seven different layers for backgrounds, shapes, shadow and lights. It will be easier to make adjustments at later stages.
② Click this icon twice to add two layers.
We have three layers.
③ I change “Layer 1” to “background”, “Layer 2” to “simple shapes”, “Layer 3” to “forms”
Layers stack up in the order shown in the [Layer] palette. Parts drawn on upper layers will cover lower layers.
■Step 4 (Brush Preparation)
♡♡♡♡ ⚠ NOTE ♡♡♡♡
All of the tools I used can be downloaded here:
It’s totally free!
After you download the file, import a new brushes:

These are the brushes that I’ll use this time:
✽Brush size is variable and not fixed✽
For my brushes, I made some adjustments from the initial tool settings.
I also use brushes as eraser. You can use them as eraser tool to edit the lines you have drawn. Just select the your brush tool from the [Sub tool] palette, go to [Color] palette and select the transparent color (colorless):
♡♡♡♡ ⚠ NOTE ♡♡♡♡
For details on customizing the [Tool] palette and [Sub tools] palette, please see the following article.
■Step 5 (Color palettes)
I used this color palettes ↓↓↓
Colors can also be selected by directly entering numerical values on the right side.
♡♡♡♡ ⚠ NOTE ♡♡♡♡
For more details on how to use the color palette, refer to the following TIPS.
■Step 6 (Background)
First add the background. Background is usually a solid color or gradient. A gradient is a gradual blend of two or more colors (or different tints of the same color).
For this tutorial, we will be focusing on linear gradient of sky.
① On the [Layer] palette, select your “backround” layer.
② Go to the [Tool] palette and click on the [Gradient] tool
③ On the Sub Tool [Gradient], select [Gradient] group, (A button for selecting a [Group] is displayed at the top of the [Sub Tool] palette) and go to the [Blue sky] tool.
④ Then please follow the gif instruction below to create your linear background:

♡♡♡♡ ⚠ NOTE ♡♡♡♡
For details on using the [Gradient tools], please see the following article.
■Step 7 (Simple shapes)
① Change the color brush with the [Color] palette. To select (H 40; S 16; V 100) as the drawing color, open the [HSV] palette and select by directly entering numerical values on the right side or click on the [Color Wheel] palette.
② On the [Layer] palette, select your “simple shapes” layer.
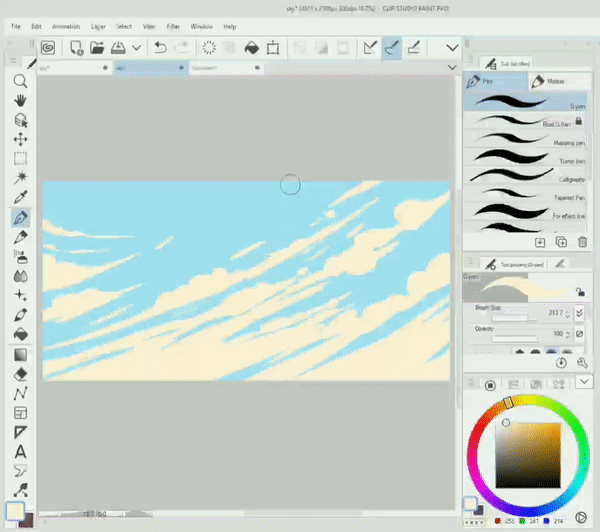
③ Start with simple shapes, roughly shapes with the [G-pen] (CSP Original) like bellow

Drawing the Cirrus clouds think about the perspective. Minding about the perspective, I emphasize the diagonal lines of the further clouds and use more random shapes for the foreground clouds, it would help to prevent overlap and duplication of lines.
You can undo your last action by pressing [Undo] on the [Toolbar]. Use [Undo] to completely redraw a line:
And use the [Hard] eraser tool to correct part of a line or an area with many lines.
Change the brush size to paint the details.
■Step 8 (Forms)
The clouds have a lot of different shapes and forms. It isn’t just clots of water vapor. Any clouds can be broken down into simplified forms like spheres, hemisphere cones, cylinders, and boxes. It might be easier to draw clouds if you think of them as solid objects.
In this step, we’ll draw the forms on a simple shapes.
Just imagine Cumulus and Cirrus clouds in the shape of a spheres crossing.
① On the [Layer] palette, select your “form” layer.
② Select [Brush] from the [Tool] palette, and choose this brush from the [Sub tool] Brush.
Change the drawing color (H 273; S 22; V 52) with the [Color] palette.
Everything we add to our work will be part of the composition, and the cloud is no exception!
③ Think about the composition, draw random a rough sketch of the spheres on the canvas with your chosen tool, then add some details.
Such an approach would help you to understand how to correctly put the light and shadow on the cloud.
■Step 9 (Light and Shadow)
The clouds are a three-dimensional object. Light and shadow would make them look the form of a voluminous structure.
Look at sphere (ball) below, analyze where the light touches, what piece are in the area of core shadow and full light, where the reflected light is located.

…a little bit about Terminology
• Full light is the area in front of light source.
• Highlight is a place where the specular reflection finds its way to your eyes. It is the brightest point of the shape.
• Half light is a full light darkening gradually toward the terminator.
• Terminator is a virtual line between light and shadow. It can be sharp and clear or soft and blurry.
• Core shadow is the area that faces away from the light source and is therefore not illuminated by it.
• Reflected light is diffuse reflection hitting the core shadow. It is never brighter than the full light.
• Cast shadow is the area blocked from the light source by the object.
Then let's come back to our illustration.
① I put the light source (light rays) in the top left corner, roughly.
② I create a new three layers, rename the first layer to “core shadow", rename the second layer to “full lights" and rename the third layer to “outlines"
③ Draw core shadow with the “G-pen". Color brush is (H 198; S 29; V 91)
④ I change the brush color with the [Color Wheel] palette (H 0;S 0;V 100) and start drawing full lights using “G-pen” and soften the edges using this brush:
Zoom out to see the entire canvas. It is important to always look at the overall balance of the work.
① Click the eye icon to the left of the “form" layer to hide the layer.
② On the [Layer] palette, select “outline” layer.
③ Add outliner using this brush tool:
① Next I create a new layer below the “full light” layer and name it “details”.
② Then I click on “Clip to Layer Bellow” icon, it will keep the new drawing in line.
③ Lower the [Opacity] on the [Layer] palette to 50% to lighten the color of the layer.
④ In this example, I used the [Magda’s] brush (CSP Original).
⑤ Paint the shadows in a darker blue color on the right side cloud. The color brush is (H 203; S 55; V 71)
Use this brush tool as eraser tool to add the details of the shadows.
By darkening the shadows, the silhouette of the clouds becomes clearer, which makes it easier to see the overall impression of the painting.
The process of painting a Cirrus cloud is the same as the earlier process of painting a Cummulus cloud.
You can continue to draw the artwork in more detail.
But, I feel like we're done here!!!
4.- SKY AS A INDISPENSABLE ELEMENT OF ARTWORK
It was important for me to show you how the sky, as part of the environment in your art, could change.
Look at the different sketches and how the sky affects the mood.
The place is the same, but by changing the composition of the clouds of their structure, and use of the other color palette, the illustration is completely different. The romantic summer landscape became mysterious, perhaps with a note of drama. The mood changed, and the illustration transformed the new worrying meaning.
5.- AFTERWORDS
Drawing the cloud sky is not simply, but using the references, studying the basics of composition and regularly practicing, you will be able to make the sky canvas alive and interesting.
Thank you for reading until the end! This is my first tutorial and English is not my first language and I'm excited.. I'm glad if you'll forgive the grammatical inadequacies of that tutorial.
Let me know if you found this short tutorial helpful in the comments below! :D
Have a good day everybody!
Best regards,
-razlert


Comment