
Hello everyone
In this tutorial I share with you my inking method with the REALISTIC G FEATHER and G FEATHER on CLIP STUDIO PAINT.
Introduction
The inking of a drawing is a set of strokes that affirms the sketch of a character and that character's personality.
You have to understand the character you are working on, know his emotions how he feels, what type of character he is.
Whether they are thin or thick, these two types of lines are not used in the same way.
Having good drawing tools isn't everything, you still need to have good technique.
We will therefore see how to ink to obtain a professional rendering.
CASE 1_PLUME G
Here we have a G FEATHER inked cartoon illustration
We use the FEATHER G with an average brush thickness, (27.0).
We can use such a thickness because The cartoon style being caricature is by definition quite an exaggerated drawing style, you will notice it in your favorite Cartoon series.
Indeed the lines are thicker to give a strong presence to the character both graphically and in his character, which most often is quite noisy, turbulent joyful or else it is his universe will reflect these three characteristics.
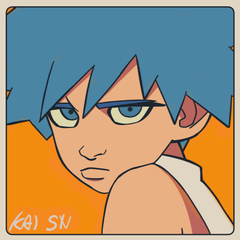
CASE 2_PLUME G REALISTIC
Here we have a Manga illustration inked with REALISTIC G FEATHER
We use the REALISTIC G FEATHER with an average brush thickness, (27.0), but unlike the G FEATHER, the REALISTIC G FEATHER retains a certain finesse, which is very important when you want to ink a manga style character, because the characteristics and presence of this type of design are in the details, and who speaks of details speaks of precision.
Precision is therefore very important.
CASE 3_
The 3rd Case is in fact a combination of the two previous techniques, because the style graphically is in itself a combination of different styles but with a touch of realism in the pose and in the facial reaction.
We will use the L FEATHER for the outlines and make the details with the REALISTIC L FEATHER.
With our example in image that we will see at the bottom, the details are not only those of the face.
In fact, to accurately draw debris, dust and scratches like on a battle scene, the REALIST G FEATHER is a very effective tool.
Let’s see in the following example, how we proceed for the details made mainly with the REALISTIC G FEATHER.
On plane A we have a first series of oblique lines, then another series of oblique lines also but this time in the opposite direction, by combining them we give mass to our illustration
(See plan B).
To express the phenomenon of the wind, draw two continuous lines (if you make more than 2 you risk overloading your illustration and making it illegible.) Then make two other lines with a space of about 5 millimeters between this group of traits and the previous one. (See Plan C).
All these graphic elements were used in the realization of the illustration below
Repeat the same technique if your "wind" is supposed to manifest itself over a large area.
Finally, two points which in my opinion are very important.
1- To draw or express the wind, dust or speed effects, you must not go fast by drawing these different elements, you must on the other hand think of the phenomenon in itself or of a moving mass, for dust for example. This is an exercise that requires some thoroughness and time, put these tips into practice and when drawing remember to step back each time to see what the big picture looks like.
2 - The movement of the forearm has a lot to do with it, generally when we start, we think that since it is the hand that holds the pencil, it is it that does everything, it is true most of the time. time, but for this kind of exercise it is more the forearm that is used, especially for supermarkets, or in a large thumbnail of a comic strip for example, it is on it that rests most of the work, to do straight lines, your forearm has to function like wiper blades, the elbow just becomes your pivot point ...
(see example below and in video)
This is the end of this Tutorial,
I hope it has been very useful and allowed you to try new things.
I'll let you watch this video for more information which may have seemed vague to you.
Users who liked this post


Comment