
Hello
On this tutorial I will show you the makings of simple animation loops to use in illustrations and how to animate in Clip Studio Paint. I will try to explain everything you need to know so you can bring your illustations to life.
Animation: Loop
An animation loop is an animation that repeats itself, over and over. Where the end frame is also the start for the beginnig frame.
To have a simple or easy loop you will only need 4, 6 or 8 drawings, but if you want somenthing more large, complex and not repetitive, it will be better to have more drawings.
A common animation goes to 24 frames per second. If my animation, due to the amount of drawings I have, seems to go very fast, it is not necessary to change the playback speed, but to repeat the drawing one frame or two frames. So the speed would remain at 24 frames per second, but the animation would be 12 or 8 seconds.
This is recommended when you have multiple animations. The speed has to be the same for all of them, but the number of times the frame is repeated will affect the animation itself, but not the speed.
1fps for 24 frames = 24 seconds
2fps for 24 frames = 12 seconds
3fps for 24 frames = 8 seconds
Of course it doesn't have to be a loop animation. Even so, there are lot of things that can be looped, there will be a limit. So make what is better for you.
What can you loop?
There are many things you can use for an animation loop in your illustrations. It can be objects, weather, lights, elements and actions. Everything can work if you find the way to make it cyclic.
Now I will show you some examples for each category and how the animation loop is apply.
Objects
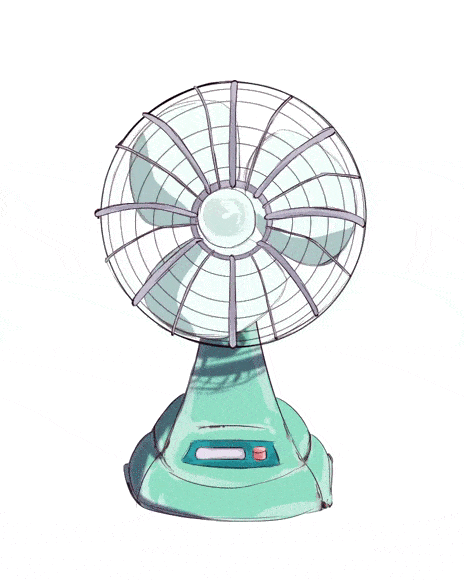
On the object category I will show you how to make a loop with a fan. But there are many objects like a record player, sheets of a book, bells, a train and more that can work as loops.
Here is our fan, nothing special. What we are gonna loop are the blades. We also could loop the motor housing.
The numbers in red indicate the drawing order. Number 2 is the middle of 1. So we are gonna need the middle of 1 to 2, which is 3 and the middle of 2 to 1, which is 4. This animation technique is know as Pose to Pose.
The blue numbers is the correct order of the animation.
And this is the result at 12 seconds
Weather
If you think closely, any kind of weather can be looped: rainy, snowy, windy, the sun rays of a sunny day.
The example will be a rainy day.
To do the rain, you have to draw the drops in different places and sizes. When you have your first layer, the second will have the continuation of this drops and the new ones that will appear. Repeat this with the next layer until you have the complete cycle.
*Remenber that, if is going to be a loop, the end frame must be the start of the beginning frame.
Here it is our rain.
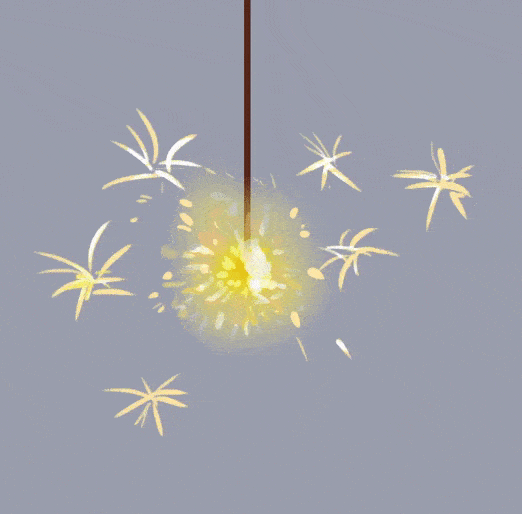
Lights
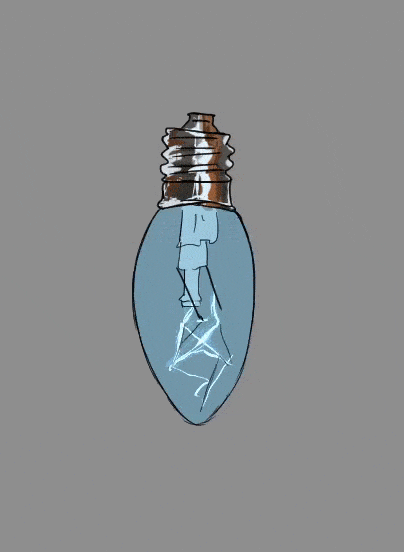
For lights we have two options. We can make a sparkle loop or a turn on and turn off loop. Some examples for the sparkle loop are stars, pyrotechnics or light bulbes chaging color light. For the second option it can be a lamp, a pole, etc.
For a sparkle loop it is not necessary to think about the next pose of the animation for it to work. Each drawing has to be a little different from each other.
For the turn on a turn off loop it will start with a small circle. This circle will become big and then, small again. In the animation you just have to invert the drawings to get the cycle. The animation technique I used here was Straigh Ahead.
Element
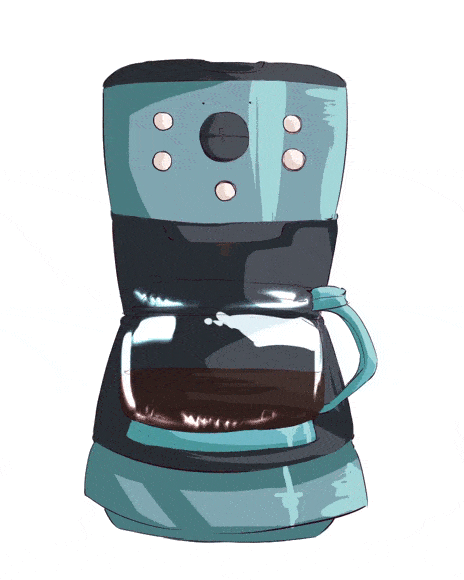
The common elements for a loop are water and fire. It can be drops falling of a tub / a coffee maker / a leaf, waves or a campfire, torch, etc.
For example I will use the coffee maker.
Here is the process of a drop falling. It can be simple or more complex. This will depend on the illustration.
Here is the example at 24fps.
Actions
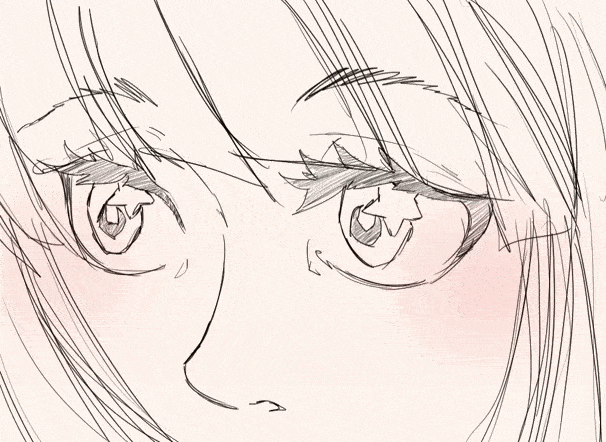
You have a variety of actions that can work as a loop. It can be a blink, grab fruits from a plate, dancing, birds flyings, and more.
As an example I will make a blink animation.
There are many ways of making a blink. It can be a simple three/four drawings or something more elaboreted if you want to have any king of emotion in the look of your character.
Here the commom way of doing a blink. You just need three or four drawings.
In the first case, you will get a fast closing of the eyes and a slow opening. For the second case, it will be the opposite. And for the last case, it will look a little more smoothly.
Let's try something more interesting, as looking both ways with a blink.
How to animate in Clip Studio Paint
Now, I will show you how to prepare your space to animate from an illustration.
Everything that is not gonna be animate must be put into folders. The number of folders you will need, will depend on the things you want to animate, where they are or how complex they are.
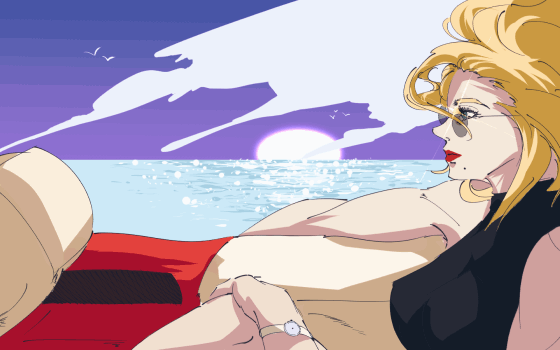
In my case, everything is in one folder, but the woman in the car could have been in a different folder from the background. So I wouldn't have to worry about the lights of the sea ending up on the woman.
Now, lets start.
First you must got to Window -> Timeline
Once you have the timeline, go to: Animation -> Timeline -> New Timeline
This is how it will look like.
To animate you will need special folders and layers, not the ones you normally use to draw. The folder will be foud here.
The foulders will appear on the layer section, also, at the same time in the timeline. In my case I have three folders for each animation.
Once you have the folder, you will be able to create a layer for animation, called Cel. To do so, you must click on the icon next to the folder.
This is how will look like in the Timeline Palette.
And this is how will look on the Layer Palette.
Before continuing with the cels creation, I will explain a few things of the timeline palette.
The zoom out / zoom in scales the number of frames displayed on the timeline.
The loop is to repeat the animation over and over.
The blue rectangle, by dragging it, change the start frame and the end frame.
The track is where the drawing will be displayed and the frames indicate the numbers of cels and its positions.
As the explanation ended, we continue with the tutorial.
To create a new animation cel, you must click on the next frame you want to put it and then click on new animation cel. I clicked on the second frame and then on new animation cel.
*Do not create a new commom layer, from the Layer Palette, inside the animation folder. It won't work to animate and it won't be show in the Timeline.
This is the result.
Now you can draw without worry on this layers. Each layer correspond with the cels in the track.
If needed, you can active the Onion Skin here.
Animation -> Show animation cels -> Onion skin settings
Here you can customize it to your liking and give it OK to set it.
Now, having everything prepare for animate, we are gonna apply our knowledge of animation
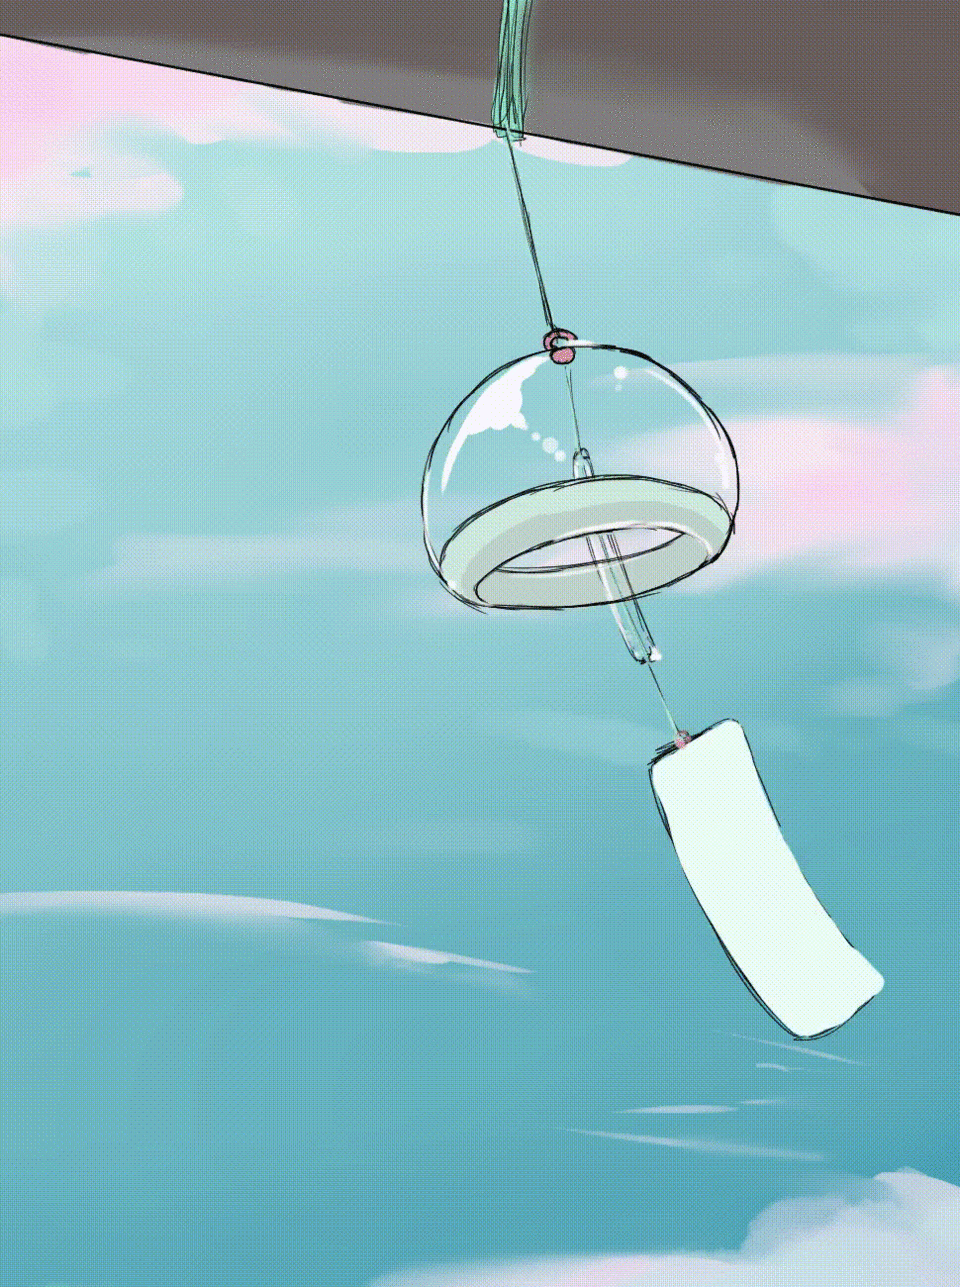
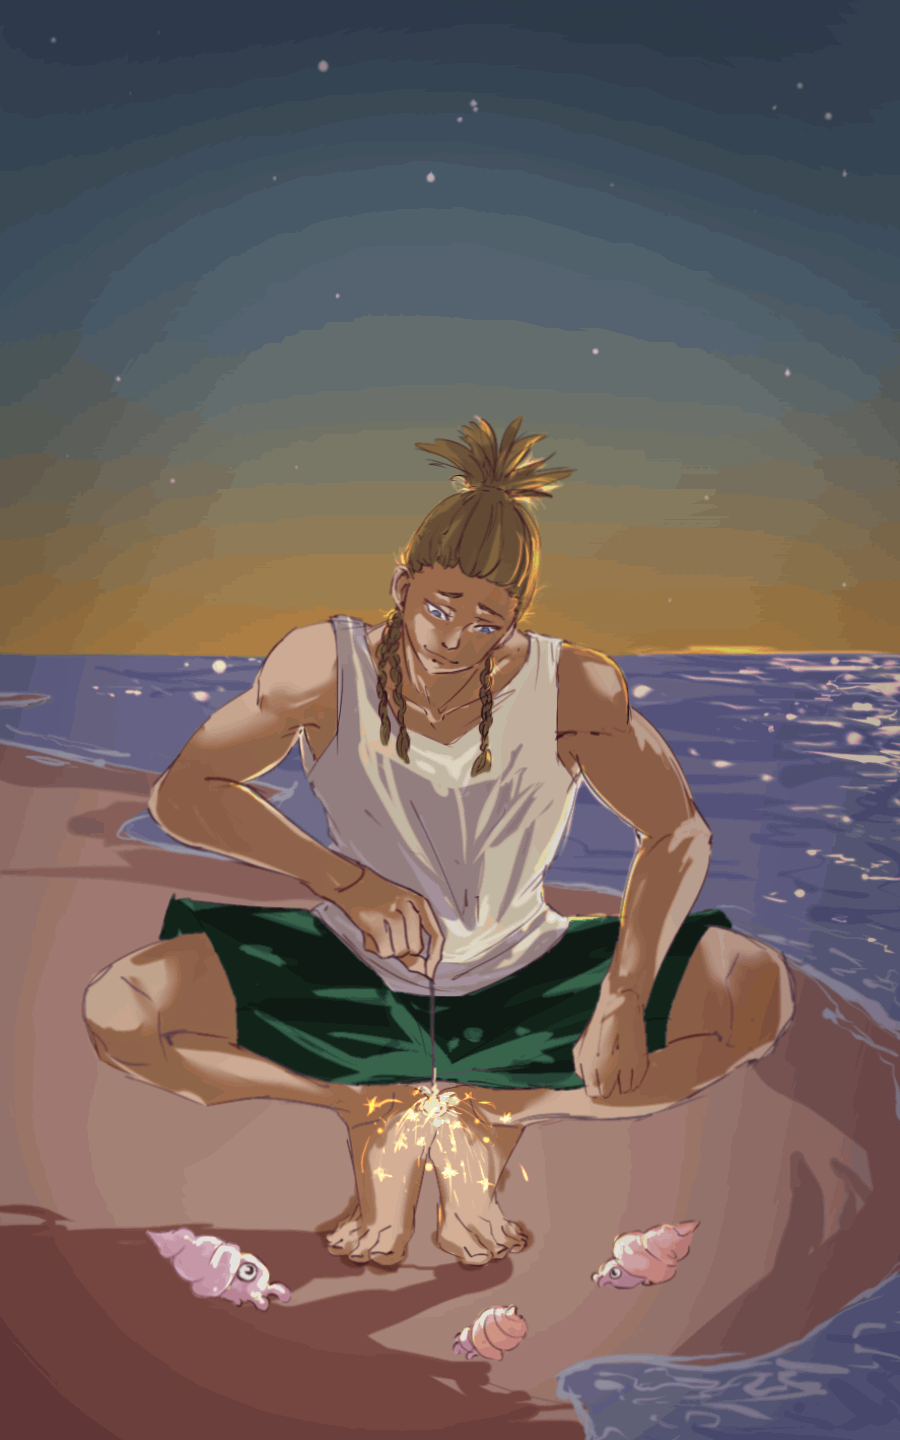
Here we apply the spark animation technique.
Here the second light technique: Turn On and Turn Off
And for the seagulls will be action loop.
Once we have all our animations we can export the final result of our illustration.
You go to File -> Export Animation
Here you will have four options: Image sequence, Animated GIF, Animated sticker and Movie.
Animated Gif will be our option.
Once you decide where to save the illustration it will appears the settings to finish the export process.
Done!
Illustrations
I hope this tutorial has been useful to learn a little of animation and how to animate in clip studio paint, to achieve animated illustrations.
See ya!
Users who liked this post


Comment