
INTRODUCTION :
Hi everyone , I am back again with a new tutorial . In this article I will be talking about how I draw my chibi from head proportions to clothing and coloring . I will try to cover most of it and surprise this time have also made a video of my coloring time lapse . I will attach the video down .
A quick disclaimer : I will be only talking about how I make my chibi and not all the different types of chibi .
------------------------------------------------------------------------------------------------------------------
SPEEDPAINT VIDEO :
-----------------------------------------------------------------------------------------------------------------
PROPORTIONS:
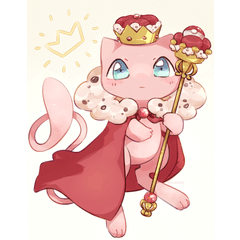
I draw my chibi in two head proportions but it’s not necessary to draw exactly inside the 2 head sizes .Even in my chibi as you can see that it's not exactly two heads proportioned , my chibi is slightly smaller than the 2 head proportion .
When you're a beginner in drawing chibis it will be really difficult to draw them inside the circle , so you can always draw them free handed and correct the size later using a “lasso tool”
---------------------------------------------------------------------------------------------------------------
HEAD:
Now, let's talk about heads .
Heads take a big part in a chibi’s body . My chibi heads are almost a circle. We can use a circle as a back guideline to draw a chibis head . Here are some of the basic angles of chibi .
But if you're like me and can't draw a stable circle . I use a ruler .
1. In the toolbar , you can find a ruler .
2. Now click on the figure ruler .
3. Select an ellipse .
4. Now if we just drag the ruler on the canvas we will get the circle .
5. Here is an important thing to do , go to "set showing area ruler " and make sure you have a tick on " show only editing the target"
- This will make the ruler enabled while only being on that particular layer .
- So using this ruler we can achieve a perfect circle .
-I use this ruler to draw half a head leaving out the cheek area of my chibi . I draw the cheek on a different layer .
(TIP : If you prefer to draw the whole head in the same layer , after drawing the half circle you can disable " Snap to ruler " which is available on the top area of the software . You can now draw freely without drawing along the ruler and you also enable it again when you want to draw along the ruler )
-If you find it hard to connect the cheek to the jaw , rotate your canvas to draw comfortably and to get confident strokes .
-As for the ears it's really simple, it's just a curve then I put a 6 inside .
-------------------------------------------------------------------------------------------------------------------
FACIAL FEATURES :
- Let's start from the eyes . I draw eyes tilted towards the sides. This makes them look sleepy but it’s really cute .
- It is also important to keep basic rules in mind like leaving an eye space between the eyes, Applying basic rules and proportions of the human body to a chibi will really help with keeping them more natural and not making them look like aliens .
- For the eyebrow I drew these cute small eyebrows . I don't know what this shape is called. It is kinda like a really small triangle and for the nose it’s just a dot .
- Make sure the eyes , nose and mouth are at the lower area of the head . You can use the “move layer tool” to adjust them.
---------------------------------------------------------------------------------------------------------------
BODY:
- Body of my chibis are smaller compared to the head and it is In fact really hard to draw small bodies and that's why I use a egg shape to draw my chibi .It's actually a triangle but with bent edges .
- This shape helps with drawing chibi in different positions . We just have to see the shape as a 3d object and try to do different angles .
- Below I will show some examples of different posing I made from the egg shape
-------------------------------
ARM and LEGS:
- The way I draw my chibi's arm and leg is similar . To be exact , they both are same shape and also same height and width .
-I draw arm and legs from big to small if that makes sense . It's almost like a starfish when they are stretching .
- For the hands it's simple I just draw an individual finger , while rest of the fingers are shown as one single shape .
-----------------------------------------------------------------------------------------------------------------
HAIR AND CLOTHING :
You might have heard this many times but I cannot stress enough about how imaging hair as ribbon or as a 3d object really helps . In my chibi , I try to keep the hair fluffy
Always start simple and do the outline of the hair .
After that start to lay in the hair strands . You don't really have to draw each and every hair strand .
-Even if I am just sketching I make sure to draw thicker lines for the shadow areas . This will really help while doing our line art . we won't be confused about which hair strand is on the top and which goes to the bottom .
Here are some more examples :
---------------------------------------------------------------------------------------------------------------
CLOTHING :
Drawing clothes for chibis is easier than for the 8 head sized figures . I just have to leave a certain space from the body and just follow the body shape . I try to keep the clothing simple with not too much of detailing and even for the cloth wrinkles and fold just keep it simple .Try drawing fold only on places where i actually folds and not at random places
----------------------------------------------------------------------------------------------------------------
COLORING :
I have already attached the speedpaint process video but here i am just going to give a small summary of what i did in the video
First i make 3 separate layers
- one for skin
-one for hair
-one for clothing
then i use " auto select " tool to fill in a base color .
After doing base color for all the 3 layers
i make a layer above each of the three layers and make sure it is " clip to the layer below "
then i do my actual base color and some shadowing
In this illustration the lighting is coming from behind i do the light which will reflect on the charcter .
I use "add glow" layer for lighting and "overlay" layer to give it that sunset mood .
Then finally I erase the unnecessary parts in line art .
---------------------------------------------------------
Thank you for reading this article and watching the video . I was also wanted to make a video explaining how to draw chibis body but my laptop crashed ><.
Hopefully I can make it next time.
Users who liked this post


Comment