HOW TO MAKE GOOD LOOKING BACKGROUNDS WITH 3D MATERIALS !
3D materials are a good way of making backgrounds quickly but they can be hard to handle so in this TIPS I’ll show how I make them look good!
Using 3D with the PRO clip studio version
Since the pro version doesn’t have LT conversion I found another way to make 3D backgrounds look descent.
First I import the 3D asset into my canvas and position it the way I want.
To go on I will need to rasterize the layer where the 3D material is.
I will duplicate the said layer then !
(Don’t forget to do this because it’ll help separate the line layer from the color layer)
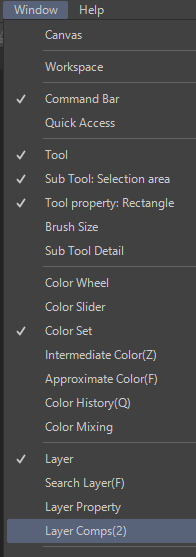
Then I’ll click >Filter >Effect >Artistic
This window will appear and I’ll make one of the two layers « colors only » which will be below the other layer who will be « line only ».
(Im talking about the two 3D rasterized layers)
When the artistic filter’s done I’ll clean up some of the unnecessary lines.
Usually when you can see the sky in the scene I’ll make a selection of it and paint it myself.
This was made using simple gradients.
Then to make the city match the sky i either pick a color from the sky and put it on overlay mode over the scene or i duplicate the color layer and put a gradient on it that’s similar to the sky.
In this case i actually did both.
I applied the gradient on a duplicated layer of the 3D layer and put it to overlay mode.
I also added a gradient over it to mimic the sunset.
And this is what it’ll look like!
Now this part is optional but I’ll usually also change the line’s color to make the scene warmer.
To do that you need to click >Edit >Convert to drawing color
Then on the color layer I will
Select the big shadows (who are grey and therefore don’t fit in the scene) , make a new layer and either put it on overlay or multiply mode and change the color to a color that matches the sky.
And there you have it!
If you’re using the pro version of clip studio this is an efficient way of making backgrounds quickly, this is really useful for webcomics!
Using 3D with the EX clip Studio version.
If you have the EX version of clip studio there’s a useful feature called LT conversion which is really useful to turn 3D assets into lines. This comes in handy when making a comic.
Like previously ,I’ll import the 3D material into my canvas and position the way I want.
This time DON’T rasterize it but select the 3D material layer and click >LT conversion of layer.
Then this window will appear.
Change the settings to your liking according to the preview and when you’re done click >OK
Here’s what it’ll look like. As you can see the lines are a bit big and messy. So I arrange them by using the vector layer settings.
If the line work is too messy you can clean it up by clicking >Filter >Correct line >Adjust line width
This is what it will look like after.
But anyways , this is what the line work looks like after I refined it.
If you’re planning on coloring the scene yourself after this is optional but I’ll keep the 3D asset’s original colors (i duplicated the 3D asset before the LT conversion) .
Since the colors are a bit dull I usually change it using the tonal correction options. To use them click >Edit >Tonal correction(D)
I then proceed to add effects when needed such as sunlight coming from the windows etc
Then I select the line layer and like before change the color of it
If You choose a light color I recommend setting the line work layer to multiply mode!
And there you have it! Here are examples of that method with characters on the scene as well.
Using 3D materials for illustrations
Now if you’re looking to make a background without line work but instead make it a painting you can still use 3D materials.
Just like before , import the 3D material into your canvas.
Then rasterize and duplicate it!
The fastest way to change the colors are to use gradients.
Since i duplicated the layer i apply the gradient to only one layer and then set it to either multiply or overlay mode depending on what looks best.
If the colors don’t look right you can modify it with the tonal correction settings after
Just like the first method i showed earlier I’ll use the artistic filter on it to make it more drawing-like.
I will then set up a perspective ruler and make it match with the scene.(this is only required if you’re planning on adding elements who need to be on perspective)
Like before , if the sky is present I’ll usually change it myself to colors who fit the scene by using gradients.
And then I’ll just add elements like buildings and plants that follow the perspective. Don’t hesitate to use tonal correction settings if needed! And I’m done!
Thanks for reading!
And that’s it ! That’s how I make backgrounds with 3D assets!
Hopefully you could learn something new here.
If you’re interested in seeing more of my art I welcome you to my Instagram page :
Thanks for reading and see you next time!💖


Comment