
1. Basic elements
Hello! My name is Stefany, welcome to this tutorial where I will teach you how I design jewelry and accessories with steampunk aesthetics!
The steampunk aesthetic is characterized by being retro-futuristic, centered on the second half of the 19th century, at the time when the Industrial Revolution was at its peak.
There are certain elements that are repeated in the steampunk theme and we have to include in our design so that they really look with that aesthetic. The basic ones to take into consideration are:
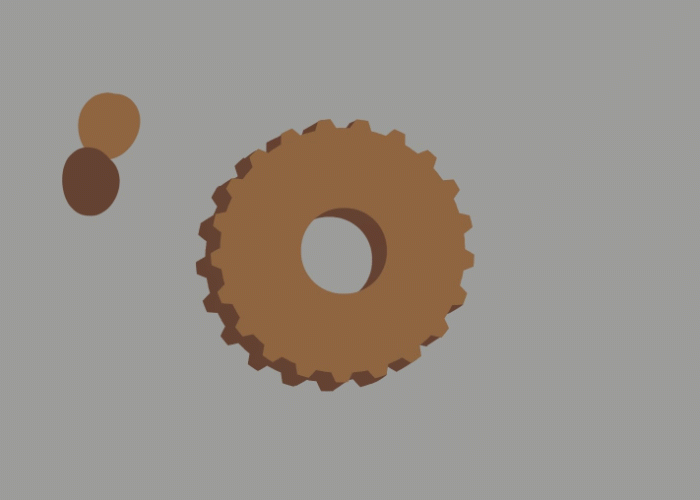
+ Gears
There are several types of gears, they vary in the center and the edges, we will start with a simple one and use it as a base to do more.
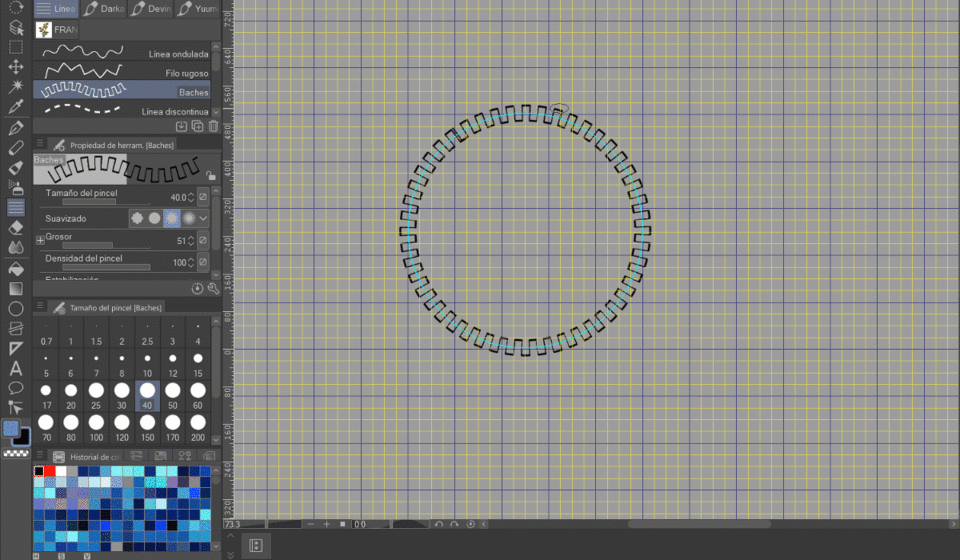
1- Creation of the base
We must make a base that works as a guide to make the edge of the gear.
We will do this with the figure ruler, with the "ellipse" option, so that it does not deform, you must be careful that the "Proportion adjustment" option is activated.
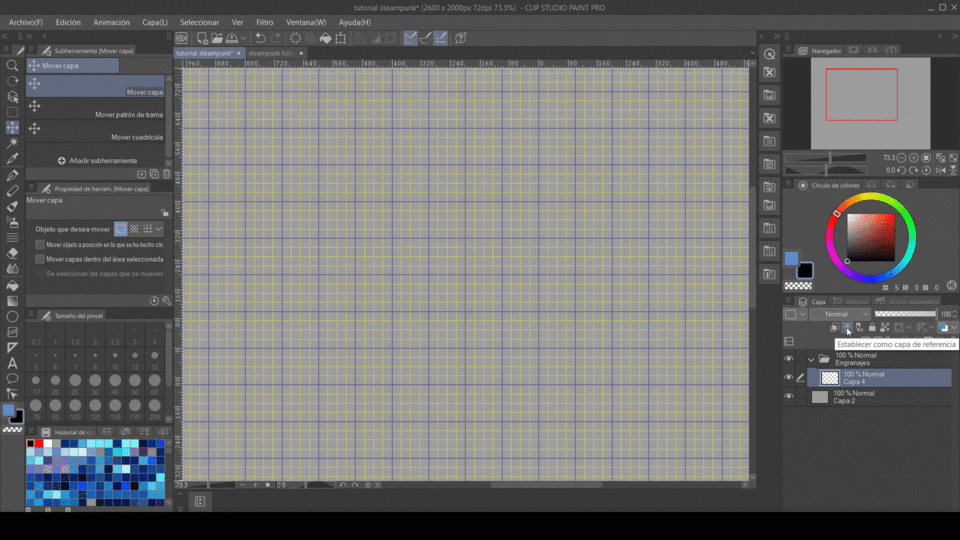
We can help us with the grid, if we do not have it activated we will:
main menu> view> grid.
In decoration sub-tool> line with ruler, we will find two perfect brushes to create the border of the gears
We put a size that suits what we want and with the help of the ellipse rule that we create we make the border.
You may have to adjust the brush to better suit the type of gear you are making, for this we press the wrench symbol, this will take us to "sub-tool details"> brush tip> Thickness.
Here we choose in which direction we want to edit it (horizontal / vertical) we edit it until we are satisfied.
2- Now, to create the inside of the gear, we use the figure tool, ellipse option, we create a circle of the size we want and with the help of the grid we place it
3- Fill with color and voila!
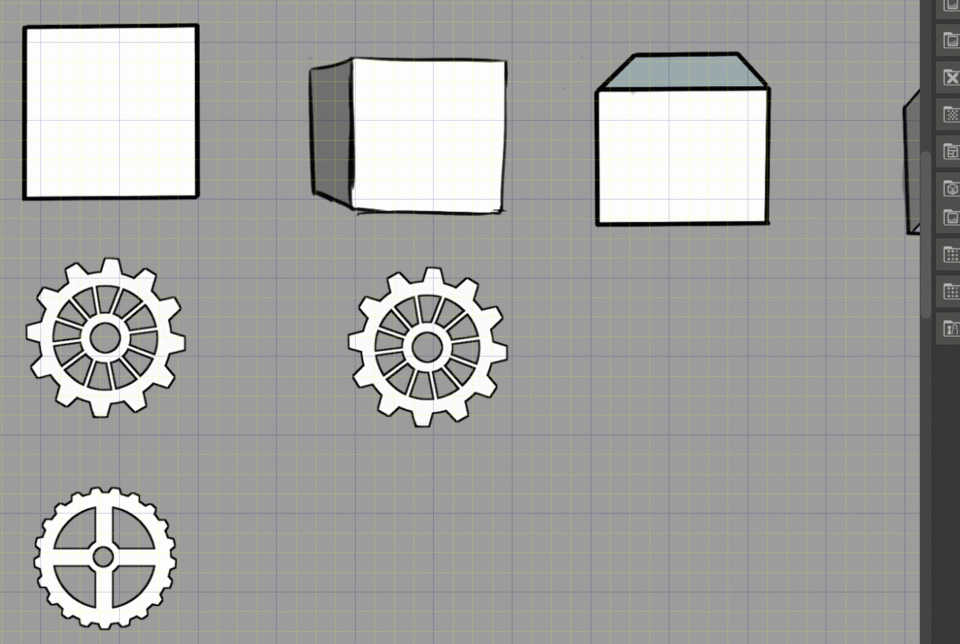
From here we can create several types of gear with the same procedure, we can alter the size of the inside of the gear, we can change the brush on the edge or even make a different design of its interior with the figure tool, the bezier curve can be ideal for work.
If you want to skip the step of making the gears manually, you can download the following gears brush:
We will not use the brush as such, but the images of the brush, we can find them in:
material menu> image.
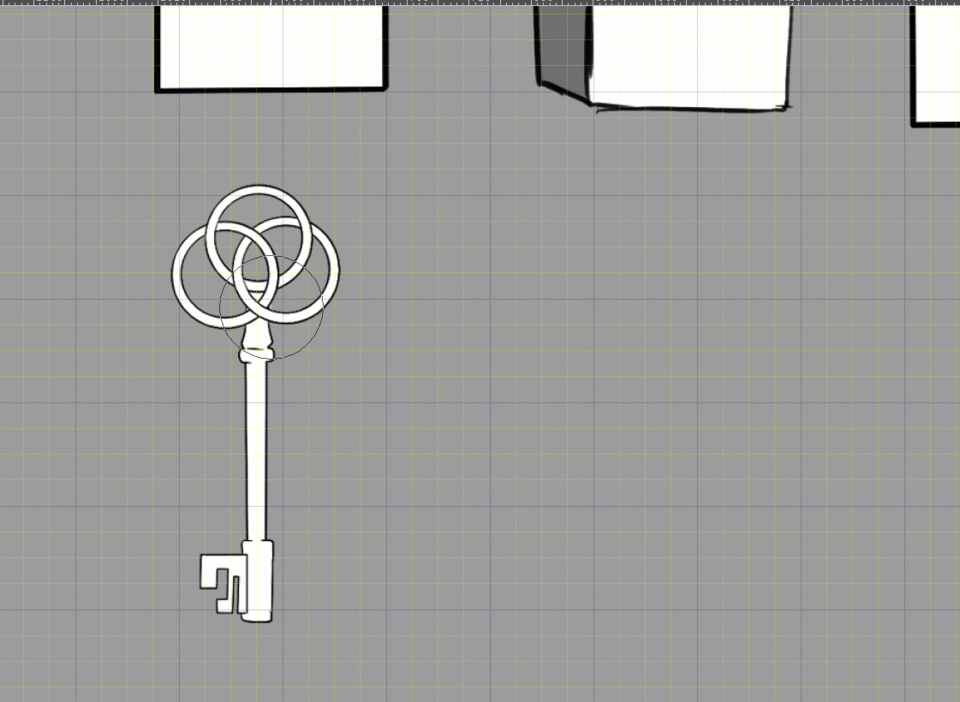
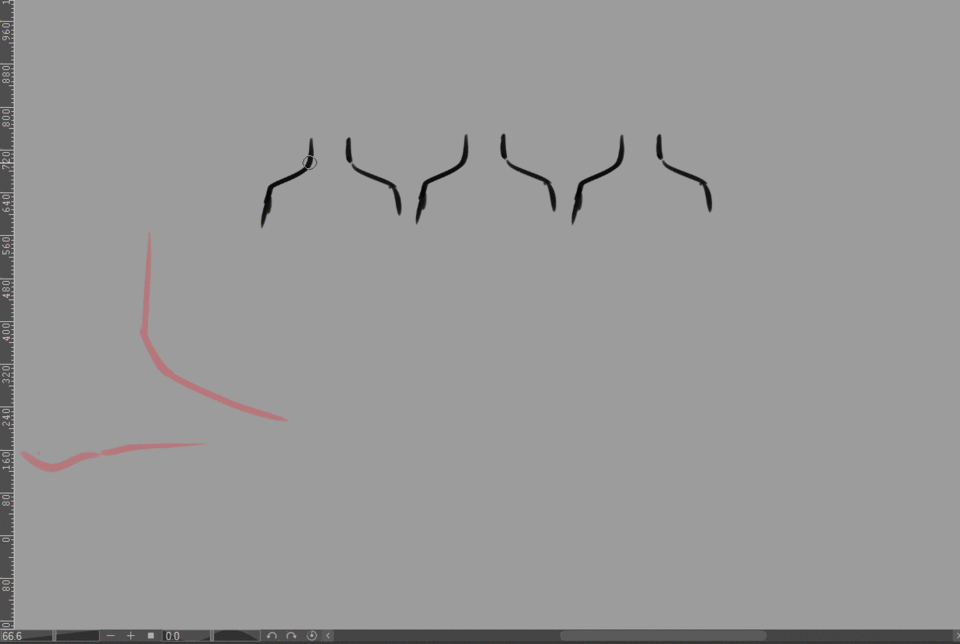
+ Keys
First, let's understand that the keys used in steampunk are usually old-style keys, therefore they are usually elongated, with a decoration on the upper part, and at the tip the cipher protruding.
The proportions are usually the following:
1-First we will make the base with the help of the rectangle figure tool.
2- We will decide what design the grip will have, I decided to make the design using the ellipse shape tool.
3- We begin to make the line, I usually make the lineart as simple as possible to add details when shading but feel free to add all the details you want.
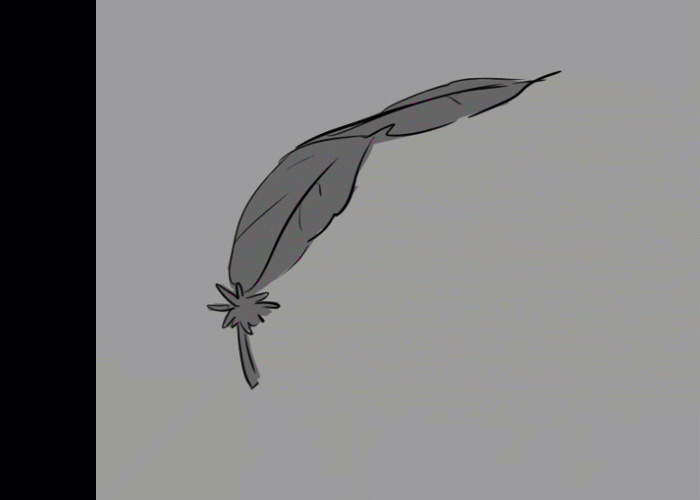
+ Decorative elements
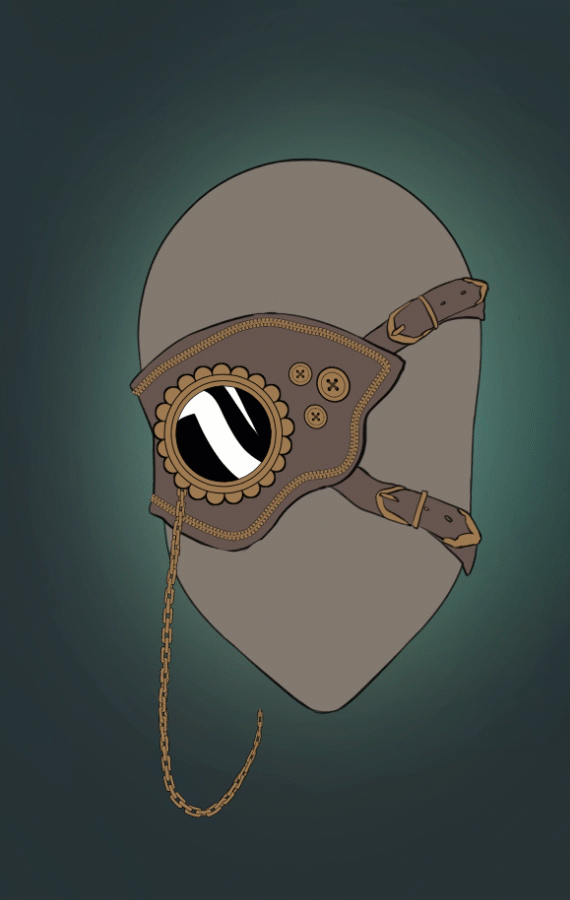
These elements are very simple and really help to give the accessories a more steampunk look. They are usually: buttons, lace, ropes, chains, zippers, ties, buckles, among others.
For these elements we can use several brushes that will help us to speed up the drawing process more:
2. Volume
Most of the items we've seen so far look very flat
now we will learn to give it volume.
For the simplest and most flat elements, we will use method 1:
1-We take our object and duplicate it
2- To identify the duplicate, we change it to a darker color and move it to where it corresponds according to the volume we want
3- Finally, we join the front with the back and that's it.
To add volume of more complex things we will use method 2:
1- we are going to analyze our object and identify its structure
2-replicate the structure of the object guiding us from the perspective boxes
3- now, we make the line guiding us with the structure:
The more complex the object, the more detailed the analysis of the structure has to be.
To further exaggerate the perspective, we can warp our object, I recommend using perspective warp or free transform.
(control + t) right click> choose the option of your preference
To avoid deformations that look strange, always deform by moving two corners, since if you move one it will be strange.
3. Design
Now that we are clear about the basic elements, it's time to design!
First we identify what we want to make: a necklace? a hat? a patch?
and in a very general sketch we choose the general composition of the piece, will it be long or small?
then we choose which elements we want to be in our design (gears, buttons, lace, etc) you can put the elements you want, however do not be tempted to put too many and make an excessive and heavy design.
now is where we really start to play with the elements we chose and make the line!
More design examples:
4. Color palette
As for the color palette, steampunk tends to use warm shades of base colors, generally leaning towards browns and golds, this varies from design to design, but it is usually the rule in general, it also avoids very saturated colors.
Since we are using warm colors for our design we can complement it with its opposite for the background colors, so we can make our design stand out more. The greens / blues should work.
5. Light, Shadow and reflected light
Now to place the light and shadow!
To shade a drawing correctly we have to be clear about where the light comes from and its direction, with that clear, we already know how the shadow generated by the drawn element will be, on itself and on the surface on which it interacts.
So that our shading is really complete, we must add the indirect light that reaches the object that we are shading.
This is the light coming from another element of the composition, which bounces back towards the main object, that is: the reflected light.
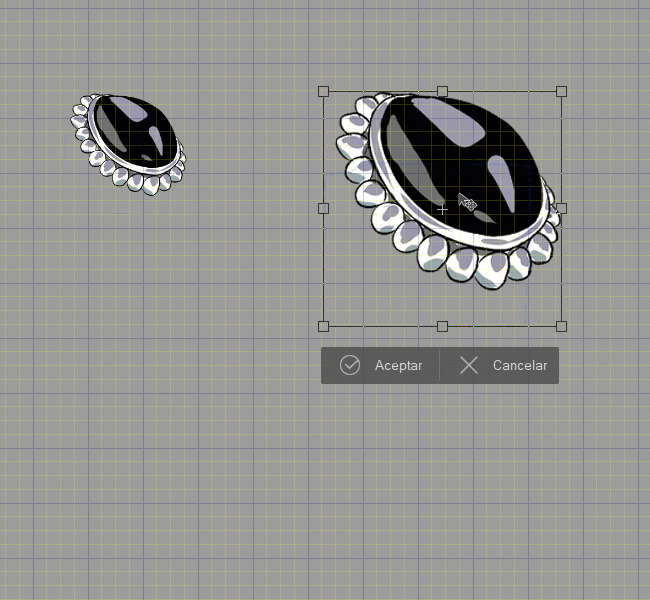
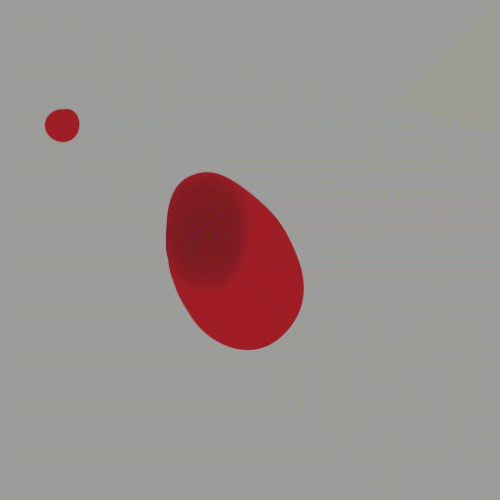
6. Materials
The way in which light interacts with an object depends on the type of material that it has, in this case, we will be using 3 types of materials, which are divided into:
- Common materials:
In these materials the light and the object interact in a simple way, this material does not have any type of reflection.
- Metallic materials:
Take into account that in this type of material it has a lot of reflection, so the light travels through the object.
- Gemstone Materials:
In this material, direct light does not stay on the surface of the gem, but rather absorbs it, passes through it until it settles at the base of the gem, the color of the gem in that area becomes more vibrant, and in the top, where direct light enters, a darker shade is usually seen.
Final score!
Clever! I believe that every aspect of the design process of these beautiful Steampunk-style jewelry and accessories has already been filled in, it only remains to see the finished design.
You can play with the correction layers to adjust the saturation and contrast of the drawing.
Another example of design and shading.
Thanks
I hope this tutorial has been helpful to you, if you do, do not hesitate to leave the link to see it in the comments or tag me on my networks:
https://twitter.com/StyleSteff
https://www.deviantart.com/nyastyle
I will be delighted to see your results, do not be discouraged if it costs you at the beginning, everything is a matter of practice, a lot of encouragement and see you in the next <3
Users who liked this post


Comment