Secret Fill Tool Magic
Video
You can see my video for more hands-on demonstration if you are a visual learner!
Intro
Well hello there, this is Tamil! Today I wanted to go over how to use the fill tool in Clip Studio Paint.
I used to use a big old hard brush to do my flats and coloring for a long time because programs were not good back in the day. Today though, you can just use great tools that are available and save lots of time without compromises. I will try to explain everything I know about fill tool in this tutorial.
Let's get started.
Opening Fill Tool
It's pretty easy to access the fill tool.
Look for the icon that looks like a paint bucket tool. The shortcut is G on the keyboard.
The other thing you need to open is "sub tool" and "tool property". These will help you change settings for the fill tool.
To make sure they are open you can use Window->Sub Tool and Window->Tool Property.
Let's go over the main function of the fill tool.
Tolerance
There are many settings, but let's go over the main things that you need to know before getting into it.
The main tool you will be using is to refer to other layers fill.
You can achieve "Refer only to editing layer" with this tool as well, so you can just stick with this one and not touch the other.
The first setting to know is tolerance. This will change a lot depending on your painting and how you use the tool.
Here is a simple gradient that I made. The bottom one is the original that is untouched. The other two are where I used the fill tool.
Tolerance will determine how close the color needs to be to fill more or less. Tolerance of 5 filled way less than tolerance of 10. Just think of it as a sensitivity meter. Lower number will fill less.
This number will change based on the art you are doing. This is especially helpful if you have lots of transparent lines or sketch underneath or textured background for example.
Anti-Aliasing
By default, anti-aliasing is turned on. It is a useful feature, but I prefer less work, so I just turn it off. It makes for less painful transition once you need to do coloring or adjusting things.
I had a simple blue shape and I wanted to fill it with green.
The first image I did had A-A off. This gave me a crisp fill.
In the second case, I had A-A on. Now it wanted to try to blend the edges between blue and green in-between. Sometimes it is good to have that transition, but if I want to fill the entire shape a new color sometimes it becomes a problem.
( Side pro tip, if I want to fill a shape one color, I just do lock transparency and then Alt+Backspace, this fills the entire layer a new color. It's a lot quicker too, but requres the obeject to be on a separate layer and remembering the shortcut for transparency lock and fill )
Area Scaling
Area scaling is an amazing tool that I wish existed in other painting software more! The main problem as to why most artists do not use the fill tool for creating flats or coloring is the small lines that are left from the imperfect fills. Let me show you.
Here is a simple square I made with an ink brush. Almost a perfect line and no blurriness. I want to fill the box with the same exact color. I use the bucket tool and here is the result.
Most programs leave this small ugly gap inside. There is usually a solution for it. You can select the inside of the box with the selection tool, then expand it by 1-5 pixels, and then fill it with color. It is not hard but takes a lot of time if you do it in your daily artwork.
Luckily CSP has a function that is build in for that and we do not need to do that anymore!
Default settings usually work fine and you do not need to change it in most cases. Basically, it will expand the fill for 10 around the edges, so that the gaps will not happen at all. If you still want to mess with it, here are some images to help you see how it works.
This is a very simple diagram of how the expand tool works. I had a simple black outline and then used different settings for the expand. After that, I lowered the opacity for the line.
As you can see higher number will create a more filled object. This is especially helpful if you use textured brushes instead of clean ink. In most cases you can just leave it as default of 10.
Close Gap
Another great function isclose gap. I am not great at making clean amazing line art. I struggle with it, so there are sometimes small gaps between lines. This usually throws off the fill tool. Thankfully, there is a setting for it.
Depending on the gap on the line art it will try to ignore small parts of it.
Even though there is a big gap, it was still able to fill the circle. There is a small catch.
As you can see there is a slider that determines the sensitivity of the gap fill. Left will close less gaps, while if you put it to the right it will try to close as much as possible.
The thing is that the max box is not really max. Once I moved to the very right, it still did not fill my circle. If you having the same problem, then I recommend opening up the number inside of it.
Click on the arrow and you will see that the max is going to be 20. You can push it even more if you need to. Just type in a higher number that will work for your artwork if you still have problems. I used 50 for this specific circle for example. 20 was not enough.
Another hidden function is "fill narrow area". It is on by default.
Click the wrench icon on the tool property.
As you can see it is on from the start. There is no eyeball icon, so it is hidden. In most cases, you do not need to use it, but if you have a sketchy style and you feel like it fills in too much, then I recommend turning it off and testing it out. This is a rare thing, but still good to know it is there.
Refer Multiple
Now it is getting more interesting. In most cases, the line art is not on one layer. Sometimes there are different folders or just multiple layers for line or sketch. This will affect how the fill tool works, so there are additional functions that will help you to color faster.
For better explanation I recommend watching the video, but I will try to do my best here in text.
This is the main panel that you will use for this. If you have it off completely, the fill tool will only "see" your current layer. If you have any line on the other layer, it will not be affected by the fill.
The first icon if you have it on is ALL layers. This is pretty simple to use. If you have a line or sketch or anything else visible, then the fill tool will take it into the account. This is a pretty standard function. If you want to exclude something then you can just hide it in the layer panel.
Referring to reference layers is a good way to narrow down to specific things in your canvas. To turn something into a reference layer you just need to find it in the layer panel and click the icon.
Select it ( or select multiple with Shift-Left Click ) and just click on the top-left icon. Now if you use fill tool no matter where what is on your canvas, it will only use the ones that are set to the reference layer.
This is especially useful if you want to focus on just a small portion on your line art.
The selected layer is not something I use a lot, because other functions are so good I do not need it. You can left-click select lots of layers and fill tool only use those to see where it needs to fill things.
Layer in folder is exactly how it sounds like. The fill tool will only look at what is inside the folder. Whatever is outside of the folder you are working in, it will look at it.
There are also some secret functions that you can use if you need to get more advanced. If you click on the wrench again and find the Reference section, there are hidden panels that you can use. For example, Excluding layers.
By default it will exclude draft layers and paper layers. It can go further tho! If you do a lot of comics and have lots of text, then you can just exclude the text layers from fill tool. If you have a reference and you just keep it around you can lock it and it will not affect fill tool. So many options!
There are many other functions, but I think this one could be really useful if you wanna get into it.
Excluding specific color.
If you turn this on you can completely ignore specific colors. For example a certain type of red or purple. So far it only supports one color, so you can always use a specific color for sketching and then another for only line art. This will exclude the other one and work very well together.
Enclose and Fill
My favorite option for the fill tool is using the Enclose and Fill! It does not change a lot of things function-wise, but it FEELS so much faster and better!
This is how you access it and it works pretty much the same exact way, BUT it has a lasso tool user interface. Instead of clicking everything one area at a time, you can just use this to color in things.
Quick GIF I made to show it :3

Just lasso around things you want to color and it will automatically fill it. You can get the same effect with point-clicking on specific spots with the regular fill tool, but this is faster and feels more natural.
If you wanted you could have just lasso tool entire image and it would still fill in everything the same way! I just wanted to show one by one for easier demonstration :)
Paint Unfilled Area
Small adjustments are always there no matter how good the tool is. Especially if it comes to small enclosed spaces.
This will help you to fix small areas fill tool cannot reach out to.
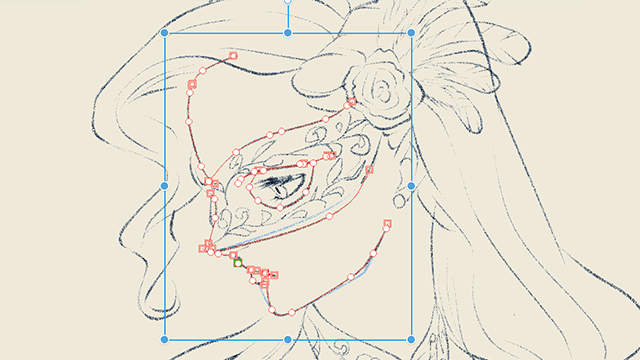
A sketch like that is something that will create problems for fill tool because it is so loose and has lots of small parts to it.
This is the first pass that I tried doing and it got most of the fill in there. Using Paint unfilled area will help me in this though.
Using the tool is simple. It feels like the brush selection tool. It has a circle brush and fill in green as you go. After you let go it will cover the area that you painted.
After 1-2 passes, it pretty much finishes the filling and works great!
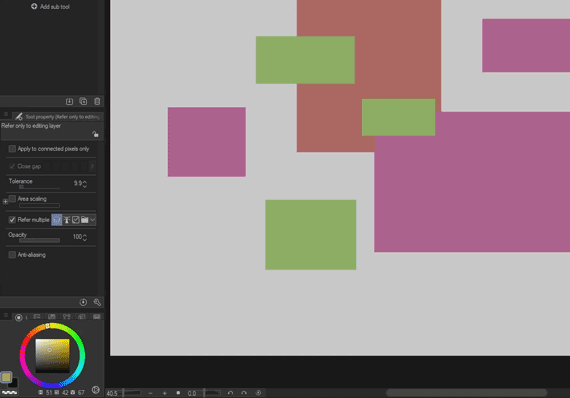
Apply to connected pixels only
A bonus tip that I really like and use often is to apply to connected pixels only.
In the fill tool you can find this option. It sounds strange, but it is pretty simple to use! Basically, if you have it off, when you fill, it will affect the entire canvas colors. Let's say you have 3 separate circles that are red. If you use fill tool it will change ALL the red circles, even if it is not connected. It is On by default because we are used to coloring only connected pixels.

This is a quick demonstration. You can see that even though the boxes are far away from each other, we still can fill all of them with one color. It is super useful if you have unconnected colors like this. Makes it super fast and easy.
The end
For the most part, I think these are the main things to keep in mind when using the fill tool. There are a little bit more functions, but they are not as commonly used and I feel like sticking to learning the core ideas is also important.
I hope you learned something and let me know if you have any questions in the comments on the video. I try to answer them if I know how to. The video shows the tool better and I use my cupcake drawing for it as well.
Here are my links


Comment