
Hi~
I'm Ray from Polysiert Gallerie again. ( •̀ ω •́ )✧
This article will focus on animated GIF which some social media platform accepts it to be set as an account profile icon. You will learn how to create an animated GIF from start to finish based on my own GIF profile icon. Then you can recreate your own animated GIF with all the process I am going to tell you guys after this. Let’s get started!~
Introduction
At this moment, there are some social media platform where allow animated GIF file to be your profile icon, for example, Discord (Nitro) or DeviantArt.
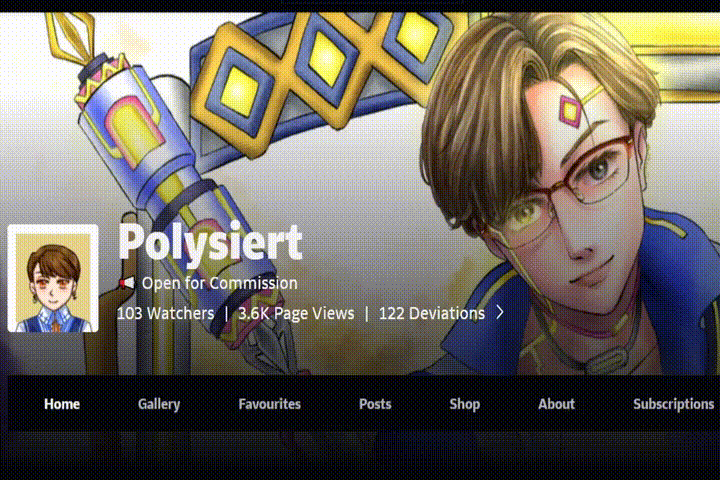
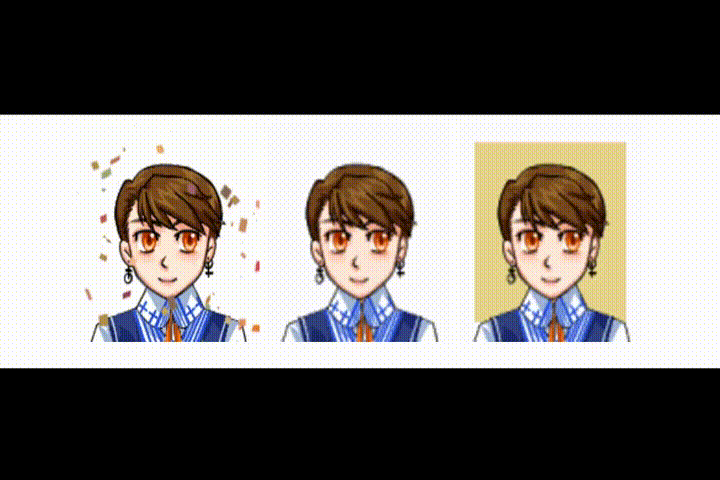
Below, it’s my profile icon on DeviantArt which I will use as an example for this tutorial.
DaviantArt allows a file which is not larger than 100kB and the size must be exactly 100x100px *
Since an interesting profile icon is one of the most important elements to catch visitor's eyes. After I found out that animated profile icon of some artists are looking fun and quite outstanding, I decided I should do one too. And now, I will share what I’ve done for my animated profile icon.
You guys can follow my steps to recreate your own animated GIF like this. I don't mind if the movement is quite the same since I will show you all important workflow I did. I intend to write this tips as a tutorial for beginner. Some people might need to copy the key idea first in order to learn, then they will adapt it later when they know the process. So, go ahead and use it!
Just avoid copying my character design, that's all I concern. ( •̀ .̫ •́ )✧
However, this is not “How to animate in Clip Studio Paint”. You will need some basic knowledge about “Timeline” before following each step in this tutorial. There are many artists has made tutorial about this tool already, so I will skip details about it.
Design and Planning
Beginning with deciding which character will be showing in your profile icon. Mine was my alter ego “Ray” who is my representative of my gallery. So I picked his essential features to portray in this GIF. Those features are his brown hair, orange eye color together with his favorite color which is blue.
After that I choose my drawing style which suits this purpose well. My answer is “Pixel art is suitable for this purpose of drawing!”
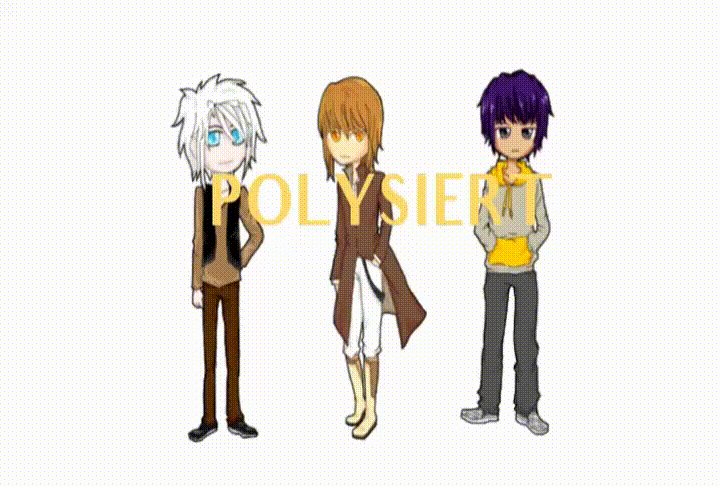
Below - my old animated GIF in pixel art style.
Then, planning on how you will animate your drawing. Be aware if you are not using Clip Studio Paint EX, because Clip Studio Paint Pro supports animation frame max to 24 frames only!
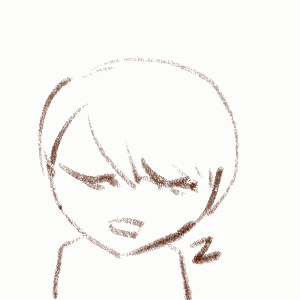
The first thing you should do if you want to create your own movement is to plan it roughly by drawing frame by frame to see how it should work. No details needed. Just a messy line art is fine, like this. Here I used the setting 8 fps or 8 frame per second. This applies to all GIF I mentioned in this tutorial, because I have never animate with other setting yet.
*don’t forget to check where this GIF will be used. Whether the frame is square or rounded, details you want to show should not be cropped out later.
Analyze and create all moving elements in the animation
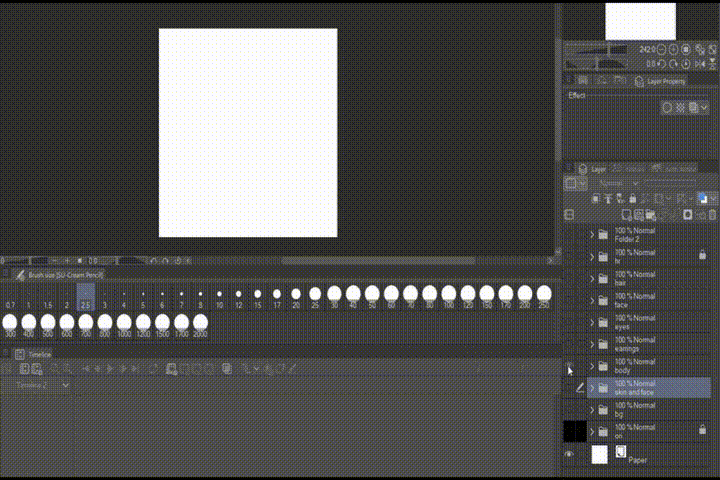
After you know all movement, you will know all important elements in this GIF. According to my GIF, there are motionless parts which are face, body, and side hair, and, there are moving parts which are eyes, earrings, and bangs and also shadow which related to bangs and eyes.
motionless parts = will appear in every frames/ created once for all layers
moving parts = must be drawn separately from motionless parts, because this part will be modified
After that, it’s time to draw the first frame for this GIF. This one will be like the start for all sequences. Don’t forget to draw those moving parts separately from motionless part.
Below left - the first frame of my GIF
below right - how layers were separated. No need to follow this step. I’m just showing that I did not draw each element on the same layer.
After the first frame is done, it’s time to plan the movement in detail.
Think of each element step by step. Then, open “Timeline” to work with each move while drawing. Use onion skin to help predicting the next move.
Beginning with earrings > moving from left to right like a wind blowing them
This is the easiest one. I created only 3 moves as shown. They are swinging from left to right.
This part will be in a loop when animating. From left to middle to right to middle to left and so on.
Eyes > rolling from left to right then blink
Elements in this part are upper and lower eyelid when eyes are opening – almost closing – and completely closing and iris (*sclera or white area in the eye was painted on skin layer)
Some parts can be used for several shots. The upper and lower eyelid will be used multiple times while the iris is rolling. You can copied the iris layer and move to the left and to the right to create another eye movement.
When closing eyelid, my tips is to copy the upper eyelid, then move it down together with drawing a little crease line above. I also reduced the size of iris to match with the transformed upper eyelid too.
For the closing eyes, just add more details on the lower eyelid with more eyelashes.
When coloring, don’t forget to paint skin and shadow on the almost closing and the completely closing eyelid.
The next element is hair.
There is only bangs which is moving, therefore the rest part of his hair can be drawn separately as same as the other motionless part. However, I have worked with the whole hair part while editing each moves of bangs, so they were combined as you can see. I created 4 variation of bangs here. You can add more if you want more movement.
By the way, there are some points you need to remind yourself when drawing moving hair. It’s not easy like earrings and eyes, because when you want it looking natural, each movement should be continuously moving. Hair length should not be different too much, or else it will look too weird.
My suggestion is to copy the first move then edit it a little to the possible move. Mine was thinking of blowing wind around the character. Then, check each move with timeline tool repeatedly. Look for overall movement whether it looks fine or not.
No need to worry too much for small detail because no one would carefully look at each frames while seeing your GIF, if it's not for studying your work. (^∀^)
Assemble all elements!
When all elements of each part are done, it’s time to create all 24 frames for your GIF animation!
In this process, you need to mark each move of moving parts first.
Earrings – always moving from middle to left to middle to right to middle …
*the last frame should not repeat to the first frame in order to avoid freezing shot)
Bangs – One pattern movement like 1-2-3-4-1-2-3-4 … till the end is acceptable but looks not so natural.
My suggestion would be placing them in random order like 1-2-3-1-4-3 … but you need to observe them a bit if it looks weird or not. After that, you should note how they were arranged, it is needed when combining all part for each frame.
Eyes – this part has fixed order as we already have movement pattern for them.
From the beginning, we planned that those eyes will look to the front first, then rolling to the left, to the right, to the front again and blink.
Here are how I placed each frame from the start to the end of this movement.
Above – I freezed the frames “looking the left and right” each for 5 frames and after that “looking to the front” for 2 frames.
After all frame order are noted, it’s time to merge each part and create 24 frames for your animated GIF.
The method I used to create a frame is to open all motionless part first, then open each moving part for this frame. For example, the first move needs hair no. 1, earring 1 and eyes wide opening layers, all of these layer should be clicked visible together with those motionless part.
Then, left click on layer panel to select “merge visible to new layer”
Do it again and again until you get all 24 frames. (Some movement can be repeated when you planned to animate differently from my example and they are repeated move. If so, no need to create more than one frame because you can link one frame to more than one animation cell in “timeline”)
This step is quite boring and tough, I know, but it’s not complicated. Be sure to merge the right layer, that’s all. LOL
I suggest you to check it regularly with “timeline” after you get each few frames, in order to check if the animation is smooth. Look at details like shadow too.
Time to animate
After I got each frame, I suggest you guys to move them to a new illustration file to avoid troublesome when there are too many layers. It’s also easier to arrange order of these 24 frames too.
When it comes to the last frame, don’t forget to check if it looks weird or not when it ended and the animation loop begins.
If all elements looks fine like what you plan, that means it’s done! Hurra! (ノ◕ヮ◕)ノ*:・゚✧
Then you can save them by clicking on File > Export Animation > Animated GIF then OK with the pop-up.
When there are not much color and details like mine, the file usually does not exceed 100 kb. To add more details like solid color background would not cause any trouble. But the other one I did with colorful confetti was quite too big. LOL
Before this ends ...
Hopefully it helps you guys to create a cool profile icon you wish for. When you are done and you would love to show me how you applied my technique, I would be much grateful to see it!
You can visit me in DeviantArt too, if you have an account. Another platform like Twitter, Facebook and Instagram are also welcomed. All account using the name “Polysiert”. (●ˇ∀ˇ●)
Don’t hesitate to contact me if you have any questions about this tutorial.
Thank you for your interest and nice to meet you here!
Users who liked this post


Comment