Easily animate a ball game: case of Basketball
Videos Tutorial
Presentation of the software
Hello good evening, I am Angela Sasara and today I am going to show you how to animate a ball game like basketball with Clip Studio Paint. The end result will be this:

Because I manipulate the software on my computer and I do not know how to draw on it, it is very difficult for me to draw and animate my drawings as others do so well. So, to remedy this, I used software called Gacha Club (pc version) for the creation of characters as well as successive poses; and Clip Studio Paint for sports character animation.
Setting
Having the free version of the software lasting 1 month, we will start by opening the software and clicking on 'Paint'
After the new working window appears, let's go to the 'File' tab bar and click on 'New'. A window like this will appear.
From there, you can modify the width, the height, etc… all that there would be to modify to your good will. But be aware that the recording of the animation will only be done on the blue square.
NB: you do not have to configure like me. Configure based on your import images.
Installation of animation files and drawings
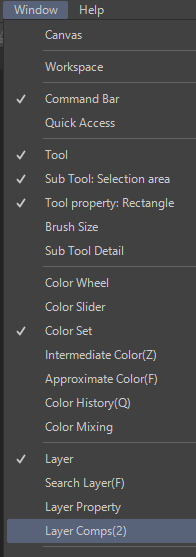
After your workspace appears, go to the “window” tab and click on “timeline”. This is what will appear:
In the space reserved for the observation of layers, select the "paper" layer to be able to insert your background image.
Return to the "File -import-image" tab and import the image you would like in the background. I chose a basketball court as follows:
In the animation folder provided for this purpose (animation folder), import your characters or the drawings you have made of the different poses of your man. For the images, do the same as when you wanted to insert the background earlier.
In the space reserved for the observation of the layers, delete the first layer which is empty.
On the timeline menu bar, click on “specify cels” just after “new animation cel”
And let's click on the image that we would like first on the video. Do this in this way until you have inserted all the images of your video on the Stage.
Let's work on the size of our characters and arrange their movements and to better remember the position and size of the previous man in blue and the next in green, I advise you to activate the option "Enable skin paper commonly known as "onion skin"
This option will give you this which will help you memorize the previous move as well as the next.
At the end of inserting your images, do not forget to insert the basketball. To do this, click on the background layer and do as usual for inserting an image (file-import-image)
Video Duration Setup
To adjust the duration of the video, we must go to the timeline settings, select "timeline M" and "change settings"
In the window that will appear, enter the data for the duration, especially the end of your animation, and validate. I entered this, it's up to you to choose your part
You will observe on your timeline a blue vertical bar at the beginning and at the end of the limit, it is this which will indicate the delimitation of the video.
To adjust frame rate, go to timeline setting, select “timeline M” and “change frame rate” and change as you like
NB: if you have difficulty moving an image on its timeline because of its very long reading length, simply click on the timeline of the latter, right-click and select "set as first/ last image to display”.
Animation of the ball
With the balloon positioned, we can start animating it. I advise you to duplicate the balloon layer, position it above all the other layers and hide it by clicking on the eye. I will explain to you later what it will be used for. For the animation, we first need to select the basketball timeline and click on the tool (1) “enable layer keyframes”. This is where the real magic happens (^_^)
When you click on this button, 03 other buttons on this bar will be opened. These are the (2) remove keyframe, (3) keyframe interpolation, and (4) add keyframe buttons.
(3) Keyframe interpolation gives you 3 tools which are (in order):
• Interpolation hold (1e) use when you want to quickly switch from one pose to another
• Linear interpolation (2nd) use for moving an object in a straight line from one point to another
• Smooth interpolation (3rd) use to give a bouncy effect
Select a place on the frequency of the timeline video, let's position the first pose of your balloon, go to (3) and select the 2nd; then click on (4) and the first keyframe button will appear. Let's move to another frequency, do the same thing but this time select the 1st and choose the second position of the ball. Continue in this way throughout the timeline. To avoid repeating the same pattern all the time, you can simply copy and paste on a new frequency and so on.
Our man having arrived in front of the basket at the position of the throw, we are going to change the rear view of the ball to present it in front of the player
On the duplicate layer let's apply the NB from earlier, let's arrange the position of the ball. In order not to see 2 balls in the field, we must arrange the positions on the timelines of these. Just place the mouse at the end of the horizontal bar (double) separating the timelines of the object, the mouse will change to "+" and reduce the frequency of the ball as you wish. Here is what we must have
To apply the movement of the ball moving from the player to the basket and from the basket to the ground, we will use smooth interpolation and apply it as in the image above and below
NB: when using this tween, be sure to indicate the motion pattern of the object.
Basket animation
To animate the basket is very simple. Simply redraw it using the background basket already. To do this, we will first select the first layer above in the layer placeholder, go to the timeline toolbar, select "new animation folder" and then "new cel from animation ". The layer being created, redraw another position of the basket according to the entry of the ball thanks to the drawing tools present in the toolbar of CSP. Above all, don't forget to position your red vertical bar at the end of the video when the ball enters the basket so that your layer is positioned there.
The rendering of our video will be this:

You can add an opponent like me if you want, just follow the same process and the tutorial video tutorial.
Thanks for following me ^_^.


Comment