
INTRODUCTION
Hi guys! My name is Jeremy but you can call me jimmy. I’m a digital artist and I love drawing anime.
If you're a beginner artist you wants to create your own kind of brush then this will teach you about creating your own brushes that will work in the right way you want them to.
Now Clip studio paint already has some pretty amazing brushes itself, but what if you feel like they don’t work too well for you, or maybe you just want to create brushes that you can call your own.
Don’t worry, I’ll be showing you guys some basic process you can do to modify Clip studio’s default brushes and also how to create your very own brush.
Note: I’ll be explaining all of these settings apart from the dual brush settings that has 2 next to them. But if you want an explanation on just the basic important settings that you’ll need to create a brush, you can check out the video I created on YouTube.
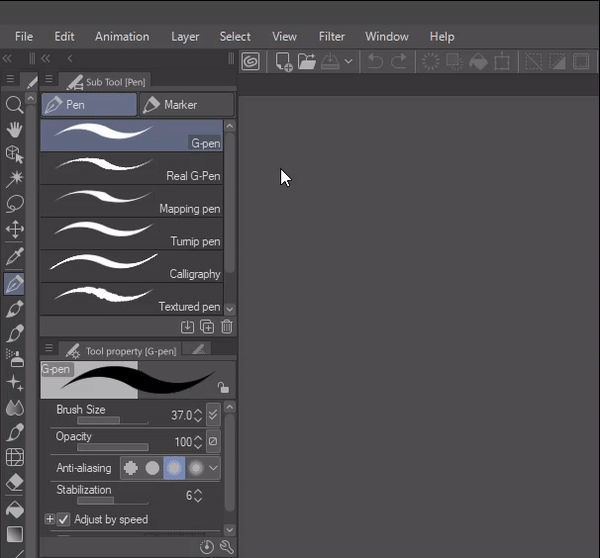
Finding your tools.
Before we start anything, let’s get to know our tools and where we can find them.
As you can see over here on the tool bar, we have our brush categories and you can find different sub categories of brushes under the sub tool window.
We have our tool property panel which consists of the brush size slider, opacity, anti-aliasing, and stabilization.
Now if you can’t find any of these windows or panels, you can simply click on the window tab and activate your panels from there.
Duplicating brushes
Now that we know where we can find our tools. Let’s see how we can duplicate our brushes so that we can start applying our custom modifications to them.
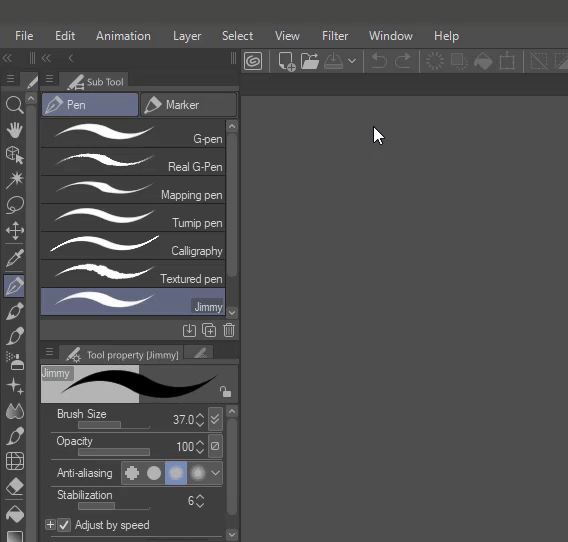
We’re going to use the default G-pen for this, now you can duplicate the brush by right-clicking on the G-pen, then click on “duplicate sub tool”
After that, you can give a name to your duplicated brush and change the background color of the icon and also the tool icon.
Now you can drag your brush and move to set it as a sub category and also change the name of the sub tool if you want. We now have our you brush that we can apply our modifications.
Understanding the Brush Settings
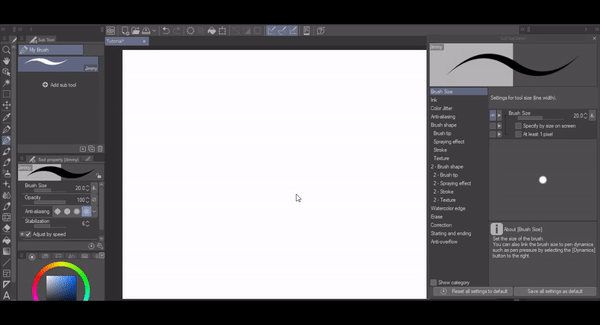
Before we can start modifying our brushes, let’s get to know the settings we would be going up against and how we can use those settings to our advantage.
By clicking on the wrench icon below the sub tools, a window will pop up which consists of different advanced settings you can give to your brush for a better feel and they can work in the right way that you want them to.
I’ll explain all of these settings so that you can understand them and know how to use the for creating your own brushes.
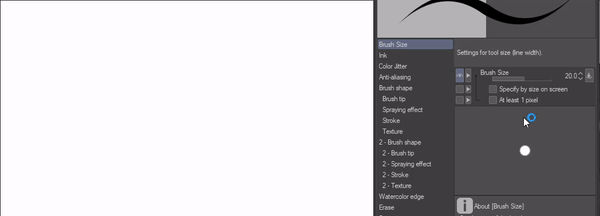
-Brush Size Dynamics
Let’s bring up our brush size dynamics menu by clicking on the box next to the brush size slider by the right.
Let’s start with pen pressure of the brush, which decides on how thick or thin your brush strokes are depending on the pressure you apply when drawing.
Right here at the minimum value slider, we have it at zero.
This simply means that the minimum value of our brush stokes will be zero pixels when we apply light pressure and the size of the brush won’t go any lower than zero pixels.
So also, when I increase it to 50% The minimum value of your brush size won’t go lower than 50% when you draw lightly on your pen.
But let’s say I increase it to a hundred, you brush strokes won’t get any thinner again no matter how little you apply pressure. It’s basically like have no pen pressure settings at all.
You can also further adjust your pen pressure using this graph settings but your pen tablet will come with the pressure settings of its own but you can try moving the curves around if you want, it’s all up to you.
-Tilt
Next you have your tilt settings. This is very good for making pencil brushes and giving them a realistic feel. It’ll make your pencil act like a traditional pencil because when you’re using a pencil and you tilt it, more of the pencil touches the paper and it becomes darker. So, when you adjust the values, you can replicate that effect.
The tilt setting also has its own graph settings that you can adjust the curves if you want.
-Velocity
Next you have your brush velocity which is responsible for how your brush stroke will look depending on the speed you use to draw. So, when you make a stroke really fast, your line will become thinner, but when you make a stroke really slow, it doesn’t become thin at all
-Random
Lastly, we have the randomize option, which creates random sizes in your brush strokes.
And the higher the minimum value is, the smoother the brush strokes becomes.
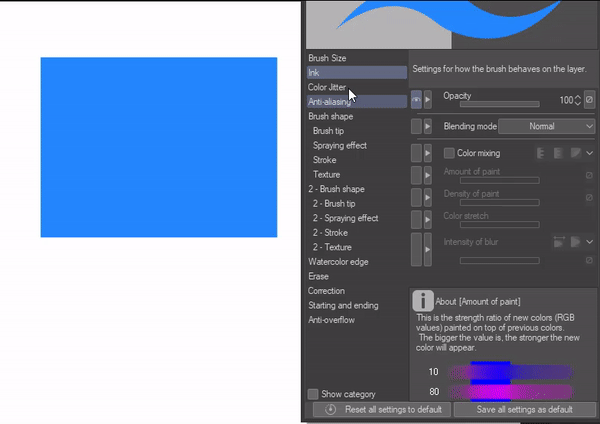
Ink
-Opacity
First, we have the opacity which will make your paint look transparent when the value of the opacity is lowered.
-Blending Modes
You can also set the blending mode of your brush. This will be responsible for how your colors will interact with each other based on the blending mode you choose.
Note: You cannot use Blending modes when the color mixing setting is turned on.
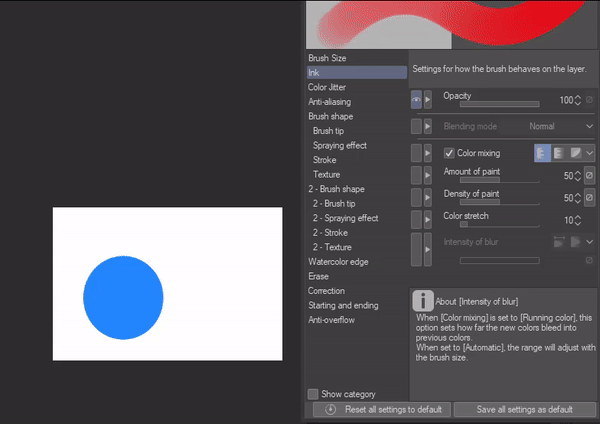
-Color mixing
Now, let’s talk about Color Mixing which is responsible for mixing your brush colors with other colors on the same layer.
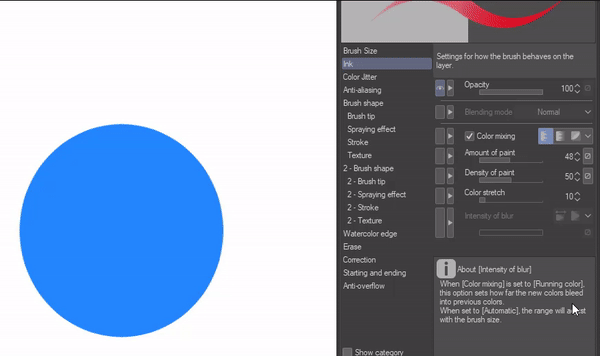
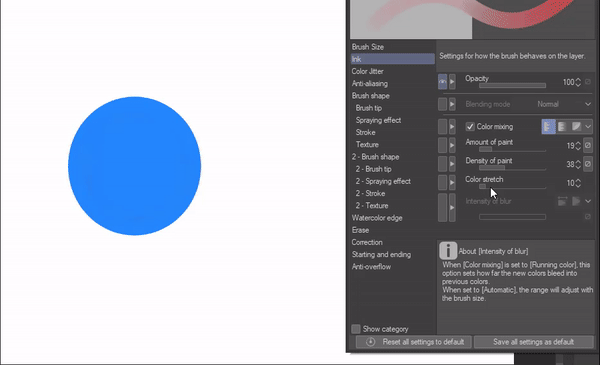
You can adjust the amount of paint and also the density of paint.
-Amount of paint
This simply means how much of the paint you’re using on your brush when painting.
For instance, when I lower the value of Amount of paint meaning I’m using a small pigment of color on my brush and I paint on another color, the original color I’m using will be barely noticeable. And when I keep painting on the color, the original color I’m using will gradually become strong.
I really like using this when I want to mix colors.
But with a high amount of paint, the color you’re using will obviously be noticeable and it will barely mix with any colors
-Density of Paint
This is almost like amount of paint, but this has to do with the opacity of the color you’re using.
-Color stretch
You can also use color stretch which when you increase the value and paint, it will stretch out the color for a long period of time before you obtain your original color.
You can also use different modes in which your color will mix.
When you use the running color, you will now be able to use the intensity of blur settings.
You can also use blending modes when you use the smear option, but your density of paint will be deactivated when this is turned on.
This simply allows you to change the hue, saturation and luminosity of your brush strokes, either by changing each brush tip or by each individual brush stroke.
Color Jitter
-Anti-aliasing
A brush that has strong anti-aliasing will have smooth and softer edge. But a brush of weak or no anti-aliasing will have a harder edge or more pixelated when zoomed in. This means that anti-aliasing will simply increase the smoothness of your brush.
-Brush Shape
This will allow you to choose different brush shapes for your brushes.
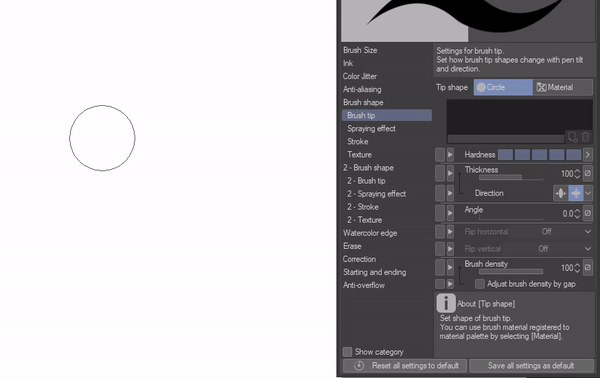
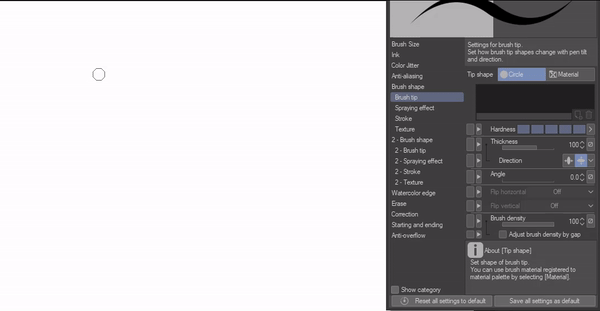
-Brush Tip
Here, you can choose different brush tips for your brushes. You can use a circle material which is the default, or you can give your brush a more custom tip shape using the material option.
I believe the brush tip settings is the most important one for creating your own brush, mostly because of the material settings. So, it’s my personal favorite.
-Hardness
This will allow you to determine how hard you want your brush to be. When you lower the value of the hardness, the edge of your brush will look blurry.
Note: You can only use hardness when you use the circle material.
-Thickness
We also have thickness, which in my understanding, helps us to set how our brush can be thick or flat if we want, and the direction decides on which way the brush tip can shrink to, so we can choose either vertical or horizontal.
We can also set the angle at which our brush tips rotate to. Note, when you’re using a circular brush tip, you won’t notice any change in the direction or angle of the tip, only when your thickness is below or above one hundred. But with a material brush tip, you can see change in the angle without making change in the thickness. You can see what I’m talking about when you try it out for yourself.
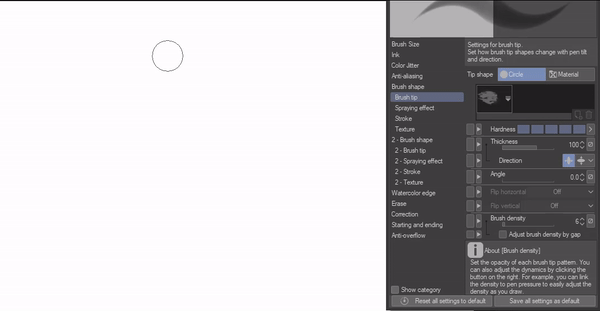
-Brush Density
Next we have brush density, which is almost the same as opacity, but works in a different way. Let’s say now by lowering the density slider to 6, this is simply saying that the maximum density or amount of paint that brush will output is six.
And you can also notice that as you keep painting over your brush strokes even without releasing your pen, the original density of your brush will keep building up gradually but only by six percent. Test it out a little to get a better understanding.
The brush density also has a dynamic setting.
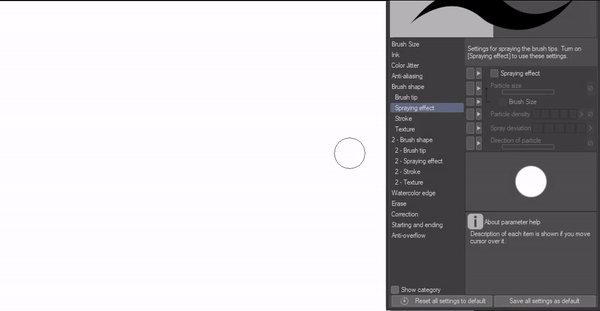
Spraying effect
This is responsible for making your brush act more like a spray than of a pen.
You can change the particle size of the brush tip, the particle density, spray deviation and direction of particle. Play around with each setting to see how they work.
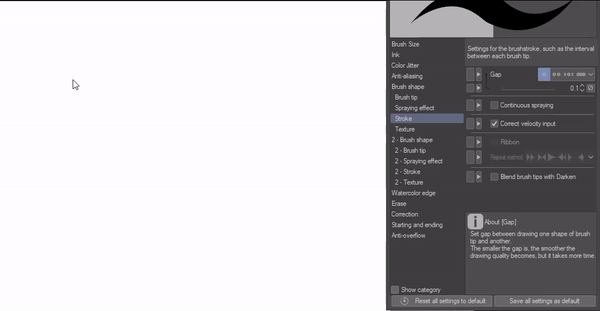
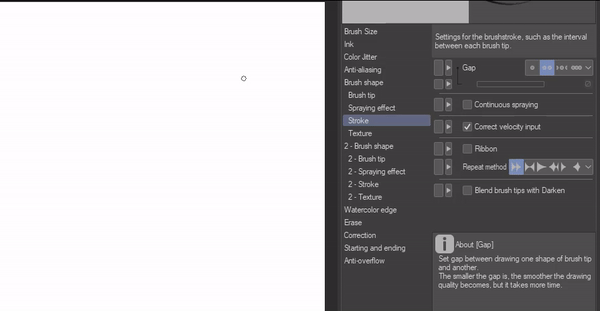
Stroke
Stroke
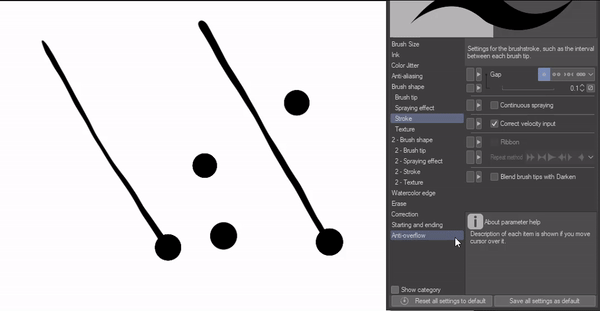
This is the settings where you can set the interval or space between each brush tip.
-Gap
For the gap you can choose between either wide, normal or narrow. But when you use fixed, you manually increase the gap between the brush tips.
Also, the continuous spraying option is quite simple to understand.
When you press your pen in one spot without moving, you will notice that your paint will gradually build up. Now if I draw and stop, you can notice this effect.
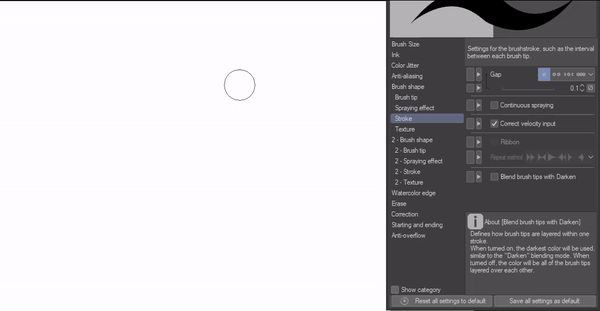
You can use the ribbon effect only when you’re using a material brush tip.
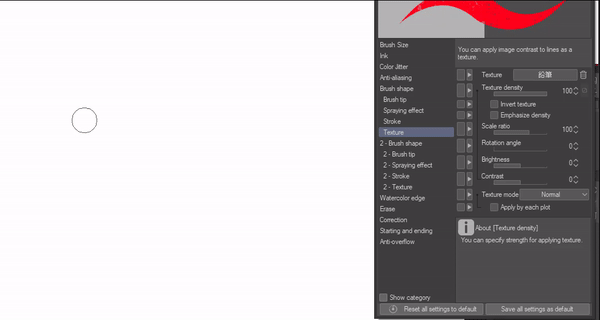
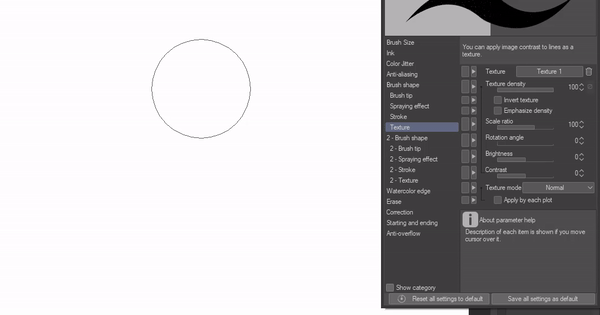
Texture
Alright, next we have the texture settings which is actually really good for adding textures to your brushes. You can change the texture density, which is how much of the texture you will see. You can also change the brightness contrast and also the texture mode, for a better effect to suit how you want your brush textures to be.
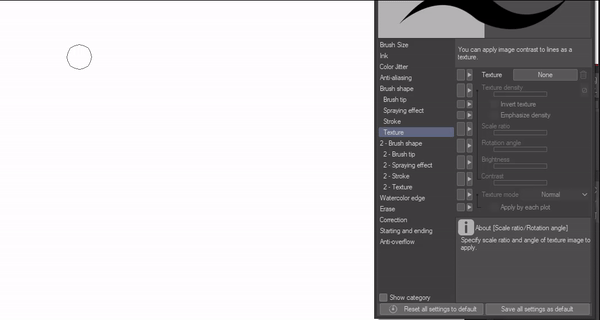
-Applying different texture modes.
[Quick Tip] Creating a custom texture fast and easy
Let me show you guys a quick, fast and easy way to create your own textures for your custom brushes.
Step 1
Create a new Project and fill the layer with black
Step 2
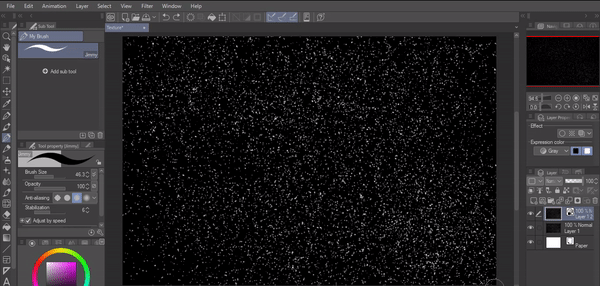
Select Clip studio default spray brush and select the transparent color and spray over the black layer.
Step 3
Right click on the layer and click on covert layer and change the expression color to gray.
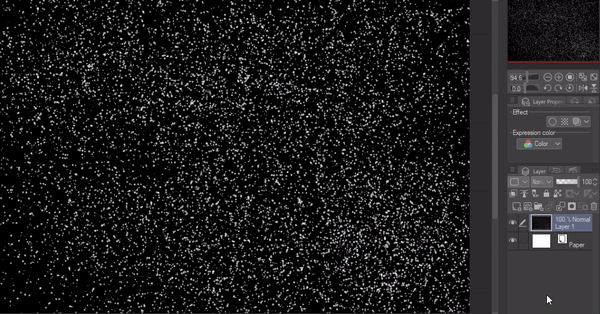
Step 4
Then hide the paper layer and also the first layer and click on your edits tab and choose register material. Choose Image, give it a name and click on use for paper texture and save the location.
Now you’ve created a texture that you can use for your brush.
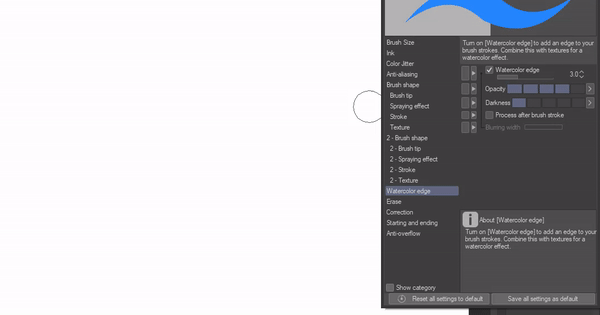
Watercolor Edge
This will help you recreate the look of a water color for your brush edges.
You can also change the opacity and the darkness of the edge.
Correction
Over here you can choose how your strokes will be corrected by the program.
You can adjust your stabilization to higher value for a more smooth and stable line.
And you can also adjust it by speed which works with the stabilization mode.
You can also correct your line and make them smoother with the post correction settings.
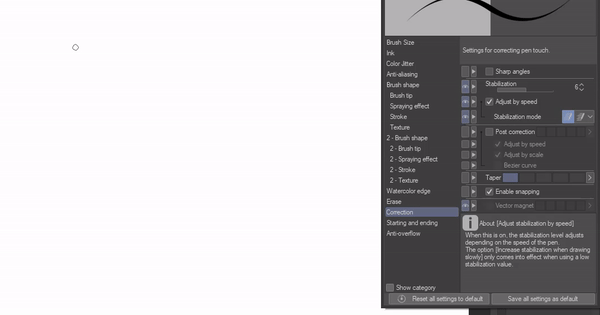
-Tapper
We also have the tapper settings. When you increase this to a higher value, it will make your lines thinner even when releasing your pen from your tablet, that’s all I can say about the taper settings actually.
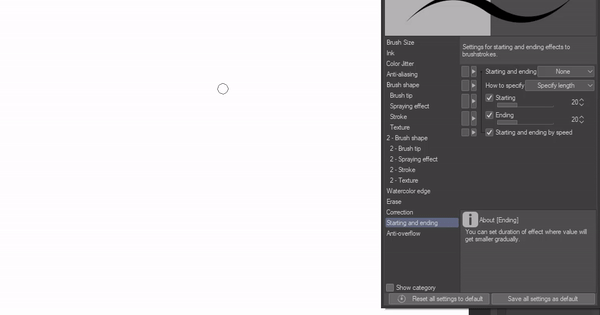
Starting and Ending
This simply helps you decide on how you want you brush to start and end.
Conclusion of Settings
Alright that’s it for all the settings for brushes. They’re quite a lot and some of them are a bit complicated especially when you’re a beginner so I actually suggest you try and just learn and work with maybe just 2 or 3 of them and then, you can gradually move on to other settings.
So, you can start with maybe just the Ink, Brush tip and textures. Then later on you can learn the rest.
And also try out the settings for yourself for a better understanding of them. You can be lazy as you want and take your time to learn them one by one. But then again, if you’re even more lazy (like I am) You can go to the Clip Studio Paint’s Asset store and get yourself some amazing brushes with all of the settings you can use already there.
Creating some cool brushes
Alright, now that we’ve learned all the settings. Let’s use that information to easily create a pencil brush and also a fun brush with color mixing.
-creating a pencil brush
Let’s quickly create a pencil brush that we can use for our sketching process. Because I really love sketching.
-First create a new project and draw in your brush tip and make the tip have some what of a random shape
-Next right click on the layer and click on convert layer and change the expression color to gray. (This will allow your Brush tip to change according to other colors you choose)
-Then hide the paper layer and layer 1 and then click on your edit tab and choose register material and select image material. Now give a name to your brush tip and click use for brush tip then save the location of your brush.
-Now make a brand-new brush by clicking the box that is next to the sub tool panel and click on add from default then choose the G-pen under pen. Next, name your brush and change the brush Icon to pencil.
-Let’s apply the settings for our brush to act like a pencil
-Now head over to your brush tip and apply your material you created
-Now go to your brush size and activate your pen pressure and tilt and just change the values a bit.
-Now do the same for your opacity by linking your pen pressure to it.
And also lower your density and link your tilt and pressure to the brush density.
It will already start looking like a pencil.
Now what I like to do for my pencil is to increase the gap between the tips just by a tiny value.
Lastly you can add a default texture to your pencil or the one we created earlier.
And that’s it, you’ve created a Pencil save your settings to default and you can start drawing.
Creating a cool brush with Mixing effect
Next let’s create a brush with mixing effect.
-Firstly, create a new project and draw in the tip of the brush. Were going to use Clip Studio’s default textured pen to draw it.
-Next, apply the same process of last time to convert and save your brush tip.
-Now set the created brush tip as your material
-Then link your pen pressure to your brush density and also lower the brush density as well.
-Lastly, head to your Ink settings and lower your opacity a bit, then activate your color mixing and lower the "amount of paint" as well.
And you’re done. Pick a color and start painting.
I think it looks great.
Final Conclusion
Alright guys we’ve reached the end and I hope you guys learned a lot with this. And I hope guys will try out these settings and try to create your own brushes for yourselves.
Try adjusting the values, and testing them out. Because remember, the brushes I created here were all based on my preferences and not yours. I just guided you on the process. So, you should know how you want your brushes to work and how you can apply those settings to implicate that.
You can also check my video that will give you an explanation just the important settings you will need to create a brush
Anyways, Thanks so much for reading, drop a heart if you liked and enjoyed it and have a great day!
Let's be friends
You can find me on my Instagram account: https://www.instagram.com/jimmywisdom543/
or you can check out my art from DeviantArt page:https://www.deviantart.com/jeremy54312
you can drop me a message if you like.
Users who liked this post


Comment