My complete guide to Animated Avatar!!(Drawing+Animating)
Hello everyone, welcome to my tutorial !!
In this tutorial, I will show you the easy steps for making a character art for an animated avatar or a rigging model !!!
This tutiorial is divided into 2 parts:
The first part will show you how to create character art for the animated avatar ,and
The second part will show you how to animate the avatar in Clip Studio Paint (Pro/Ex)
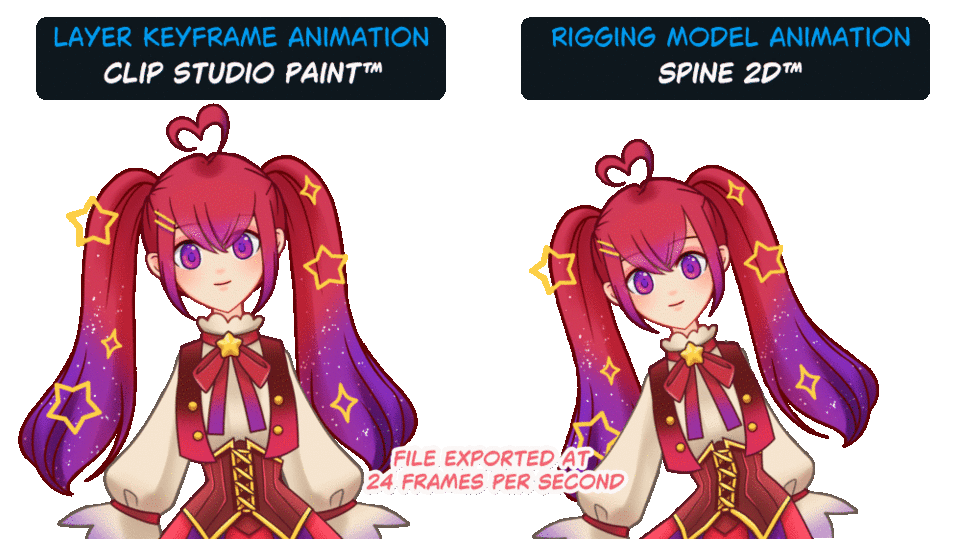
You can also export the art to another animation software to create a 2D rigging model for interactive avatar, such as game sprite or Vtuber model.
This tutorial also including the file cleaning process for that.
Let’s begin!!
Video Tutorial
Video version of this tutorial
Part 1 : Create the avatar model
The basic for making an animated avatar is simple.
Split the character into parts and move them to create animation.
The traditional way to do this is drawing a character then cut and edit the parts
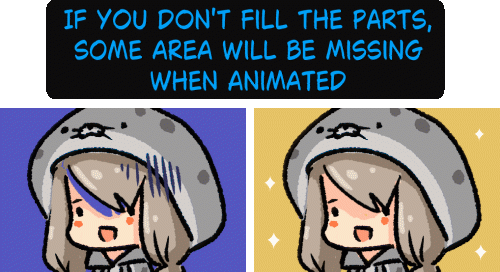
If you draw the parts separately instead, planing for the part spliting will help you to work easier.
These are the process that I’m going to show you in this tutorial.
Step 1 : Creating the clear design
Sketch the art in front view and basic standing pose.
The art need to be clear with the detail for the tracing process
Optional : I also colored the sketch to use as the color reference in the drawing process
You may use the head model to help with the sketching.
The head model is in the [Material Panel > 3D > Head]
(You may access this panel by the menu [Window>Material:3D])
Optional : You may customize the face features to fit your design by adjusting value on the [Facial features] tab in the [Sub tool detail] panel
Create a new layer and sketch over the head model
The head model has clear details, you can use it as reference for face shape, ears and eyes position.
Step 2 : Planing for part spliting
when the design is done, split the art into parts.
The key for part splitting :
“Split where it will be animated” and “Start from the center line, big to small”
Note : in this tutorial, I will finish the body parts first, then work on the face features later to avoid confusing.
Start with the head (face +back head) and the body
Optional :
I split the head into 2 parts : the face and the back head
This will give a more natural look on head turning animation.
Split the furthur details around the center line, list them in the appearing order
you can see that some parts are symmetrical and some are asymmetrical
There are also the parts that has a mirror version on the opposite side, such as the side bangs or the twintails.
You can draw these parts once, then copy and flip them to make another side.
When finish the part listing, Create a new folder for each part
In this tutorial, I’ve set the color label by the type to show the working process,
you may set it to your most comfortable way
Note : I use the ‘-’ in the folder name to identify the part’s group. (ex : ‘hair-twintail-L’)
Step 3 : Drawing the parts # Body
Set up the workspace
I copy the sketch with color to use as the color reference.
You can also use the [Sub view] panel for it
Change the color of the sketch layer on the [Layer Property] panel
Now it’s time for The symmetrical ruler!!
Select the Paper layer,
Go to the [Ruler] and pick the [Symmetrical ruler]
Set the options:
[Number of line] : 2,
[Line symmetry] : checked,
[Snap angle] : 90,
Draw the ruler on the canvas, the ruler will snap to 90 degree
Make it show in all the layers :
Right-click on the ruler icon and [Show in all layers]
Select the ruler with the [Object] tool and align it to the center of the canvas
you may set the [Center X] option in the [Tool Property] panel to half of canvas width
Or align it with the align/distribute panel (Clipstudio 2.0+)
Adjust some part to align with the ruler line with the mesh transformation :
[Edit> Transform > Mesh transformation]
the canvas is ready, it’s time to start drawing!!
Drawing the parts#1 : Symmetrical parts
Let’s start with the face part.
Create a new vector layer for the line art
This is optional, you may use the raster layer for the line art too, but the vector layer will be easier to edit/change in later process
Make sure the [Snap to Special ruler] is enabled.
When you draw on the canvas, it will be on both side of the ruler line
Note : If the brush/eraser doesn’t work with the ruler, check on the [Enable snapping]
in the [Sub tool detail] panel, [Correction] tab
To fill the color:
Create a new vector layer and draw lines to close the area
For the face part, I draw a hair line
Create a new raster layer
Fill color with the [Fill] > [Refers other layers]
In the [Tool property] panel, set the option [Refer multiple] to [folder]
And enable the [Fill up to vector path] option
Delete the vector layer for the hair line
then lock the transparent pixel and shading on the part
the first part is done!
Optional : I change the folder layer mode to [Soft light] so I can see the sketch layer to work on another part.
Drawing the parts#2 : Asymmetrical parts
For the asymmetrical parts,
disable the [Snap to special ruler] option and draw the part
Drawing the parts#3 : Mirror parts
The left hair bang can be flipped and make the right hair bang
When finish drawing a part, select the part folder.
Then create a rectangle selection, cover the part and the width of the canvas area
Click on [Copy and Paste] icon on the floating menu to copy the part folder
On the floating menu, click on [Scale/Rotate]
and in the [Tool property] panel, click on [Flip Horizontal] icon
Rename the folder and add custom details
[Symmetrical ruler tips]
You may need another special ruler for drawing some part,
and when finish, the symmetrical ruler is no longer work
This happened because only one special ruler can be snapped in the same time
so, when you create a new special ruler, the old one will be disabled
To enable it, select the ruler with the [Object] tool, and click on the snap icon on the ruler
When all the parts are finished, select all parts and change the [Layer mode] back to [Normal]
You can notice the hard edge of some part.
To fix it, create mask with the [Mask] icon on the [Layer] panel.
then paint the transparent with the [Soft airbrush]
Step 4 : Drawing the parts # Face
Unlike the body that have to split the part by hair style and costume,
There is a basic structure that’s always the same
you may add some extra part (such as tongue or separate pupil layer)too,
but make sure it’s on the correct layer order
Move the sketch layer to the top and create folders for face parts
Create a [Rectangle] selection covering only half face, then mask it on the sketch.
It will be less confusing while drawing the face with the symmetrical ruler
When you draw the parts, you can also see the result on the finished parts
Tips :
For the Clip studio 3.0 user,
you can select multiple points on the mesh transformation to adjust on both side together
Note: you have to select the point in mirror position too
[Clipping problem]
Most animation software for the avatar animation has the clipping mask feature.
However, sometime it’s more complicate to use, depends on the software
You may have to research which way is more fit for your animation software
To draw the mouth, I draw the mouth line and inside of the mouth
I copy the mouth line and put in the folder for lower lips,
then paint the skin to cover the inside mouth area
When the face is done, move the layer folders down to over the face layer folder
You may paint on the layer mask with the transparent or soft eraser
to make the front bang translucent
Usually the left and right eyes are animated separately,
To split the left and the right eye parts :
Select the layer folders, make a selection over an eye
then click on [Cut and paste] button on the floating menu
Rename the folders and now all the parts are finished!!
Step 5 : Clean up the file
When your avatar art is ready, you may export it for other animation software or animate it in Clip studio paint. Some software may need you to merge layers for each part before export, this will be uncomfortable if you want to edit the part later
(Note : I use Spine 2d for the animating process. it may have different result in other software)
The Clip studio’s [File Object] feature can help you keep the part editable (in separate files) and you don’t have to merge the layers every time in exporting process!!
Let’s prepare the file.
First, delete everything except the part folders from the file
(Ex : Paper layer,sketch layer, reference etc.)
Covert the layer folder to a file object :
Right click on the layer folder > [File object > Convert layer to file object]
Set the area to [Drawing area] and save the file
The part is now saved in an external file
Tips : put the export menu on the [quick access] panel will save your time on converting
Convert all the folder into files.
The file name will be the folder name by default
Note : If the animation software require the .psd format (Photoshop Document) you can just save with the [Save as..] menu
(If you need to edit something, you will not able to edit from the .psd file with Clip studio. Just edit it in the .csp file then export to psd again)
To edit the part, select it with the [Object] tool
Then, in the [Tool property] panel, click on [Open the file ]
When you save the part file, It will automatically update in the main file
Now your avatar is ready to be animated
It has a clean file structure with clear name!!
The part splitting art is usually animated with the rigging method (skeleton) for the interactive model for game or streaming avatar
If you don’t need the dynamic model,
You can simply make the animation in Clip studio paint and export as a video or gif animation too!!
Part 2 : Animate the avatar in Clip studio paint
You can use the [Layer keyframe] to create your avatar animation.
The face expression is easier to animate with the frame-by-frame animation.
Put the face feature parts in a layer folder
Select all the layer except the face expression folder, and click on [Scale/Rotate] icon
In the [Tool property] panel, set the mode to [Skew],
Then move the control point on the top away and back to its position.
Open the timeline panel ([Window > timeline])
Create a new timeline with Framerate : 8 and Playback time :24
(This amount of frame is compatible for Clipstudio paint Pro version)
Select all the layer this time, and enable the layer keyframe on the [Timeline] panel
The red tab shows the current active frame.
At the first frame, click on [Add keyframe] button
Note : the color of the Keyframe icon is by the type of the Interpolation
you may use linear for steady movement speed, smooth for exponential speed
and hold for fix the position of the object at the frame
When you select the part with the [Object tool]
in the [Tool property panel], you will see the [Transform] option appears to corners position. This is from skewing all the parts in the previous step
With the adjustable corner, the part can be more freely adjustable
Design the animation before the adjustment.
In this tutorial, I will make a wink pose, in loop animation
When map the animation to the time frame,
The post has to be set only for the start and for the wink position
Adjust the starting pose at frame 1
Note : I start with the body, then move other parts later
Add the end keyframes for all object
Select all the layers, click on last frame and add the keyframe to create the loop
Make the animation stop,
Create keyframe for all layers at frame 7, then set the pose for the stop frame
When finish posing, copy the keyframes to make the next animation stop
click and drag to multiple-select all the keyframe,
then right-click on the keyframe and copy
Select all layers, go to frame 13 and paste
Almost done
Shift the last keyframes to frame 19,
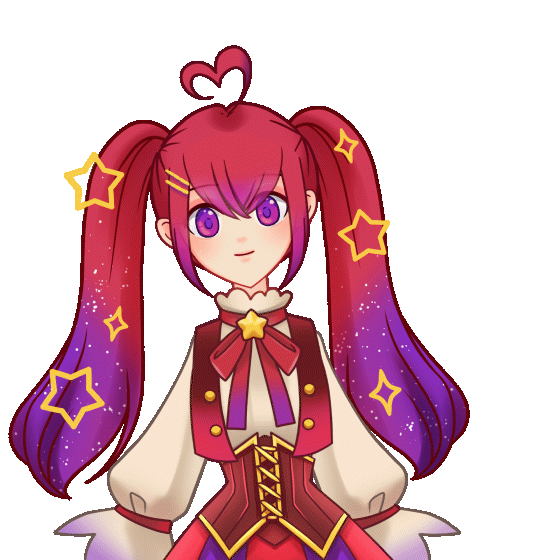
and now the character movement is the same as the design
Animation physic
Let’s make the more lively movement by adding some animation physic!
Right now, the cloth and the hair is moving all together with the character movement…
but in real, there is inertia effect that will make the attachment objects stop moving slower. Adding this effect to the animation will make it looks more natural.
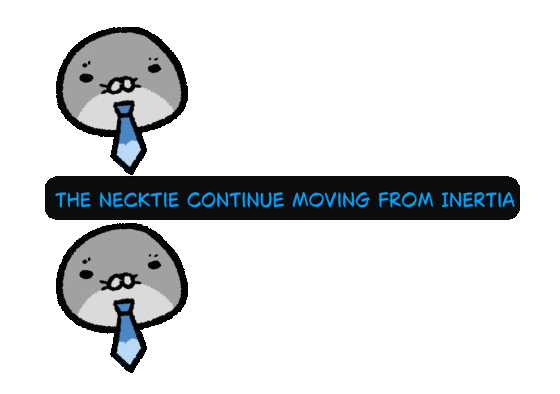
Add more moving effect to the frame that’s the end of movement
There is movement on the frame 1 to 7, add more moving effect on frame 7
There is another movement on the frame 13 to 19
add the more movement effect also on the frame 19
The keyframes at frame 19 used to be the same as frame 1, and the animation is in loop.
Since there is adjustment at the frame 19, the animation will no longer be in loop.
To fix it, copy all the keyframes from frame 1 and paste on the last keyframe
This adjustment make the hair continue to move on the frame where the character is not moving

[Loop gap]
The animation has a little stop gap between the loop because the last keyframe is on the end of frame 23
To delete it, you must shift the keyframe to the end of frame 24.
This is how to easily shift it
[bouncing]
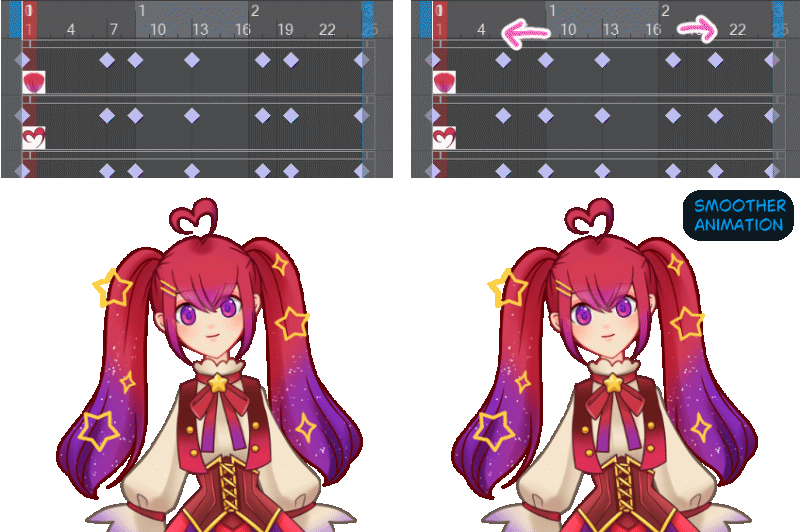
Adding bouncing effect to the animation makes a more natural look.
Insert a keyframe with the object moving/rotating to opposite direction,
between the inertia effect keyframes.
Tips : if you adjusted too much movement position and the animation looks flickering,
you may expand the gap between the keyframe instead of re-adjust the objects
Face expressions
It’s easier to add the face’s expression with the [Animation folder]
Select all layers and disable the [Layer keyframe], the parts will be at their initial position
In the face expression folder, merge all left and right eye parts(except iris/pupil),
and rasterize the mouth layers
Put the edited face parts into a folder
Copy the folder and newly draw or adjust the parts with [Mesh transformation]
I created 3 face emotions
Create a new [animation folder] inside the face expression folder
then move all the face emotion folders inside
Select all layers and enable the layer keyframe again, the keyframes will be back
Expand the face expression layer folder, it will show the animation folder
Expand the option for the folder with [+] icon, you will see the timeline for [cel]
Right click and select the face to assign to the keyframe.
And it’s done!!

I hope my work process and animation techniques is useful for your project!!
Have fun animating and see you in the next tutorial!!




Comentario