
Nice to meet you! You can call me Houdi. In this tutorial, I will be walking through the painting process for this illustration
Since this will be more of a general walk through, I will mostly mention notable steps in the painting as well as a few tips.
1. Tools
Let’s start with the main tools used. I usually limit myself to only a few painting tools, as it keeps my painting consistent. Depending on the style and the client’s wishes, I will adjust the brushes accordingly. Please feel free to experiment to find which tool you’re most comfortable using!
For this painting, I used 2 main brushes, the 3rd one is only for one part, which is the hair. I will introduce it once we get there. The settings for these brushes are my own preferences, you can adjust and test them on a blank canvas!
1st is [Brush] > [Transparent watercolor]
2nd is [Airbrush] > [Soft]
2. Sketching
For sketching, I used [Pen] > [G-pen] but any tool that will allow you to make quick strokes will be sufficient. I suggest turning down stabilization for whichever tool you chose for sketching.
With this sketch, I only went through 2 passes since I already knew what the composition would look like. A rough sketch, and a cleaner and more detailed sketch. The more information you include in the clean sketch, the better you will understand the details once you start painting. If there is anything that you think might be complicated later on, it’s better to resolve it in the sketch rather than finding yourself confused and frustrated when painting.
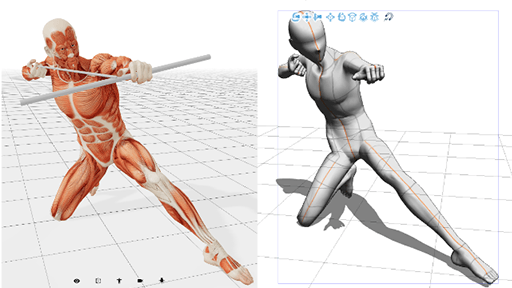
I predicted I might have a hard time with the foreshortening on the character’s hand, along with how the cloak will float around it, so I spent some extra time there.
3. Basic Techniques
As you start, you might find it beneficial to acquaint yourself with some shortcuts. The [Eyedropper] is automatically mapped to the [Right Mouse button]. This is usually mapped to the lower click on your tablet pen. If it is not, I would strongly recommend re-mapping as it makes clicking with your thumb an ease as you draw.
You can also use [Alt + Left click] on Windows, and [Opt + Left click] on Mac OS
You might also notice the foreground and background colour in CLIP. To alternate between them, press [x]. To switch from color to transparent (turning the brush you’re using into an eraser), press [c] or [right click] anywhere outside your working canvas.
Even though the [Brush] does have blending, the [Airbrush] does not.
To blend, you can have 2 colors overlap and pick whichever colors in between that you like, and continue painting.
Note: You can keep swatches of the drawing as you go along, but I’ve found I can get very organic and natural swatches by blending and picking colors as I go along.
4. Colour Layout
a. Face
For a character painting, the most important part is the character’s face since it will be what your viewer be drawn to first when observing your work. I always start out with the face before anything else.
Lowering the opacity of the sketch. I find the lower the opacity of the sketch, the easier it is to see what you are painting underneath. I set mine to about 9~18% opacity usually.
On a new layer underneath, we can start painting!
It’s best to put down the midtones, and them going back into it with light and shadow, this way, you can better control how light or dark your colors will be.
I’ve done these 5 steps entirely with the [Airbrush] since I wanted to keep her face soft and smooth. Adjusting the size of your brush can help with smaller details, and sharpening some of your edges. I also zoom in quite close when I paint the face.
In order not to surprise yourself later on, please flip your canvas often to check the face! You can do this with the [Flip Horizontal] button on the [Navigation] window.
At this stage, since we are still keeping things relatively loose, I found that some proportions weren’t to my liking, so I made adjustments to her mouth. Please take your time painting and adjusting. But if something becomes frustrating, perhaps focusing on something else and coming back to it later will help you look at it with fresh eyes.
Since this is an important part of the painting and has a lot of detail in a small area, I always spend more time on it as I start.
For now, I am quite happy with the face, so I will move onto the next part.
b. Hair
This character has long flowy hair, I want to map out the general shape before anything else.
On a seperate layer, you can outline the shape of the hair, it doesn’t have to be exact to your sketch. You can add or remove any part depending on how it looks. With the outlines done, you can use the [Fill] tool to get all your flat colours down. Locking the layer opacity after you are happy them will allow you to paint freely without messing up all your shapes.
Once again, with the [Airbrush], I map out the general gradients and shadows for the hair, but I won’t be painting it until later.
c. Clothing
We can move onto the clothes on a different layer!
Sometimes I will separate every small part in different layers, but since I will be merging everything to paint, it won’t be necessary for this piece.
1. With the [G-pen], I lay down flat colours for everything on the clothes, the more detailed your sketch was, the easier this step will be. Once you are happy with the colours, create a [multiply] layer on top of everything, and draw in the shadows for the hair and clothes.
I usually use a neutral cool color for the shadow, like a muted purple or blue.
2. After the main shadows are laid down, I will group everything into one folder, and create another [multiply] layer clipped to the whole group [Layer] > [Layer settings] > [Clip at Layer below]
3+4. This time I will fill the whole layer with a solid color and then choosing a secondary color to make a gradient. If some parts are too dark, you can paint in a lighter color, or in this case, I simply erased the parts I want to have lighter, such as her face, under her hair, and her hand. I’ve also added a grey BG, since it will help while you paint to see where all your highlights are.
5.For the highlights, create a clipped layer on top, and draw in a bright color. Since I want the painting to be warm, I chose a cream highlight.
5. Painting
Once you are happy with everything, group all of your layers and duplicate them. You can choose to paint them on separate layers, I simply like to paint them on one as I can blend and keep all the elements unified.
This is where I alternate a lot between the [Brush] and the [Airbrush] as I want to keep the sharper edges, but also create soft gradients. It helps with the clarity and depth of the painting.
If you get to a difficult part, it might help to break it into simpler shapes, as well as find the closest reference you can get. I usually take references of my own hands or legs as references.
(Please excuse the strange shapes of my hand!) and lay out some clothes if I’m having trouble with fabric.
Another potentially tedious part is the pattern on the scarf. With this, I’ve drawn on another layer completely. Locking the opacity once I’ve gotten the patterns down, I can then add in highlights and shadows with ease. You can erase the overlaps once done.
As the final touches, there are small highlights you can add to help the patterns stand out.
With a complicated painting, it might get overwhelming and you end up not knowing where to start. Sometimes focusing on one part at a time will help. I tend to go in the order of Skin > Clothes > Hair as well as painting from Left > Right.
Don’t be afraid to paint over details, as long as you have your clean sketch, you can always repaint everything!
Usually, I save the hair for last since it is my favourite thing to paint besides the face. So you start with your favourite thing, and end with your second favourite thing! Sometimes if the hair is simpler, and I’m more excited to paint the shoes, I will save those for last instead. It keeps you motivated to finish if you are having trouble.
I will using [Brush] > [Watercolor Brush] since it has strands in the strokes, it’ll help in creating the look of the hair. Painting hair is just like everything else, though you might find yourself rotating the canvas a lot more to find a natural angle to paint certain lines.
You can hold down [r] and drag the canvas to rotate, and while holding [r] you can [Double Left click] to reset the rotation.
I was quite excited about the hair strands so her hair ended up very messy. But as you can see, since her hair were split into several segments, simply painting those, and adding on a few more strands created a really detailed look even though most of it was already there in the earlier stages.
If you paid extra attention to details during the sketch and colour layout, the painting portion should not be very complicated. It will simply take patience to refine all details you’ve laid out previously, and some small adjustments such as the buttons on her cloak which I decided to change to unify them with the rest of the design.
6. Post-effects
We have reached the end of the character painting, only some effects left.
I did a bit of colour adjustments with a [soft light layer] since it was turning a bit too brown.
I also really really like purple and pink.
There is a lot of movement in this painting so blurring it will add depth to the overall look.
Once again, group all of your character’s layers, including all the added colour adjustments, duplicate and merge the copied folder into one.
You can then go into [Filter] > [Blur] > [Gaussian Blur] and adjust it to your liking. I would suggest experimenting with other effects as well.
Once you’re happy with the adjustments, using the [Airbrush] set to transparent [c], erase parts you’d like to stay in focus, i.e the face, the hand, some parts of the clothes and hair. Usually the centre will be more in focus than the outer edges.
Since the focus of this painting is the character, I’ve decided to leave the background white. The only decorative elements were the floating latten like objects which I’ve also left mainly blurred to further create the illusion of depth with foreground, middle ground, and background elements.
Backgrounds might be an afterthought when the painting is character focused, but I think if you plan the piece accordingly during the sketches, you can harmonize them even if you leave it till later.
After some post effects, I ended up with quite a few layers anyway even though I painted the character on only one. Generally I like to keep them below 15 or 10 (visible) layers, but feel free to use as many as your program allows!
I hope this was helpful! Have fun painting!
If you have further questions or any inquiry regarding my art, you can find me on any of the following link
Website
Usuarios a los que les gustó esta publicación


Comentario