Nesting Neko Animation Tutorial

Introduction
This tutorial will show how I make use of various animation methods and Clip Studio Paint tools such as hand-drawn animation, 2D camera folders, and layer masks to create a looping animation, as well as some tips and tricks along the way.
Step 1: Concept
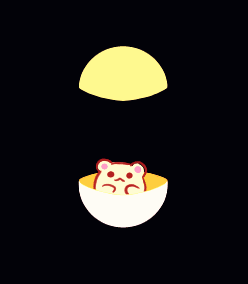
I start by first sketching down the concept I want to bring to life. For this specific animation*, I wanted to make a more graphic/illustrative style of animation, and to mix the maneki neko with the matryoshka (or nesting dolls) along with the idea of the four seasons being shown in each cat. I also like to put a little quirk on animations to make them a little more interesting, and decided to have a small hamster get revealed in the very last piece, like a gachapon capsule surprise, that closes the animation so that it loops back to the start.
*the dimensions for this particular animation are 1920x1080, one of the standard high resolution screen sizes.
Step 2: Color draft & key image
After deciding on the concept, I create a color draft and key image -- deciding on the final colors of the elements and something close to the final look of the animation. This will serve as a reference for the final animation.
Step 3: Setting up the animation
With the colors and style decided, I finalize illustrating each separate piece with cleaner lineart and simple fills. I then arrange the layers according to the order they will be animated in, starting from smallest/innermost piece to the biggest/outermost.

TIP! Grouping each part in a folder with a specific color for the thumbnail is quite helpful with keeping track of the layers and elements of your animation. This can be done by clicking the thumbnail square near the upper left of the Layer tab and choosing the color/s you want to assign to those elements.
Step 4: Adding animation
For the starting animation, I wanted to animate the movement of a maneki neko’s arm waving down, as they’re known to do, with this serving as the ‘launch’ motion for the rest of the animation to follow. I also wanted to animate the cat’s eyes going from wide open to happy closed eyes.

For this animation I started with drawing the key frames, which are the start and end poses of the cat. Next is to draw the in-between frames to make the animation smoother.
TIP! Using the onion skin feature is helpful in having a reference for the before and after frames when in-betweening.
Breaking down the animation using a line/timing chart is an effective way to make smooth animation. Each line shows how every frame is spaced, and adding more lines in between each division will make the animation smoother and even add to the speed and timing of the animation.
With this cat animation, I wanted to add some ‘easing-out’ with the arm so that the movement feels more dynamic and has more weight to it, which is why there are more frames by the end of the movement so that the arm slows down a little. I used a similar process for the eyes as well.

To add a bit more weight and pop to the animation, I made the arm do a little bounce by adding a frame where it goes back up before settling to the final pose.

TIP! setting shortcut keys for frame animation (new frame, specify frame) can really help with streamlining the animation process.
I duplicated this cat animation and changed the colors to fit with the night version of this cat, having this alternate version for the next part of the animation:
Step 5: Creating a fade-in transition with the 2D camera folder
To have a fading in transition for the day cat to turn into its alternate night version, I used a 2D camera folder (Animation > New animation layer > 2D camera folder), put the alternate version cat inside it, and made sure the folder is above the first cat
To create the transition, set the first and last keyframe in the desired spots on the timeline, and input “0%” on the opacity of the start frame. This will automatically make whatever is in the camera folder fade from transparent to fully opaque.

Step 6: Animating movement with the 2D camera folder
To start with the ‘nesting doll’ effect, the cat needs to split up into two pieces. To do this, I duplicated the last frame of the animated cat and separated the 2 halves that will split up
To make sure that the previous animation does not overlap with the next one, I set the last displayed frame to right before when the split will happen (Animation > Edit track > Set as last displayed frame).
I then put each cat part in its own 2D camera folder, then set the start and end keyframes to have the same timing. Using the Sub Tool Operation > Object tool, I moved the cat pieces to their end spots, using the key image draft as a reference.
To see how the movement is being applied via the 2D camera, I set the Display mode to ‘Show camera’s field of view’.

TIP: To make sure a layer moves in a straight line, hold the [Shift] button as you move it.
The 2D camera folder will instantly create a tweened animation of the movement. For this animation, I wanted some easing to be applied, so I set the keyframes to ‘Smooth Interpolation’. This can be done by clicking the Keyframe Interpolation drop down button and clicking ‘Create keyframe: Smooth Interpolation’.

Step 7: Using a mask to animate lines getting drawn/growing [Autumn cat]
For the autumn cat, I wanted to make the effect of some leaf linework getting drawn/”growing” on the cat, so I went with using a mask to easily animate it.
For this, I first defined the final frame of the linework, or what it looks like when it’s complete.
To animate growing lines, make an animation folder with Animation > New animation layer > Animation folder, or the New animation folder button on the timeline. To make a mask, ctrl/command + click on the thumbnail to select the lines, and set it as the mask of the animation folder by clicking the mask button on the Layer tab.
Above: what it looks like when you ctrl/command + click on the thumbnail of the lineart layer, making a selection from the lines.
The layer mask thumbnail will appear when you apply the mask. Whatever is colored white in the mask is the only area that will be visible, while whatever is in black will not be shown.
TIP: Pressing alt/option + clicking on the layer mask thumbnail will show you what the mask looks like, showing the visible area in white and the rest in blue. You can edit the mask by using the Eraser tool to reduce the mask details and/or the Brush tool to add to it.
Gradually animate the lines ‘growing’ by filling the lines from a starting point going outward. For consistency and speed, duplicate each previous frame and add onto the line until you reach the finished linework.

Then I repeated Step 6 with this autumn cat to have the same animation of it splitting up to reveal the next cat.
Step 8: Using a mask to animate a freezing effect [Winter cat]
With the winter cat, I wanted to animate the effect of it frosting/freezing up, which is similar to the previous autumn cat animation, except with a more organic ‘design’.
Like in the previous step, create an animation folder and use ctrl/command + click the thumbnail for the fill of the winter cat to create a mask of the cat’s body
Using the default airbrushes, use a light blue color and start drawing in a freeze effect that starts from the edges of the cat going in.
Soft airbrush - for a ‘fading in’, kind of frosty/smoky effect
Running color spray - for a frosty icy effect
Again, for consistency and speed, duplicate the previous frame/layer and keep adding onto it until the cat is filled with the blue color.

To get to the final winter cat form, I used the same fading in transition effect in Step 5, making sure that the 2D camera folder that includes the final winter cat is on top of the freezing animation. I also used the steps in Step 6 to animate the cat’s parts splitting up to reveal the next cat, this time with the top and bottom of the cat separating up and down.

Step 9: Using a mask to animate a melting effect [Spring cat]
For the previous steps, masks were used to create something, this time it’s to do the opposite: make something disappear, specifically the effect of snow melting off of the spring cat, to show a version of winter transitioning into spring.
For this part, I reused the eye animation from the very first cat to make this spring cat open its eyes, sort of to signify that spring ‘woke up’ or started, so the snow will melt to fully reveal it. I also added a simple effect animation where the snow poofs a little in response to the cat opening its eyes, to sort of make the action seem more like a sudden pop.

To animate the snow, create an animation folder and make the first frame where the snow is fully covering the cat. Duplicate the layer and click the mask button to create a mask on that frame, and using the hard and soft eraser brush, start erasing parts of the snow.
Repeat this step while erasing more and more of the snow until it’s gone. Using a mask will make it easier to make adjustments and correct any mistakes along the way. Use the brush tool to bring back any excess snow that got erased.

Again, I repeated Step 6 on this cat so that it splits up to reveal the last element.
Step 10: Simple character animation with a hamster [Gacha hamster]
For the last part of the animation, I wanted to animate a cute hamster getting surprised at being revealed when the capsule opens (still using the same 2D camera method as in Step 6), then shooting up to close it, which I wanted to animate frame-by-frame.
When animating, I often like to use squashing and stretching on certain actions, and in this case I feel it helps to give the hamster some more personality and cuteness to go with the snappy fun motions. To exaggerate the hamster’s surprise, I used a snappy sequence of frames and made the hamster stretch for a moment.

Then to animate the hamster jumping up to close his little capsule, I made the hamster stretch into a smear, or blur, to really show the speed of the action, further emphasized by the way the hamster gets a bit squished when he hits the top of the capsule. Using some additional keyframes with the 2D camera, I also made the top half of the capsule jerk up for a moment to give an added feeling of weight and strength in the hamster’s motion.

TIP! One way to easily adjust the timing of some animations is to make a frame appear for a longer or shorter amount of time. If the frame takes up less space on the timeline, it animates faster, and the opposite for if it takes up more space.
To add a little bit of cuteness to the hamster, I added some extra frames of the hamster kicking his feet alternately in a small struggle to close the capsule. I used the Specify cels option (Animation > Edit track > Specify cels) to make the frames repeat several times.
Finally, I animated the hamster closing the capsule by stretching both the hamster and the top half of the capsule, then making the capsule bounce a little to add to the feeling of how quickly and heavily it was closed.

Step 11: Looping the animation back to the beginning
With the hamster back in his little capsule, all that’s left is to “rewind” so that the animation can go back to its starting state and loop. To do this, I simply did the reverse of the different animations. With the 2D cameras, I set the keyframe for the start of the movement, then copied the very first keyframe of the folder and pasted it to the end spot. This can be done by right clicking on the keyframe and choosing ‘Copy’, then right clicking on the spot I want it to end at and choosing ‘Paste’.
I also duplicated the earlier day and night cats and reversed their animations, using the same fade in transition method to revert them back to the very first frame.

Step 12: Final
To add some final touches, I added some small effects for a little more flair, such as a little surprise effect on the hamster and an impact effect for when the capsule gets closed up. Small effects like these can be done by making lines burst in a certain direction (in this case radially outward) by stretching out then disappearing.


After all of the animation is finished, I added a little color adjustment above everything with Layer > New Correction Layer > Color balance, and adjusted the background color slightly. Finally, the animation can be exported as a looping GIF via File > Export animation > Animated GIF.


Comentario