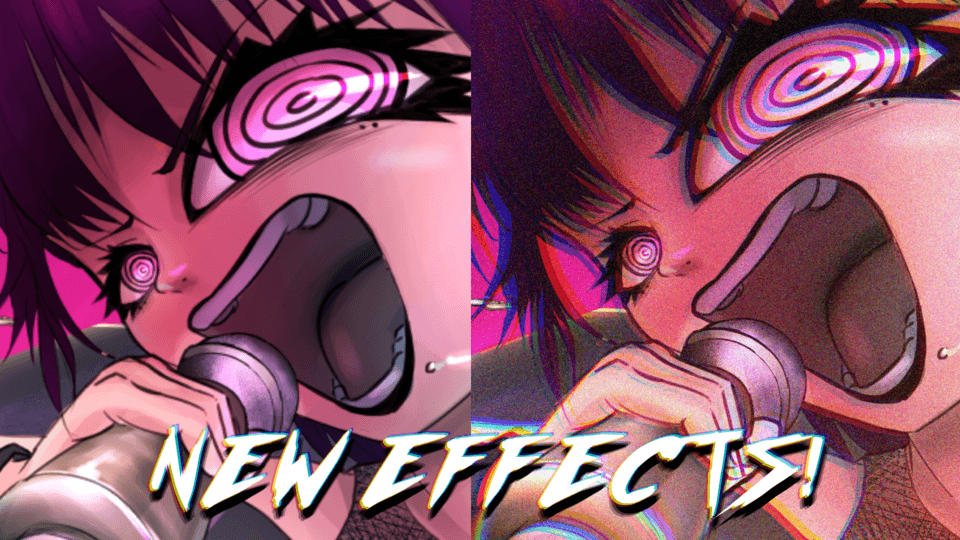
HOW TO FINISH ART FAST AND EASY! Feat. Blending Modes
Have you ever tried out a faster way of coloring your artwork? Trying out methods that make your style even way better? or Seeing your artwork improve in rendering.
A lot of artists out here struggle to finish their art; usually it takes a week or days to finish one illustration. One of the biggest problems why their art didn’t finish fast was Colouring/ Rendering. Here I got a special tutorial for Y’ALL!!!! I used this method these past months; believe me my art only took ONE OR TWO DAYS to be finished and It really changed my progress too!
Thank you! You click this tutorial :3 I will help you out in your way of coloring.
TAKE NOTE: THIS TECHNIQUE WILL HELP YOUR ART DONE FASTLY!! CSP WILL HELP US TO REACH OUR EXPECTATIONS!! THANKS TO THEIR BLENDING MODE ^^
THE STEPS
As you can see below, There are steps needed to follow. BTW, I used my fanart for Makima in this tutorial.
Tip: For you to get faster in drawing, make a time management method like this, for you to keep motivated finishing it in just a day or 3 days. Btw, challenging yourself to try to keep in some parts takes you just 1 hour.
EXTRA TIP: Find some reference
Okay! So first we need to find some inspiration. Using “REFERENCE” was a lifesaver for all artists. This is where everything begins, especially when it comes to finding the REF for your art. Pinterest was the most frequently recommended platform for reference material.
Step 1: SKETCH (Normal Mode)

The tools I use for sketching
>FLAT BRUSH >LIQUIFY - to fix the parts if you flip your work >G-PEN BRUSH for for small detail in sketching >CHANGE LAYER COLOUR into blue
Take note: organize your layers by using folders; this will help you not to get confused when you were proceeding to add more layers in your art
Step 3: LINEART (Normal Mode)
EXTRA TIP: Drawing Folds in Clothes
Second, let’s start knowing the folds. In these step you will know these 3 things: Variations, Elements & Tips on Drawing Folds.
When you draw clothes, one thing every artist should be aware of is “FOLDS”
Elements of Folds
As we know the variations, folds also have three elements: Motion, Gravity and Wind. Please keep in mind: folded parts were affected by movement or motion, the weight was caused by gravity, and the direction was dictated by the wind.
Step 3: BASE (Normal Mode)
As for the base , create a new folder then add new layer NORMAL MODE
Take note: Separate the color depends on parts of your subject’s body, incase you want to add some gradient only in that layer
Rename it correctly so as not to get confused in layers.
MY METHOD: These are the tools I used in order for me to color fast
Option 1: Paint Bucket Tool - big parts to colour: make it REFER ONLY TO EDITING LAYERS
Option 2: SELECTION AREA (after to use this tool, the next used MILIPEN brush
-LASSO TOOL
-POLYLINE
-SELECTION PEN
Option 3: you can download this tool:
Step 4: SHADING / VALUES (Blending Mode & Gradient Method)
This step will takes you hours to work; However this method was much more flexible than classic method we used when we are beginner. Shading was important; Contouring some parts for making it more semi- realism/ realism in your art.
1. Click the folder of your base layer : Ctrl + C ---> Ctrl + V
Now the Copy folder ---> Rename it Shading then Combine all he Layer into one layer
2. After renaming it, Combine all he layer into one
3. Move the Shading folder to you base folder but at the top of your separated layers
4. Right click your mouse button —> New Correction layer —> Hue/Saturation/ Luminosity
5. Change the Luminosity to 100%
6. Merge the new correction layer to your shading layer hen you can now proceed in your shading
EXTRA TIP: Values
In this method, this was the easiest way to render your art because WE will only use the value scale however, you should know where's you lights and shadows.
Artists today work using a 10 tone value scale.
By 10% increments, value grows.
The majority of artists can understand the scale and utilize the words:
When discussing shading, use "one tone up" or "one tone down."
A value scale is an excellent resource for selecting the appropriate value.
When compared to various backgrounds, the same value seems lighter or darker.
Numerous factors can affect how much light a surface reflects, including:
1. brightness of the light source
2. position of the light source in regards to the object
3. Distance to the light source
4. value and color properties of the surface itself
5. How a surface is facing the light.
6. Reflected light.
7. Background value
NOTE : you jus need to your light source and when it comes in shadows , DON'T BE SCARED OF USING BLACK SHADES
Here are the tools I used:
BRUSH : ROUND MIXING & G-PEN
BLEND : PLAINTERLY BLENDER & FINGER TIP
BLENDING MODES !!!!!
CSP offers 29 BLENDING MODES the gives your art magnificent moods in your drawings. As I finish doing the shading part, lets try it out blending it to the Base Color!
WE WILL USE THESE BLEND MODES FOR THE SHADES & LIGHT
take note: Some of the Blend modes I just use 50 opacity for making the some of our base part look visible but anyways, you can change it depends on what you like.
HERE ARE MY FAVS WHEN I'M IN SHADING PART:
GRADIENT METHOD!!!
As I finish demonstrate some of my fav blend modes, I prefer now in this pace was Multiply Mode for we can use the Power of Gradient Method.
This method was used if you wanted to change the color of your subject which also much more flexible
First off, Lock the shading layer (btw, he blending mode I used was Multiply Mode 100%)
Use selection pen, to select the parts that wanted to changed the colours
After that, use the mouse —-> right click —-> choose New Correction Layer —----> then choose Gradient Map
As I open the Gradient map, I can choose now what colour I want to change my Character’s hair.
Csp recommended a gradient set that you can use in your shading for free, if you want more of it then these are my suggestion to download in assets
Step 5: LIGHTS (blending mode)
Add New Layer and Folder ---> select blending mode into ADD (GLOW )
Use the Base color as light to your Drawing
Brush : Milipen
Blend: Finger Tip
Btw, Here are some Blending Modes that you can use when you add Lights to your drawings:
take note: These are the blend modes I prefer to use in Light besides what i'm using rn Add (glow)
Step 6: POLISH
After we used the blending modes, we successfully get where the shadows and lights in place in drawing. As you also noticed, Colouring was also simple and fast to do when you are using Blending Modes, Gradient Map and Shading Method
And then on top of all that, I will add a new layer setting to normal mode to fine some things; cleaning , add some details before we completely call it done.
BEFORE :
AFTER POLISHING:
As I end this tutorial, I hope you guys like it (even tho it's my first time making this tuts ;-;)
This tutorial, by the way, was not particularly difficult. In CSP, I typically only use the basic tools. This was useful for beginners who want to try drawing or painting landscapes in USING BLENDING MODES . I use blending modes for me to be more flexible in making art. Using this method, make you even more "DRAW SMARTER, NOT HARDER"
I hope you like this tutorial. Thank you for viewing this TWT
enjoy and good luck to all of us!
btw i will add a video timelapse here, for you guys see my process for this tutorial


Comentario