How to Organize Layers
Hello! My name is Liz Staley and I’m a long-time user of Clip Studio Paint (I started using the program back when it was known as Manga Studio 4!). I was a beta-tester on the Manga Studio 5 program and for Clip Studio Paint, and I have written three books and several video courses about the program. Many of you probably know my name from those books, in fact!
Layers are one of the best innovations in digital art. But if you use a lot of layers in your work, it can be difficult to keep them organized. Especially if you’re like me and forget to name them as soon as you create them! Aside from naming there are a few other ways you can keep your CSP layers organized though, and that’s what we’re going to learn about today.
In this article we will cover the following topics:
Naming Layers
Creating Layer Folders
Color-coding Layers
Let’s dive right in!
Naming Layers
This is the easiest way to be able to tell what your layers are, so long as you remember to name the layers as you create them. Trying to find the layer you’re looking for when there’s just a stack of “Layer 1, Layer 2, Layer 3, Layer 4” can be frustrating, so try to get in the habit of naming layers as your create them or soon after!
To create a new Raster Layer, click on Layer - New Raster Layer in the top menu bar, or click on the New Raster Layer icon in the Layer Palette. You can also hold down Ctrl+Shift+N to create a new layer with a keyboard shortcut.
After you create a new layer it will show in the Layer palette and will have a default name depending on the layers already in the document. For instance, if I add a new layer to the document in the above screenshot, the new layer will automatically be named “Layer 5” because none of the other layers have names. But if all the existing layers have been renamed, a new layer will come into existence with the title “Layer 1”.
The easiest way to rename the layer is to double-click on the existing name. This will turn the existing name text into a text entry box. Type the new name in and press “Enter” to finalize it.
Alternately, you can also perform this operation by right-clicking on the layer. This will bring up a small menu in Clip Studio Paint. Move the cursor to Layer Settings, then over to Change Layer Name… This is shown in the following image.
Using this menu command will bring up the Change Layer Name window. Type the new title for the Layer in the “Name” box, then click on OK to complete the name change. Clicking on Cancel will discard the name change.
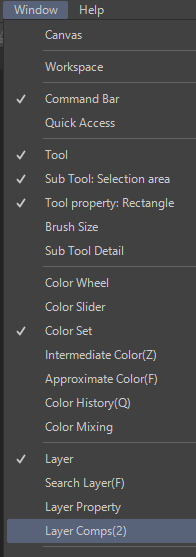
In true Clip Studio Paint fashion, there is ANOTHER method you can use to rename your layers. The Change Layer Name window from the previous image can also be accessed by clicking on Layer in the top menu, going to Layer Settings, and then going across and down to Change Layer Name, as shown in the screenshot below.
If you have trouble remembering to name your layers consistently but tend to use the same layers in most of your pieces, consider setting up an Auto Action to create your layers! Find the instructions here: https://tips.clip-studio.com/en-us/articles/3789
Layer Folders
If you have a bunch of layers that are all related to one part of your image (i.e. all colors and shading layers for one character, or a bunch of ink layers for a background) then you can group them together for ease of organizing without having to flatten the layers. We can do this with a Layer Folder. Like renaming layers above, there are several ways you can create a layer folder, but the easiest is to click on the icon in the Layer palette. This icon is indicated by the red arrow in the following image.
Clicking this icon puts a new “layer” in the stack in the Layer palette, but instead of being a layer that we can draw or ink on, this is actually a folder we can put other layers inside of. This is a bit like storing sheets of paper in a manila folder in a filing cabinet!
After the new Layer Folder is created, you can double-click on the folder in the Layer palette and type in a new name. Like layers, they will default to “Folder 1” if not renamed, so changing their name will help with organization in complex files.
To add layers into the layer folder, click on the layer you want to store in the folder and hold down the mouse button. Drag the layer with the mouse button still held down. A red line will show where the layer will be dropped if you release the mouse button. Drag the layer over top of the Folder until the red indicator changes from a line to a rectangle around the Folder. Release the mouse to put the layer in the folder.
One of the best things about folders is the ability to show or hide all the layers in that folder at the click of one button. For instance, in the screenshot below the list of layers in the Layer palette is starting to get unwieldy because there’s so many! Scrolling through all those layers could be tedious, even if they are in folders, because of the length of the list.
But with Folders, we can “collapse” or “expand” the folder at will to make the list of layers more manageable. Click on the downward facing arrow to the left of the Layer Folder in the Layer window to change a folder from expanded to collapsed. The arrow will change from facing down to facing toward the right, indicating that the folder is now closed up. In the following image, all three of my layer folders have been closed.
The layers in those folders are still safe, they’re just not showing in the layer palette until we open that folder again and click on the layer we want to select to make it active. This is a great way to cut down on the “visual clutter” when working on complex files with lots of layers like group images or digital paintings.
You can also hide and show all layers in a layer folder at once from the canvas view. Click on the Eye icon to the left of the Layer Folder and every layer in that folder will be hidden from the canvas. Click again to show all the layers! It’s the same function as hiding and showing individual layers, but applied to every layer in the folder at one time.
Color-Coding Layers
Did you know that Layers and Layer Folders can be color-coded for even more organization and fast identification? It’s a simple process that can be done in just a few clicks, but it can really help with your organization on larger, more complicated files!
To color-code layers, locate the “Change palette color” dropdown at the top left of the Layer palette. This is indicated by the arrow in the following image.
Clicking on this option will show a dropdown menu of 8 options. These are Do Not Use Palette Color (default), Red, Orange, Yellow, Green, Blue, Purple, and Use other color… Click on the color of your choice to see the icons to the left of the layer name change to that color.
To change the palette color of multiple layers at once, select the layers by holding down either the Shift or Ctrl key while clicking, then change the Palette color using the process described above. In the following image, I’ve turned all the layers in my Sketches folder to blue and all the ones in Inks to red.
This doesn’t change anything about the contents of your layers and how they look on your canvas, but it does make them instantly identifiable in the Layer palette when you’re looking for them. Instead of reading the names, you can look for the color on the left side instead.
If you don’t care for any of the preset colors, click on “Use another color” at the bottom of the dropdown options. This will bring up the color picker window. Select a custom color and click “OK” to set it as the current layer or folder’s palette color. In the screenshot below, I’ve changed the Inks Layer Folder to a bright aqua color.
Note that even though you can set a palette color for a Layer Folder, that color doesn’t automatically apply to all the layers inside that folder! You will have to select all the layers inside the folder by holding down Shift or Ctrl as you click on the layers to select multiple layers at once and then apply the palette color to all the selected layers at once.
Conclusion
Layers are an amazing part of digital art creation, but they can become overwhelming when not organized well. This isn’t a problem if you are using just a few layers at a time, but once more complex illustrations get involved it can become a frustrating waste-of-time to find one layer in a stack of 50-100 layers! With a bit of planning, you can make this process a lot easier by staying organized! Organizing your layers is also helpful if you collaborate with other artists on work, such as working with an inker or colorist. Have fun and stay organized!
For more information on CLIP Studio Paint, please visit https://www.clipstudio.net/en or https://graphixly.com


コメント