Optimising workspace! My Clip Studio layout
General overview
Hello! My name is ReveSomnia and I'll show you the way I've used my screen space, modified shortcut keys, and a few usefull features of clip studio that I haven't heard discussed a lot.
As you can see, I have different tools and trays on both of sides of the screen. I will go into them more a bit later, but firstly I want to introduce the "Hide all palettes" capability, found in the Window menu or by pressing Tab. The reason I introduce this function so early, is because I want to stress that workspaces do not need to be static, and you don't have to feel bogged down by the many different trays you're adding/have. As the name suggests, this hides away all the tool trays you have on the first press, and bring them back exatcly as you left them on the second. It's incredibly useful if you know you will be working with the same color/brush for some time, and would appreciate more screen space when you don't need all the other different tools at your disposal. Here is what that looks like:
For the interface, I prefer a dark grey color as it's less harsh on my eyes compared to white. To choose between light and dark mode, you go to File menu > Preferences and from the window that pops up, go to the Interface tab.
Now, with basics done, I will talk about what I have on the left and right sides of the screen. Then, I will mention a few shortcut key modifications that I've done, the things I've selected/deselected from menus and finally, I will show you how to save your workspace layout.
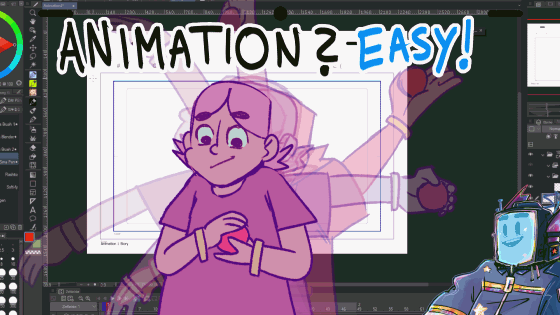
If you want to see the first picture of my whole screen without the thumbnail edits, here it is:
Left side set-up
The left side of my screen consists of a typical two-column layout, where the first column is a narrow Tools bar, and the second one is an extendible column containing many different trays. From top to bottom, the second column has Sub tool, Tool property, Brush size and various Color-related trays. I typically don't need much space for these functions, so I'm ok with cramming them into one space.
By the way, in the Tool properties tray, see the little blue lock? That's the lock settings function. If you use a tool and you change it's properties or the brush size, everytime you click off to a different pen or close and reopen the file, your brush settings will go back to default. So, if your lineart pen going back to default size 7 when you need it to stay at size 10 annoys you, the little lock will be your best friend. I have that feature for customised properties of every brush I use frequently and for specific purposes. It will not budge even if you close and reopen Clip studio.
About the vaguely-mentioned color-related trays:
They are Color slider, Color wheel , Color history and Color set. When I'm changing colors, I usually need only one tray at a time, so I happily put them together in one space, with Color wheel (square version) being the one that shows as default, since that is the one I use the most. Color slider offers incredible and minute control over the exact shade of your color and Color set acts as a palette function (you can create your own, use default Clip studio palettes and even download palettes from Assets store).
As you can imagine, I frequently have to do something on the left side of my screen when drawing, so usually I leave the second column extended.
Right side set-up
The right side also consists of two columns. The left-most one is the Materials tray and since I don't have to mess around here too often, I keep this column hidden unless I need it. The right-most tray contains a few of some usual trays and one incredibly useful tray that I'm surprised not many people talk about. By default, the trays shown are Navigator at the top and Layers at the bottom (I tend to use layers a lot, so the layers get a bigger space. Navigator is a tool that makes it easier to zoom in into different parts of the drawing as you working on them, and when you're viewing the drawing in such a way that all of it fits in the middle space and it always shows you a small thumbnail of what your drawing looks like from the distance.
The other trays present are:
My favourite Sub-view tray! This is the function that I was surprised not to see it mentioned more often, as it has been incredibly useful for me. As far as I remember, this one isn't enabled in the default Clip Studio layout, but you can find it easily in the Windows menu. Basically, compared to other drawing programs such as Photoshop or Krita, Clip Studio has one weakness because it doesn't have easy ways to integrate reference images in your workspace.
Sub view is the tool that allows you to open other images from your computer (like this collage of Violet Evergarden that I made) to use as reference image, allowing you to zoom into it, rotate, invert horizontaly and vertically. You can import many images, but can only view one at a time. The images you opened in Sub-view stay when you close the program and open it later, you just have to be careful not to move those images from where they are originally or the program will not be able to find them. You open new images by using the open icon in the very bottom row (second from the right) and close them with the delete icon/ trash bin next to it - closing an image in Sub view tray with this button will not delete the image from your computer, so don't worry.
For the layers, I also have History tray and Layer property tray enabled. The layer property is useful if you go back and forh between monochrome and colored layers like I do, but if not, then you can easily skip this one. What I advise you to use though, is the History tray as it allows me to see the different action's I've taken and allows me to easily go back in time to any point available, instead of spamming Ctrl + Z 20 times in a row.
Modified shortcuts
You can customise shortcuts by going to File menu > Shortcut settings, from where you can see everything neatly organised into Setting areas (main menu, pop-up palette, tools, etc.) then by general grouping. You can add, delete or edit a shortcut. One function can have 0 (be left blank) or more than 1 shortcuts, too. If you try to assign a shortcut that already exists for something else, the program asks you if you're sure, and if you say yes, then the shortcut gets deleted from it's own function and is assigned to the new one.
My most used shortcut modifications are:
Redo = Ctrl + A (closer to Ctrl+Z and easier to hit, plus I wasn't using the original shortcut a lot anyways - it was "Select all")
Deselect = Q (easy access and is used frequently)
Eyedropper tool = right click (not sure if this was default or custom, but I really love this one)
After you're done with the modifications, hit "OK" and you're ready to go. If you decide later that you want to go back to the defaults, you can hit "Reset" in this same panel.
Others / misc mini-tips
Two more small remarks before I show you how to save you workspace so that you don't have to set it up every time you open the program.
First of all, the Selection launcher. This is the little bar of tools that pops up at the bottom of every selection you make and have tools such as deselect, crop, etc. I can see how it could be useful to some people, but for me it was just plain annoying - it got in the way and I never got used to it.
To disable this function, simply uncheck it from the View menu. This tip saved my peaceful mood and a bit of my time - before I found out about this, I had to make every selection that had multiple parts from bottom to top so the tbar wouldn't get in the way.
The second mini-tip is about animating. Primarily, I use Clip for illustrations, but if I want toconvert my set-up to an animation one, I can quickly do so by enabling Animation cells and Timeline trays from the Windows menu. Here is where I put those trays:
Timeline is in the middle bottom as is standard, and Animation cells tray shares a space with Brush sizes on the right.
Also, I'm right handed. If you're left handed, then it might be better if you switch the places of the right-side panels and left-side panels that I showed in this tutorial.
Saving your workspace
What a sweet set-up you've got going on there. Would be a shame if you lost it or had to remake it everytime ... Fear not! This is the last step to optimising your workplace.
In my Workplace tab, you can see that I'm working on a set-up called "PREF". That's my custom workspace that I've set to be the default. (You can also see a sneaky peek at an overview of what trays I have enabled from my Windows menu):
To save your own workspace, you have to set it up the way you like it, then simply go to Windows menu > Workspace tab > Register Workspace. It will propt you to give a name to it, and once you're done that - that's it! Now it's saved and available for you to select it as your default the way mine is. Don't let the word "register" confuse you - this workspace will only be available and known to you(r account).
Aaaaand that's all I have for you! Thank you for reading so far - I really appreciate it. If you found any new tips or have questions, comment below and I'll try to help. And if you've enjoyed the tutorial, please consider liking it.
I hope you found this useful! Bye-bye~


コメント