
This tutorial makes use of Clip Studio Paint EX for a longer animation, but the same general concept can be applied for shorter animations in Clip Studio Paint Pro.
Perhaps you have a character illustration that lacks a bit of sparkle, and want to do something unique that adds flavor to your artwork, so you decide to add a touch of animation to it. But, how exactly should you do that? This tutorial shows you how to animate a very simple trail of magic particles to enhance a character scene.
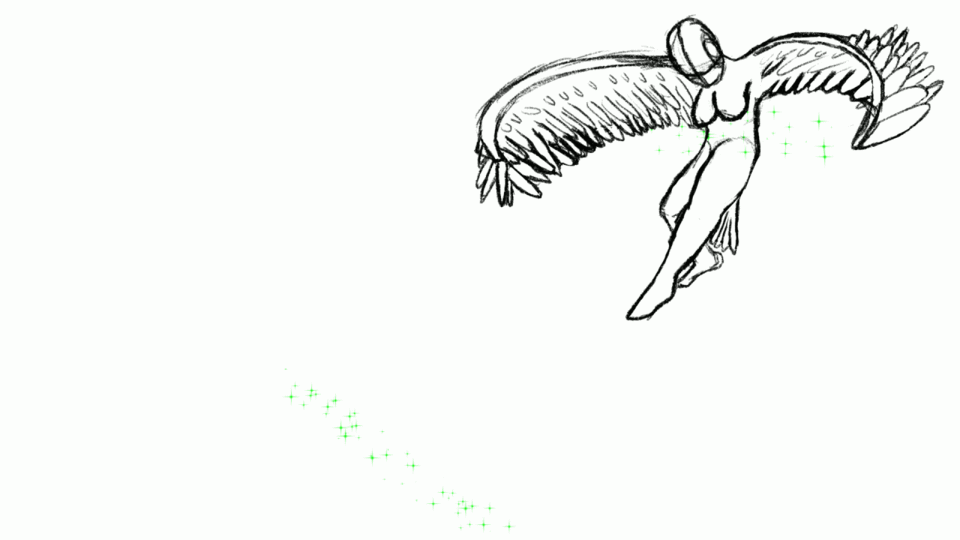
To start with, have your character drawn on your canvas. I decided to draw a Harpy flying away from us.
We will then go into the "Decorations" tool Palette. Decorations in Clip Studio Paint are expansive, including plenty of patterns, effects, and more to streamline your work process. For my drawing, I decided to use the Sparkle A subtool under "Effect". Lay out the area you want your effect to move throughout so you can get a rough idea of what it will cover.
If you haven't already, make a new Animation Folder, and prepare a new Animation Cel. You will want to start by laying a general starting and ending point for your effect.
There is a variety of ways to have your animation begin or end, and it will always depend on what you prefer. For my animation, I wanted to have the effect come out from the wings, descend, then grow as it leaves the canvas. Perhaps you want your effect to dissipate instead, and that is simply a matter of making it smaller or decreasing the number of particles for every new cel once you feel the effect has reached its full size.
In any case, completing the animation from here is a matter of adding bands of your decoration from your start to your end point, and polishing where you need to. Having a new animation cel every 2 frames should be enough to have convincing motion for a magical effect, but animating a new cel for every frame can make your effect even smoother.

Now it's done! A simple magical trail to boost the interest of your character!
However, it does feel a little empty. A simple solution for that is the duplicate your animation folder, and offset the copy to the halfway point of your original. Specify your cel's for your copy to compensate for the offset. The timeline in the following image shows a good example of how to do this.

And there you have it! A simple trail of magic glowing across your images. Use this tutorial as a starting point to lead yourself into experimentation with a variety of other animation techniques to create astounding visuals with moving magic effects.
この投稿を「いいね!」したユーザー


コメント