
Vector Layers are quite useful in various ways, especially if you work with outlines in your drawings. They can make adjustments a lot easier, and they are not that difficult to master!
I myself have gotten used to always using vector layers when I draw lines, and I highly recommend that you do too!
In this tutorial I will give you a good overview of how vectors layers actually work, and what features they have.
1 - How to make a Vector Layer
First of all we need to know how to make a vector layer.
It’s very simple. In your layer window your see a couple of icons at the top. The square looking icon with the little plus in the corner is the button for making a normal layer. And right next to it you can find the button for making a vector layer. It has a little cube in the middle.
Alternatively you could right click into the layer list, or go “Layer” in the top menu, go to “New Layer” and click on Vector Layer.
But honestly you won’t really need the alternative paths. Just use the convenient button in the layer window.
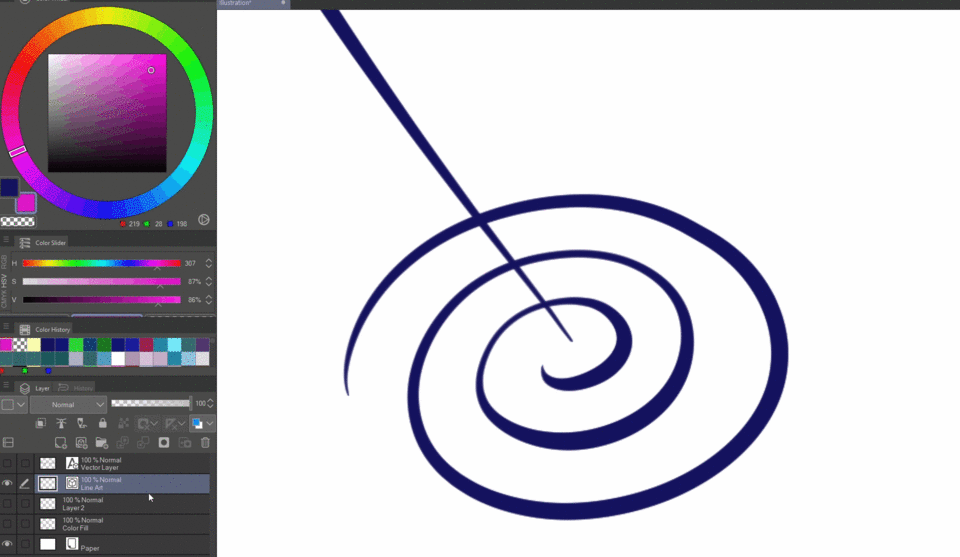
Alright, now a vector layer has been added. You can tell that it is a vector layer because of the little cube icon next to the layer name.
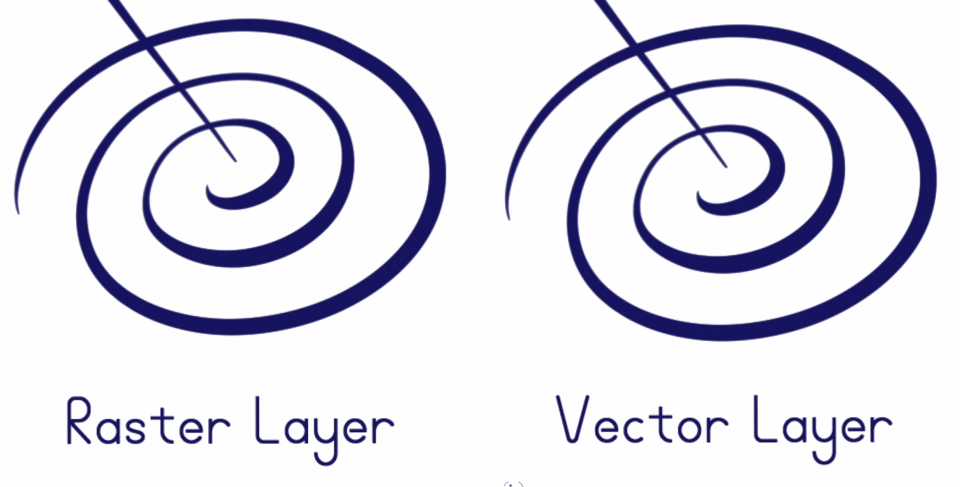
2 - Difference between raster layers and vector layers
Normal layers, which are so-called “raster” layers, work quite differently to vector layers. They are called raster layers, because you can imagine a raster stretched over the entire layer, and every square is 1 pixel wide. The color and transparency of every single pixel is stored in this layer. So, when you draw on those, you change the pixels of that raster layer.
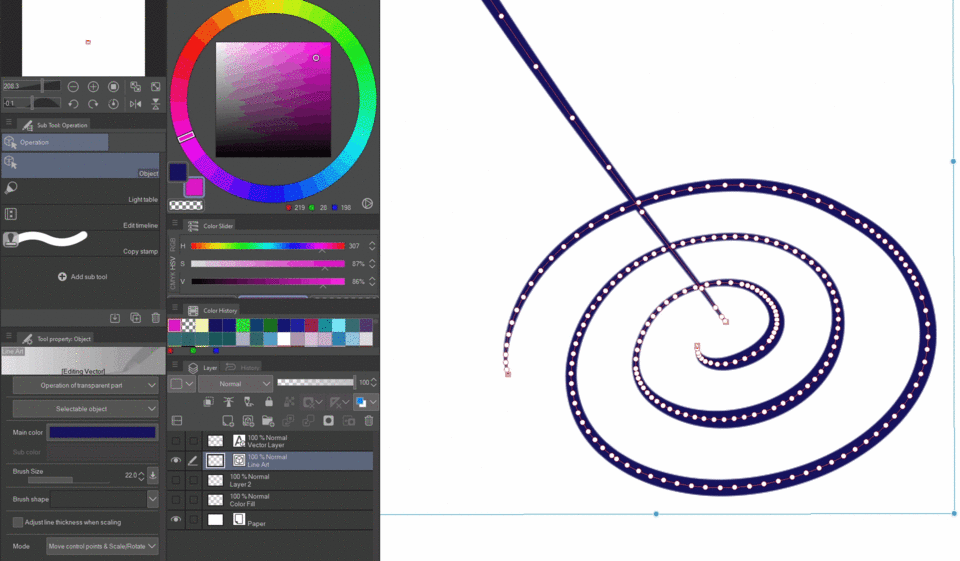
Vector layers on the other hand don’t store information like that at all. Instead, when you draw a line on it, it stores position points on the layer, and draws the line between those points with a specific curvature, color, line thickness, opacity and shape.
So, the pixels that you see on a vector layer were drawn by the program itself, based on all of those factors. Whereas on a raster layer you are the one who draws those pixels.
There are a lot of benefits that come with drawing on vectors layers. First of all, you can make adjustments to the properties of vector lines very easily. So, instead of having to erase and redraw, you could move the control points, make the lines thicker or thinner, transform it, and so on. More about that further down below in this article.
Another benefit is the fact that vector lines can be up-scaled without losing quality. For example, here are two shapes drawn with a 5 pixel wide pen. Both are identical, except for the fact that the left side is drawn on a raster layer, and the right side on a vector layer.
Now I am going to Transform them and increase the scale by 10 times. In this case I have to make sure that “Change Vector width” is turned on in the settings.
You can clearly see that the raster based drawing looks very blurry. However, the vector drawing still retained it’s sharp lines. The thing that actually changed was the width of the lines, and the position of the control points. Not the pixels, like in the case of the raster layer.
This is not only useful in the case of up-scaling, but any kind of transformation. Rotating, skewing, mesh-transforming, … Any time you transform a pixel based image, you distort it in slight ways. Do this often enough, and you will lose quality. However, with vector lines you don’t have to worry about that.
It is possible to convert vector layers to raster layers. Simply right-click on the vector layer and click on “Rasterize”. Or click on “Convert Layer” and choose “Raster Layer”.
You can also see that in that Covert Layer menu there is a “Vector Layer” option. So it is also possible to convert raster layers to vector layers. It also gives you some settings for how the lines should be generated. But honestly, this is far from being perfect. You’ll most likely need to make some corrections if you do this. So, if you have the option, I highly recommend drawing on vector layers from the very beginning if you want to have clean vector lines.
3 - Tools you can use on Vector Layers
Not all tools and features that work on raster layers work on vector layers. And some features are vector layer exclusive.
So, here is a list of the most essential tools that work with vector layers:
✦ ANY BRUSHES
Yep, pretty much any brush works on vector layers. Pens, airbrushes, dashed lines, paint brushes, etc.
Any brush strokes you do get converted into vector lines.
However, keep in mind that the brush settings “Color Mixing”, “Watercolor Edge” and “Anti-Overflow” are not compatible with vector layers.
So your painter-y and watercolor-like looking brushes will probably not look quite right on vector layers.
✦ SHAPE TOOLS
Any shape tool works with vector layers. Lines rectangles, polylines, ellipses, and so on. However, only the outlines of those shapes. Not the fill colors.
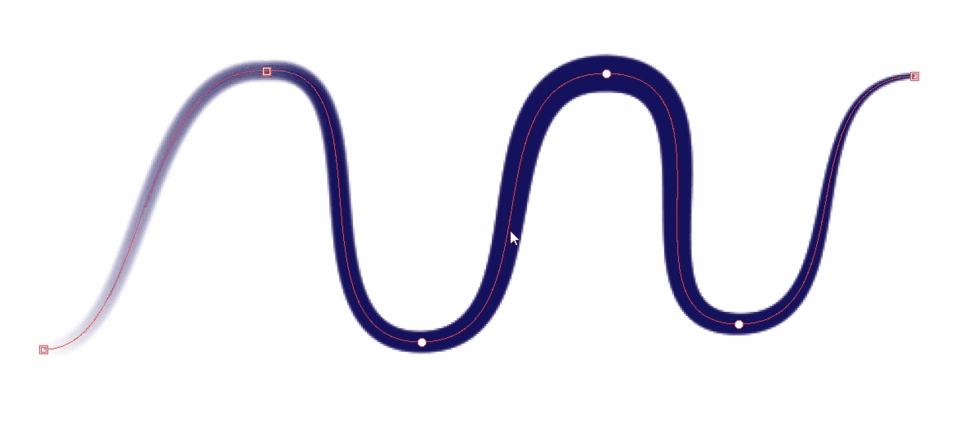
✦ BEZIER CURVES
Technically they are in the same category as the other shape tools, but I want to mention this separately, because they have “curve” settings. They change how you draw a curve. And that setting is stored in the line information too if you use vector layers. So for example if you use “Cubic-Bezier”, then the Bezier lines for determining the curvature can be changed later on. That is not possible with raster layers.

The benefit of drawing curves like this is that you can be very precise, and create flawlessly smooth curves. It often takes more time though, and it is not as intuitive as drawing the lines normally.
✦ ERASERS
Of course you can erase vector lines with erasers too. In this case however you need to pay attention to the special vector eraser settings.
If it is turned off, you are technically not erasing, but you are drawing a new vector line that makes everything underneath it transparent. You can even manipulate that eraser line like any other vector line.

If you have it turned on, and set to “Erase touched areas”, then it basically behaves like a normal eraser. Only the parts that were drawn over by the eraser get erased. If you erase straight through a vector line, then it will be split into two separate vector lines.

The second setting erases the complete line(s) it touches, up until it encounters an intersection with another line. This is a really useful feature. With it you don’t need to worry that much about drawing over another line. You can quickly cut the overreaching bit away.

The third setting “Whole lines”, as the name suggests, erases all the lines completely that it comes in contact with, regardless of whether they intersect with other lines or not. Also a useful feature, since you can erase a line without having to dodge around other lines.

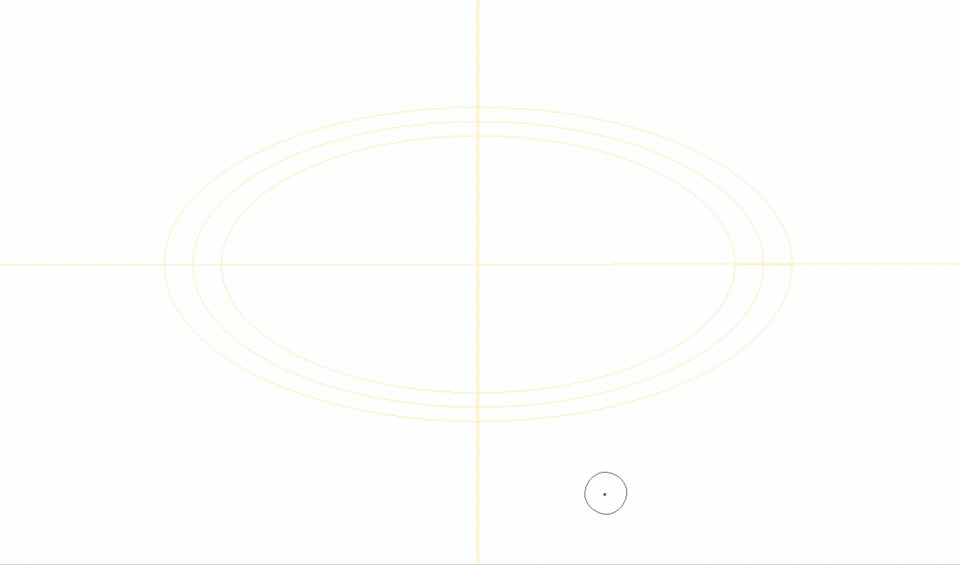
✦ RULERS
You can also use the wide array of rulers on vector layers. Any Special ruler, symmetry ruler, perspective ruler, etc. works.
(The example below shows both a symmetry ruler and concentric circle ruler at the same time)
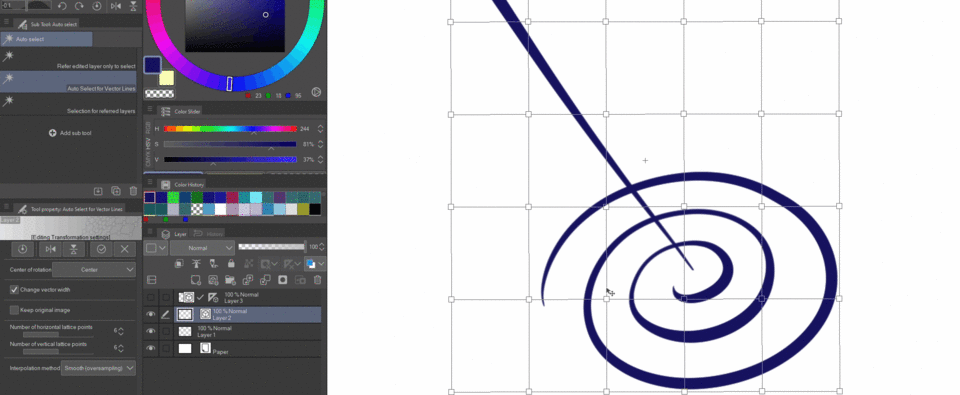
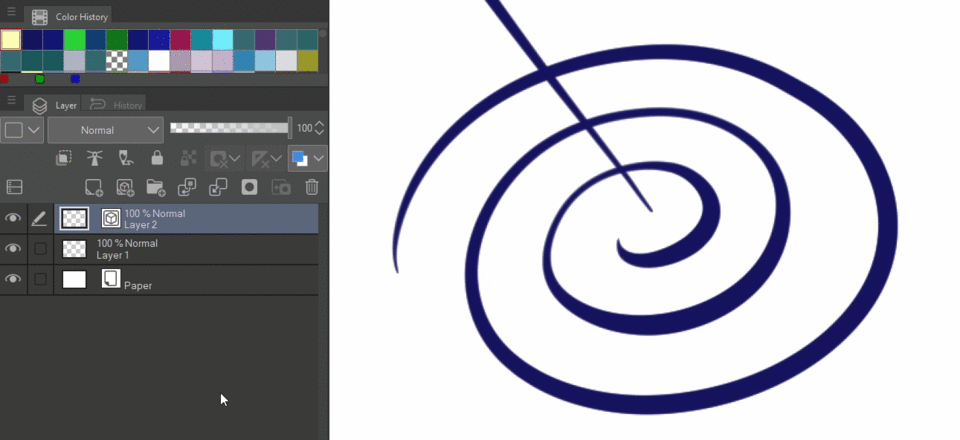
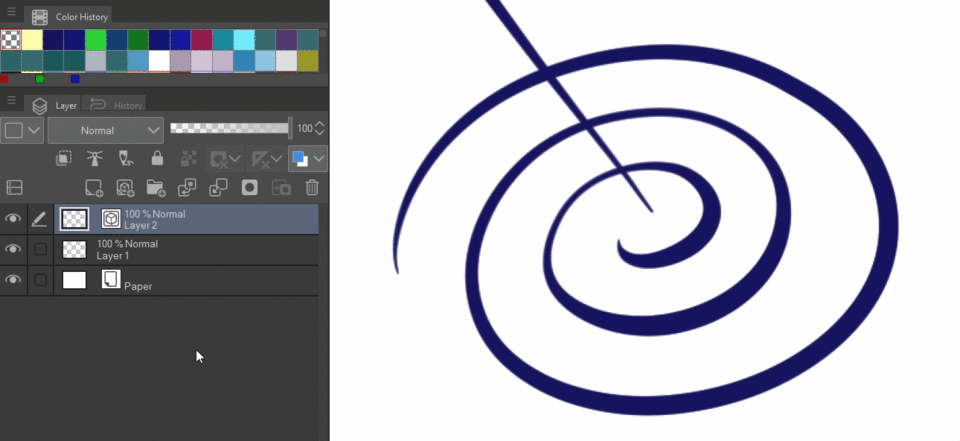
✦ SELECTION TOOLS
Any kind of selection tools still work on vector layers. For example you can select part of a line, move it, and then those lines would be separated.

Or the auto-select tool, even if it bases its selection on the pixels. Although it has its own “Fill up to vector path” option, where it ignored the pixels and only looks at the vector paths.
Speaking of the auto select tools, if you want to learn more about how its settings work, together with some useful information for filling in lines of all sorts of different kinds, then you can watch this tutorial video that I made. Everything gets explained in detail one step at a time:
✦ TRANSFORMATION TOOLS
All the transformation tools still work too. Even though the transformation works quite differently, in a technical sense. Scaling, rotating, skewing, and even mesh transformation.
If you want the vector line width to change with your transformation, then there is a setting for that.
✦ CLIPPING LAYERS & MASK LAYERS
You can still clip any kind of layer above a vector layer. For example you could clip a raster layer above your line art vector layer and paint your desired colors.
And mask layers still work too to make certain parts of your vector layer transparent.
4 - Tools that don’t work with Vector Layers
Unfortunately you cannot do ANYTHING with vector layers. To avoid confusion, let be list a couple of tools that don’t work on those layers.
✦ BLEND / BLUR TOOLS
As I mentioned before, the “Color Mixing” settings of the brushes don’t work. The “Blur” and “Blend” tools are actually regular brushes too, just with specific Color Mixing settings. But since these don’t work, you would basically get a normal brush stroke instead of the blend or blur effect.
✦ GRADIENTS
They all are vector based and therefore don’t work on vector layers.
✦ FILL TOOLS
None of the various fill tools work. So, if you for example want to fill in a line drawing you made, you would have to make a separate raster layer underneath the vector layer with the lines and fill it in there.
To make sure that the fill in tool still only fills in within the lines and doesn’t spill over, you can use the “Refer multiple” setting and set the line layer as “Reference layer”
By the way, reference layers are super convenient and I can highly recommend using them on a regular basis too!
I made a separate tutorial about reference layers, which also includes its own YouTube video:
Another recommendation would be the tutorial I made about the various fill tools and how to use them to make base color layers underneath the lines layers. And once again it has its own video!
✦ FILTERS
No filters from the “Filter” menu work here. So no blurring, sharpening, distorting, or any of the other filters. They all are raster based.
✦ TONAL CORRECTIONS
These tools, like “Brightness/Contrast” or “Tone Curve” are raster based too. However, there is a workaround for this. Instead of using the Tonal Corrections directly, you can make correction layers for it and put them above the vector layer. If you want them to apply to the vector layer alone, you can clip them above. You can make a correction layer by right-clicking into your layer list, going to “New Correction Layer” and choosing the one you need.
5 - How to easily adjust Lines on Vector Layers
As I mentioned before, one of the biggest benefits of drawing on vector layers is that you can adjust the lines in all sorts of versatile ways that wouldn’t be possible on raster layers.
Here are the various tools for doing so:
5.1 – Object Tool
This tool is essential. You can switch to it by pressing “o”. And it enables you to quickly and easily change some basic properties of some lines.
You can either click on the line you want to change, or select several lines by holding left-click and drawing a selection box over the ones you want. You can also add objects to your selection by holding SHIFT and making additional selections.

After you made your selection, you could change various line properties from the settings menu.
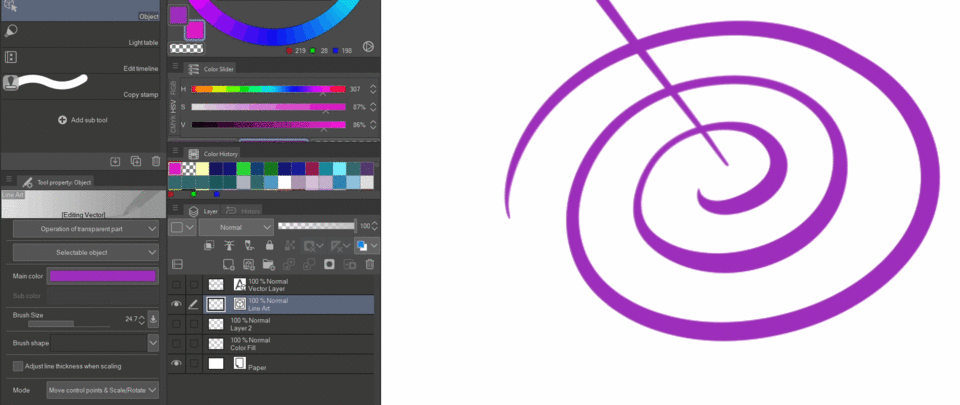
For example the color, by clicking into the color field.
Or the brush size, which then will be applied to all the selected lines equally. However, a thing to note is that if a line has a variable width, it will still stay variable.

Then there is the brush shape. So this drawing only has some solid lines. But how about we give them some texture?
Just click on the drop-down menu and select the brush shape you want.
Clip Studio Paint comes with a couple of default brush shapes to choose from, but you can register any brush you have as a brush shape, so that it will show up here too!
Simply select the brush you want to add, go to the sub tool details by clicking the wrench in the lower right corner of the tool properties, and go to “Brush shape”.
Here you can see all the brush shapes that are currently registered.
Simply click on “Add to presets” to add the currently selected brush with its current settings. That’s it. Now you’ll find it in the drop-down menu too.
If you want to add several brushes in a row, you don’t have to close and reopen this window. Just leave it open and switch to another brush, and the sub tool details window will switch too.
Then there is also the transformation mode. For the most part you can leave it on “Move control points & Scale/Rotate”. With this setting you can do all of those things without having to switch modes.

In some cases the “Free Transform”, “Skew” or “Perspective” modes might be useful though, since the normal scale can’t do those kind of transformations.
The “Adjust thickness when scaling” setting is basically the same thing we saw before. If turned off, then the line width will stay the same, regardless of how you transform them. If turned on, it behaves more like a normal transformation.
Something I can recommend is to set up the object tool to a modifier key while you are using other tools, like brushes for example.
You can do that by going to “File” → “Modifier Key Settings” and you get a window that lists all sorts of modifier keys.
Select “Tool specific settings” to adjust what the modifier keys do while using certain sub tools, which you can choose at the top.
So for example let’s choose a pen brush. I personally have them set up so that while I am holding CTRL I switch to the object tool. Not only does this enable me to change vector lines very quickly that way, but I can also move things around like that. Even on raster layers. So it’s quite convenient.
Or you can set it as a general setting.

5.2 - Line Correction Tools
Clip Studio Paint also offers a wide array of tools for fine-tuning your lines, especially vector lines.
Starting with the one that I personally use the most:
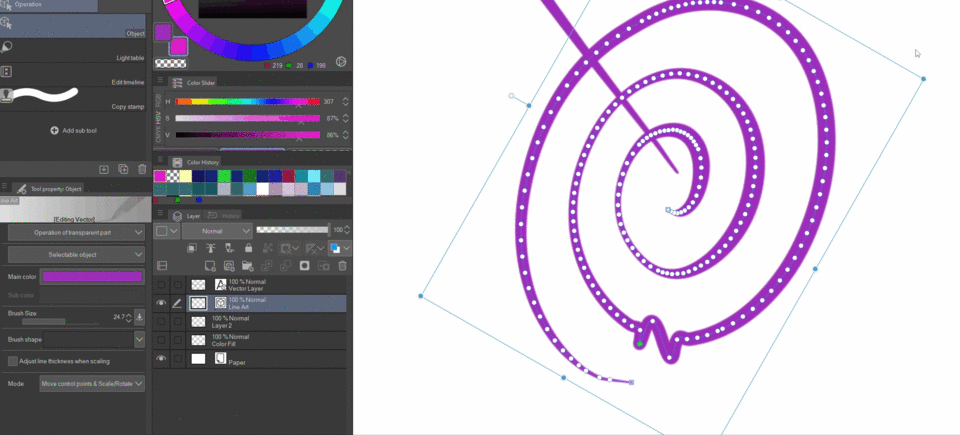
✦ CORRECT LINE WIDTH
You get a brush with which you basically draw a selection. All the line parts that are within the selection area get their width changed based on the several options this tool provides:
“Thicken” and “Narrow” increase or decrease the line width by a certain pixel amount.

“Scale up/down width” do this in a multiplicative way. In this case 1.10 means that the tools increases the line width by 10%. Whereas 0.9 reduces the width by 10%. Useful in case you don’t know how many pixels you need, or you just don’t want to switch values all the time.

“Fix width” sets the line width to that exact pixel amount you set up, regardless of how thick or thin the current lines are.

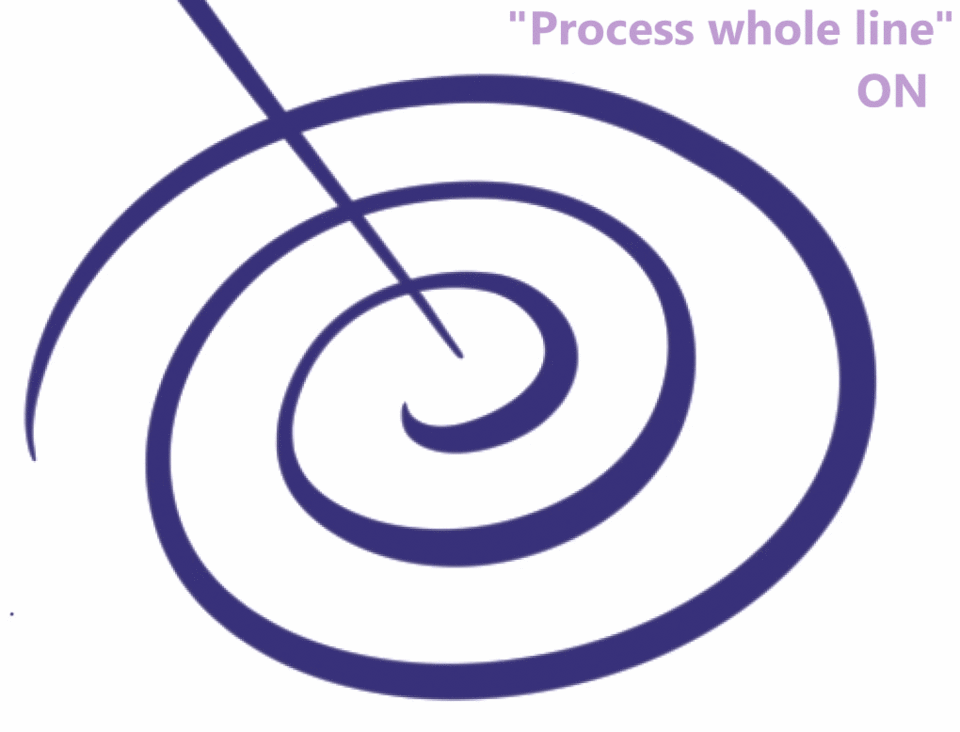
Now if you want to make sure that it only applies to your selection area, then you need to have “Process whole line” turned off. If it’s turned on, then it always applies it to the entire line that is hit by your selection area.
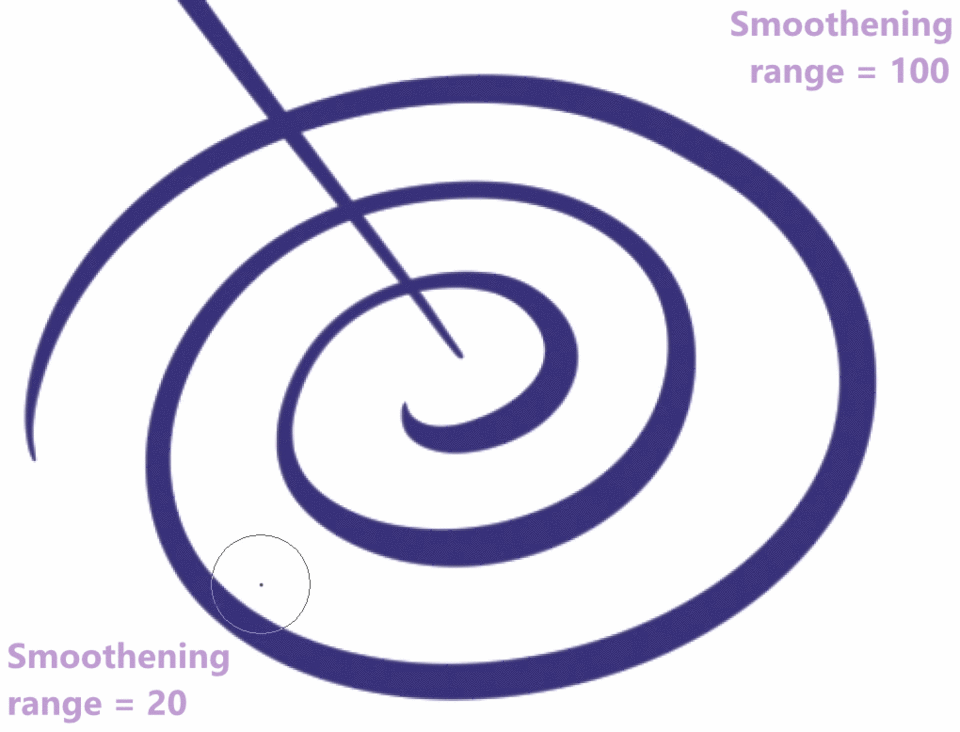
If you got “Add control point and correct” turned on, you set up a “Smoothening range”. It adds a transition between the original line width and the new one. The range determines how long that transition is.
This tool is really useful for changing the line weight of your line art. You can draw the lines comfortably without worrying too much about how thick your draw them, and come in later and polish them with this tool. And a good line weight distribution can make a huge difference!
By the way, this tool also can work with raster layers, but only the “Thicken” and “Narrow” options, without any smoothing, and it cannot distinguish between the lines, since it’s just pixels. It just adds or removes pixels within the selected area.
✦ SIMPLIFY VECTOR LINE
This one can be useful too. When you freely draw a line with a brush, you will end up with tons of control points. The slower you draw, the denser they are. But if you want to go in and change the curvature by moving those control points, it can become quite tedious.
But you can reduce the amount of control points with the “Simplify Vector Line” tool. The higher the “Simplify” value, the more points get deleted. You can overdo this though and remove too many, destroying the original shape.
✦ CONTROL POINT
“Move control points” I’d say is pretty straight forward. You’d normally use the object tool for this purpose though.
“Add / Delete control point” is also pretty self-explanatory. And quite useful in certain cases.
“Switch Corner” let’s you switch the type of control point. So whether it is just a sharp corner, or a point with curvature, depending on what type of curvature the line uses (spline, quadratic beziers or cubic beziers)

“Adjust line width” lets you fluidly change the line width for one specific control point. You click on it, and hold-click while dragging towards the right to make it thicker, or to the left to make it thinner.
It feels more fluid than the “Correct line width” tool from before, but it works very differently. Since it only applies to one control point at a time, it is only useful if those points are far apart from each other. Vector lines that were drawn with normal brushes have too many control points and so using this tool would be tedious in that case.
“Adjust opacity” works similarly to the previous tool, but this time you adjust the transparency by dragging left and right.
Doing this for just one point won’t really do much, but if you do this for two adjacent points then you get a much wider result.

“Split Line” allows you to click on a spot on a line and it will be split into two at that exact spot.
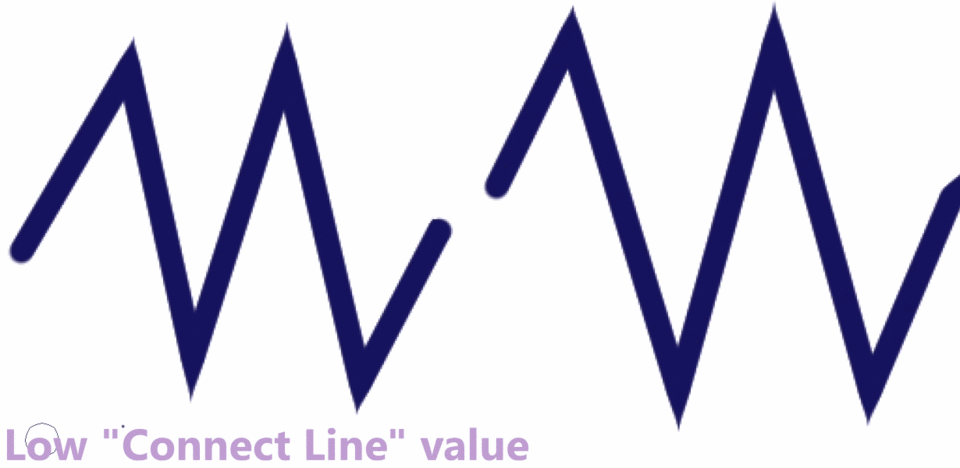
✦ CONNECT VECTOR LINE
As the name suggests, it connects separate vector lines together into one.
Simply paint a selection that covers both ends, and they will be connected.

If the ends are too far apart from each other, you might need to increase the “Connect Lines” value. If they are very far apart, then even the maximum value won’t be enough though.
Certain line properties are not compatible with each other, like color or line hardness. One vector line can only have one main color for example. Therefore connecting them normally won’t work. However, you can turn on “Connect lines with different properties”, which will overwrite one of the lines’ properties. As far as I was able to tell, it prioritizes the older line.

The "Simplify" option reduces the amount of control points made to connect the ends of the lines, depending on how high you set this value.

✦ PINCH VECTOR LINE
This one lets you reshape a line by pinching the control points and moving them around that way. By increasing the “pinch level” you can increase the amount of control points that get influenced by the pinching, making the curve wider.

“Fix end” determines if the start and end points of the line can get moved by the pinching or not. You can fix them so that they don’t move at all, or free one or both of them.
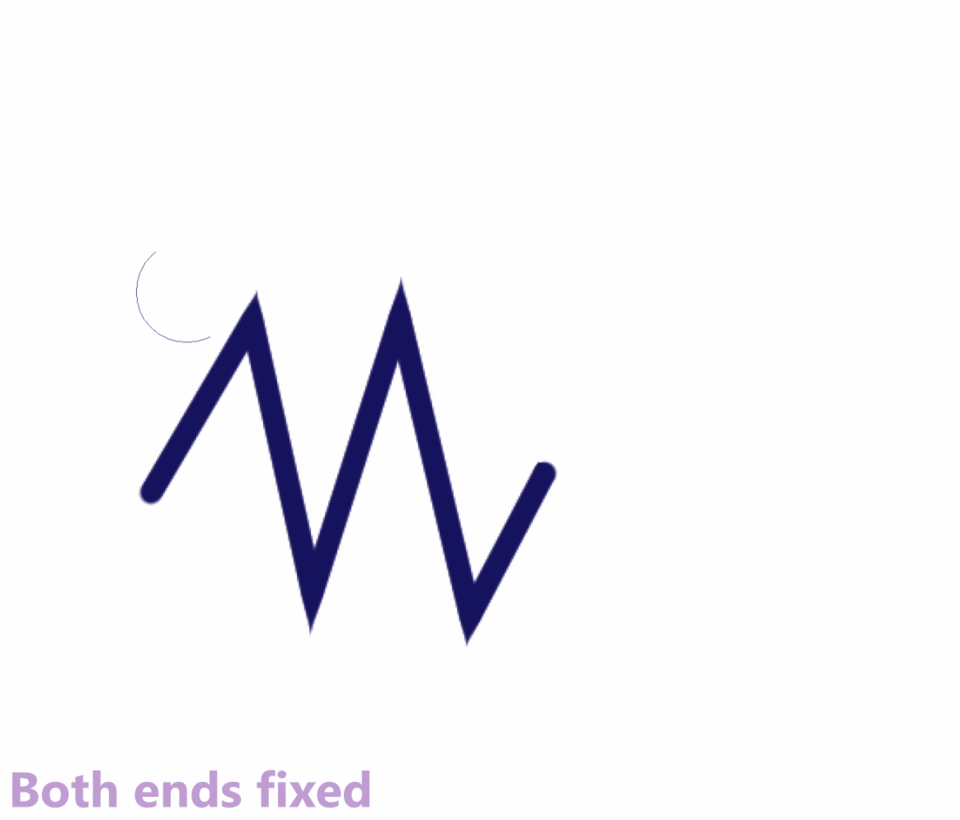
And the “effect range” is pretty straight forward. It changes your brush size, so the area that is affected by the tool.
Now it can happen that the line becomes quite irregular looking after the pinching. In that case the “Add control point” setting can help smooth out those irregularities.
✦ REDRAW VECTOR LINE
Are you not happy with how the line has turned out, but only parts of it? You can redraw that part directly, while leaving the rest of the line untouched!

Or you want to draw a connection between two lines while having the “Connect Lines” option turned on, fusing them into one this way.

✦ REDRAW VECTOR LINE WIDTH
Another way for adjusting the line width of your lines, but a bit more manual this time. You choose the brush size and pen pressure settings like with a usual brush and draw over an already existing line. Depending on how how hard you press, you make the line thinner or thicker.

It does a little bit of smoothing, so that it transitions well into the rest of the line that you left untouched. And you only redraw one line at a time. If you encounter an intersection, then the overlapping line will not be affected. Therefore you have a bit more precision if there are a lot of lines close together, compared to the “Correct Line Width” tool for example.
6 – Advice for using vector layers and their tools
Vector layers are best used for drawing lines. Especially if you draw very distinct, clear lines. There are so many benefits to using vector layers.
Made the ends of your line too thick? Thin them down with the “Correct Line Width” tool.
Accidentally drew over another line? Just use the eraser with a vector setting to cleanly remove the overreaching part.
Need to change the shape? There are lots of different ways. You can use the Object tool and move the control points, or transform it without losing quality, or pinch it, or redraw parts of it.
Or consider the case when you make animations. Being precise is often very important, especially for small movements. Instead of redrawing the lines if they don’t line up correctly, you can make slight adjustments with those tools to achieve your desired result much easier.
Since it basically feels the same to draw lines compared to raster layers, there is not really a reason why you shouldn’t use vector layers. Unless you have a line art style that looks a bit sketchier or even paintery. Then it might not work as intended on vector layers.
Combine their strengths with other types of layers. You are still going to need normal raster layers most likely for filling in lines and painting backgrounds. Especially for painting purposes vector layers are not suited, since your cannot mix colors on them.
If you get used to those tools, then your workflow can become much cleaner and quicker. I learned about them some years ago, and ever since then I have been using them exclusively for drawing lines.
So there you go! I hope that this tutorial was helpful to you!
If you got some additional ideas and tips, feel free to share them in the comments.
Have fun drawing!
この投稿を「いいね!」したユーザー


コメント