Exploring the Artistic filter: Creative tips
Hello everyone! I'm Mattlamp. in this tutorial, I will share the things I learned using the New artistic filter on CSP version 1.9.4. Also, I will show you some creative techniques that I experimented with to apply to your illustrations and animations.
I hope it helps!
Quick intro to the Artistic Filter
The New Artistic Filter is a powerful tool. it can be used to quickly turn photographs into painting style, as a base for illustrations or comic Backgrounds.
■First, let's explore the Filter settings on a photograph so we can get familiar with how it works and what kind of results we can spect.
▼ [1] Open an image to work with and make a duplicate.
NOTE: The artistic filter is a destructive process because it affects the pixels of the original layer, that's why we work on a duplicate layer so we don't have to worry about losing the original data.
▼ [2] Now to use the filter, with the duplicated layer selected we go to [Filter] menu > [Effect] > [Artistic]. This opens up a settings dialogue where we can modify how the filter affects the image. I will try to quickly explain what each setting does.
▼ [3] The first setting is the Mode in wich the filter works. The dropdown menu shows 3 modes.
As stated on the manual:
●[3.1] Color & Lines: Blurs the colors and extracts the lines from the original image
●[3.2] Color Only: Blurs the colors of the original image
●[3.3] Lines Only: Extracts the lines from the image. The lines are black, and the rest of the image is transparent.
▼ [4] Ok Now that we understand the filter modes, let's go through the settings. the dialogue can be divided into two groups.
●[4.1] Lines settings: This group affects only the lines.
●[4.2] Color settings: This group affects only the color.
■Note: When in Lines Only mode the Color settings [4.2] are not applied to the canvas, likewise when we select Color Only mode the Lines settings [4.1] doesn't have any effect on the image.
▼ [5] Lines Only settings:
●[5.1] Line thickness: This setting affects the thickness of the rendered lines.
■Note: All the settings are relative to the pixels of the image, so the numbers I use in this tutorial may not work on different images. Please experiment whit the settings on your own.
●[5.2] Line simplicity: a high value connects the lines to each other, simplifying the number of lines and their shape, a low value results in a higher number of shorter lines.
●[5.3] Line density: Low values result in fewer lines and details, High values add complexity to the detected edges.
●[5.4] Line Opacity: This slider controls the opacity of the rendered lines.
■Note: When using the Lines only mode is better to use 100 opacity since we can change the opacity later in the [Layer] palette. This slider is useful when using Color & lines to blend the lines with the color.
●[5.5] Line anti-aliasing: This slider controls the anti-aliasing of the lines smoothing the result.
▼ [6] Color Only settings:
●[6.1] Color blending: This setting Blurs and blends the colors of the image without affecting the edges. it tries to maintain the contrast and edge details. At low values, the result will look more like the original photo.
■Note: as a simple explanation, increase the value to make the image more like a painting.
●[6.2] Color Blur: This slider controls the amount of blur applied to the colors. This will affect the edges and contrast of the image.
●[6.3] Number of colors: Control the number of colors to use for the gradients, at low values it will result in a posterize effect.
■Note: When using the artistic filter on greyscale images, this settings control the tone values on the result. We can use this to Achieve Comic or manga Style effects.
Ok, That's a quick rundown of the settings. Now let's experiment with them to achieve so more creative results.
Creative Use: Quick Backgroud form Photo.
The first thing that comes in mind when learning about the Artistic filter is to transform photos into illustration, especially for quick backgrounds.
To make them more editable, I will show you some workflow Tips.
■Note: I will use blending modes and layer masks. if you want to learn more about them check the links below:
▼ [1] First when we open the image we want to turn into an illustration, we will make 2 copies, one for the color and one for the lines. this way we can further edit the colors and the lines separately.
Then we go to [Filter] menu > [Effect] > [Artistic] for each, on one we will use Lines only and in the other Color only.
▼ [2] Here I show you the settings I used for this particular image, please experiment with the values on your own.
▼ [3] Now that we have the filter applied to extract the lines and to modify the colors, we can combine them and further refine the result.
I will play with opacity, change the line colors and use some corrections layers, and Masks.
First, I changed the lines opacity and applied a layer mask to remove the lines on some of the parts I don't want to have much detail such as the trees. Then i created a new layer above the lines layer and clip it, then painted with different colors to blend the lines.
▼ [4] Now I work with the colors, I created a couple of correction layers to adjust the contrast and the hue and saturation.
Feel free to experiment, or paint over details. this is just a base for now but you can add anything you want.
▼ [5] Finishing touches: For this image, I added some vignetting and a Glow layer on top of the orb to add and accent.
▼ [6] Finally to soften the whole image and add interesting contrast I merged the layers to a new layer, then from [Filter] menu > [Blur] > [Gaussian Blur] I blurred the copy, then set the layer to soft light with reduced opacity.
The finished result▼
▼ [7] To achieve a less detailed or more painterly result we can apply the artistic filter to the previous finished result.
The finished result▼
I made a couple more examples using the same workflow as before.
▼ [8] Same process on a flower photo.
▼ [9] Process with low number of colors, on a greyscale image to achieve a stylized comic book result. This could be used as a base to further play with tone layers later.
■Note: a similar effect can be achieved by using LT conversion of layer, please try it.
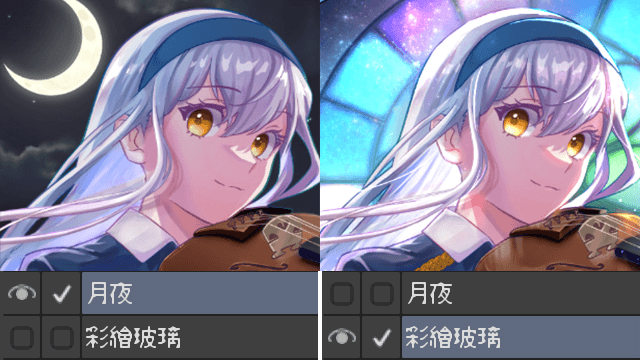
▼ [10] as an experiment i apply the filter to a finished illustration. here are the results.
As you can see we can achieve a lot of results by combining techniques, We could also experiment with applying the filter to rasterized 3d objects ETC.
In the next section, I will share a couple of animation experiments.
Creative Use: Basic animation reveal with keyframes and masks
▼ [1] I prepared a scene with a finished illustration, one copy with artistic filter Lines only mode applied. and two other copies with Color only mode, with different settings, applied.
Explaining the animating functions of clip studio goes beyond the scope of this tutorial so if you arent familiar with animation please read this tutorial. ▼
▼ [2] Then I created a timeline to animate the layers, and apply keyframes to the opacity of the layers. On the animation timeline, we press the button to activate keyframes on the layer.
First, I revealed the Lines, then the colors one by one and finally the original illustration.
The finished result▼

Creative Use: Animation effect | Painting to photo reveal
▼ [1] Now using a similar method as before I will reveal an image of an apple from a "painting" to real life. To achieve this I separated the Apple from the background, and then make a copy.
Applied artistic filter to turn Photo into painting style.
▼ [2] Then I animated the isolated apple and shadow opacity , position and rotation to achieve the desired effect

Closing thoughts
The new artistic filter is a powerful tool, that lets us experiment to achieve great results,
I hope my tips help you.
Remember, The most important thing is to be creative. Please don't be afraid to try new things.
See you next time. Thank you for watching.


留言