A Beginner's Quick & Easy Guide to Vector Layers!
One of Clip Studio Paint’s strongest features is definitely its Vector Layer. It is a powerful tool that really elevates the efficiency process when it comes to creating in Clip Studio Paint. In this tutorial you will learn everything that you will need to know get started with Vector Layers! You will be learning how they function, how to manipulate vector line art, how to correct vector lines, how to use the vector eraser, and a few other tips and tricks I have learnt over the years of using vector layers. So let’s get into it.
what is a vector layer and how is it different from a raster layer?
A raster layer is a layer that is pixel based. Raster layers are easy to use and allow for you to be able to fill in colour. When scaling or transforming, a raster layers will lose resolution as the image stretches to match. Vector Layers are layers which utilize mathematical formula to determine how lines function, in comparison to a pixel based layer. It is a layer that will allow you to edit and manipulate lines that have already been drawn. You can also change directly the brush tip or brush size using handles and control points, or change the shape of the lines. With vector layers you can scale or transform your lines without a loss of resolution.
see lines above with an estimated scaling of x50.
How to create a vector layer
There two ways to create a vector layer.
1. Simply go to the [Layer] menu > [New Layer] > [Vector Layer]. A dialog box will appear; simply change the name of the layer (if you want to) and proceed.
2. the second way is by simply clicking on the new Vector Layer Icon in the Layer Palette.
Once you have created your new vector layer, an icon with a cube in it, will now appear to the right hand side of your layer preview box in your Layer Palette, to indicate that this is a vector layer and that anything you create on this layer can be manipulated as a vector image.
Please note this feature
Fill tools such as the paint bucket tool, cannot be used on a Vector Layer ❌
Managing & Manipulating vector lines with the Operation tool
The [Operation] Tool will be one of your vector Layer’s best friends throughout this entire process. The [Operation] tool will allow for you to be able to change the size of a brush stroke, change colour, select, separate and move a line, all after a line has been draw.
Feature: Vector Objects
Once you draw on a vector layer, you have created a vector line/object. This line/object can then be manipulated with the [Operation] tool. With the [Operation] tool selected, once you click on a vector line or object you will immediately see the following features:
1. The path of a vector line
2. the bounding box
3. And the control points
You can manipulate vector objects by dragging any of the circle points on the outer edge or in the center of the bounding box’s lines to scale and transform, and the extended circle at the top to rotate.
Clicking on a control point allows for you to directly manipulate and change the line. You can further add, delete, switch corners, or split control points by right clicking; these properties will be further explained in the [Control Line] tool section.
You can move the object by clicking and holding a line of the bounding box or clicking and holding on the vector path of the line.
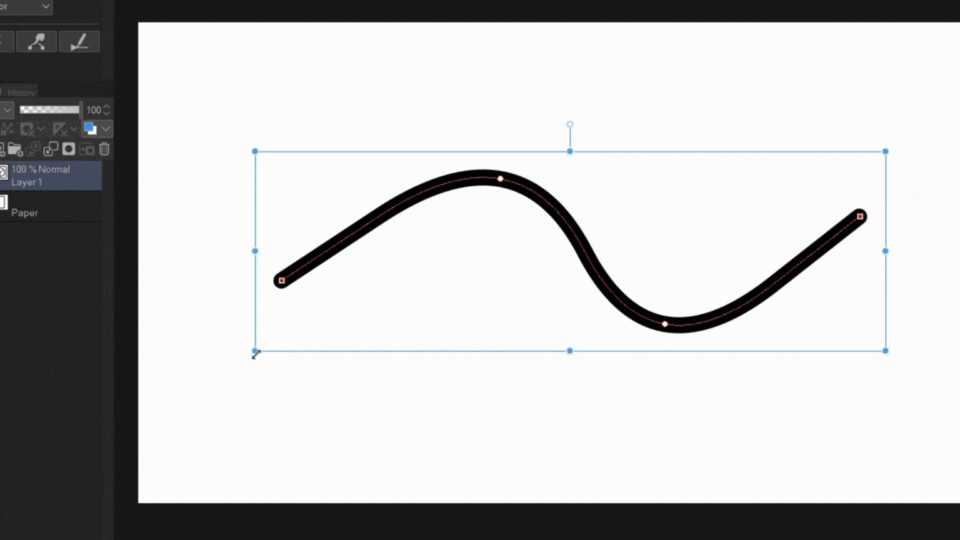
💡TIP: You can also copy and paste a line directly on the same layer once you have selected it with the [Operation] tool.
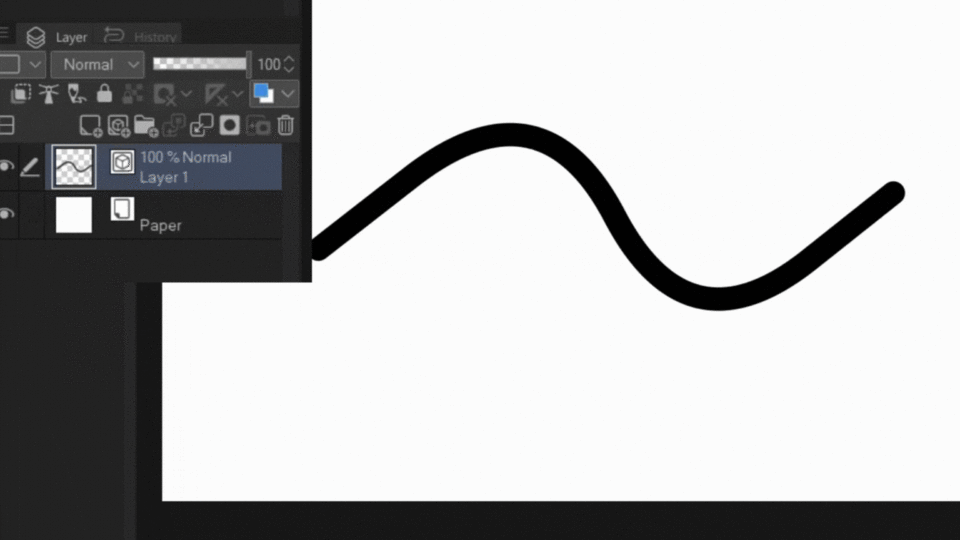
Changing the Brush Size (after line has been drawn)
In order to change the brush size of a Vector line/ object with the [Operation] tool, select to the [Operation] tool (and then select your line or Lines) > [Brush Size] > Drag the slider or manually entire the size.
Changing Line Texture (after line has been drawn)
When creating a line, you can use any brush to draw on the vector layer. In a case where you may want to change the texture of the lines drawn to match that of another brush, you can easily do so. In order to change the texture of a line after it has been drawn:
1. Simply change to the [Operation] Tool by either pressing O (keyboard shortcut) or selecting the tool directly.
2. 2. Select the line(s) that you want to change.
3. Find the [Brush Shape] option in the [Operation] Tool and click on the dropdown arrow.
4. Now select the brush shape you would like, and you’re all done!
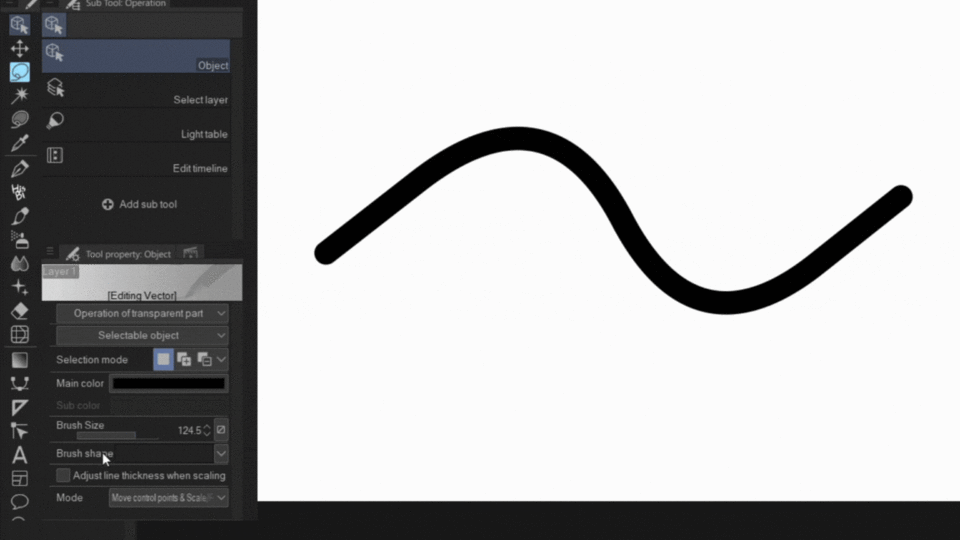
💡TIP: The [Brush Shape] menu comes with a list of presets. If you would like to add a shape not listed, simply go to the brush you want the shape of> click on the [Sub tool Detail] palette > [Brush Shape], and a where it says [Current Brush Shape]> Click [Add to Presets].
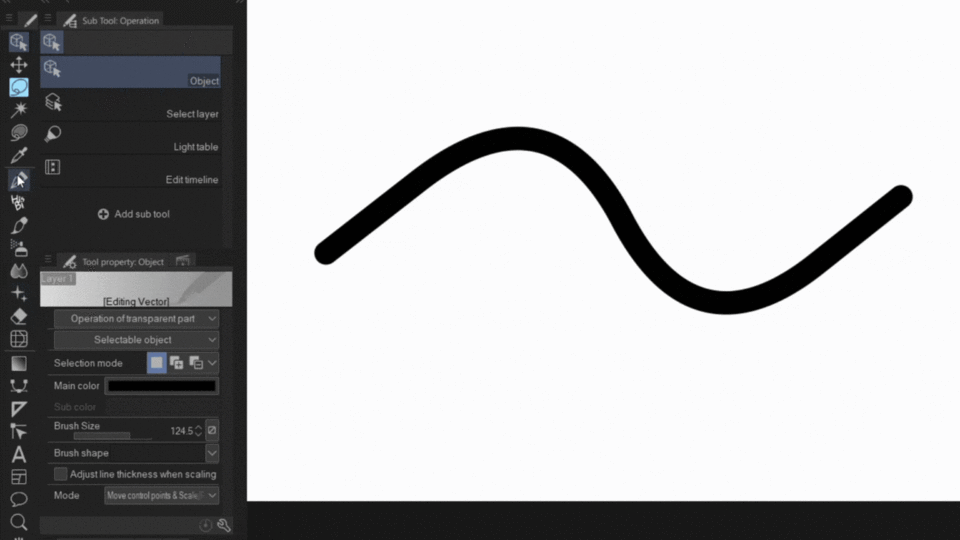
Changing the Line Colour (after line has been drawn)
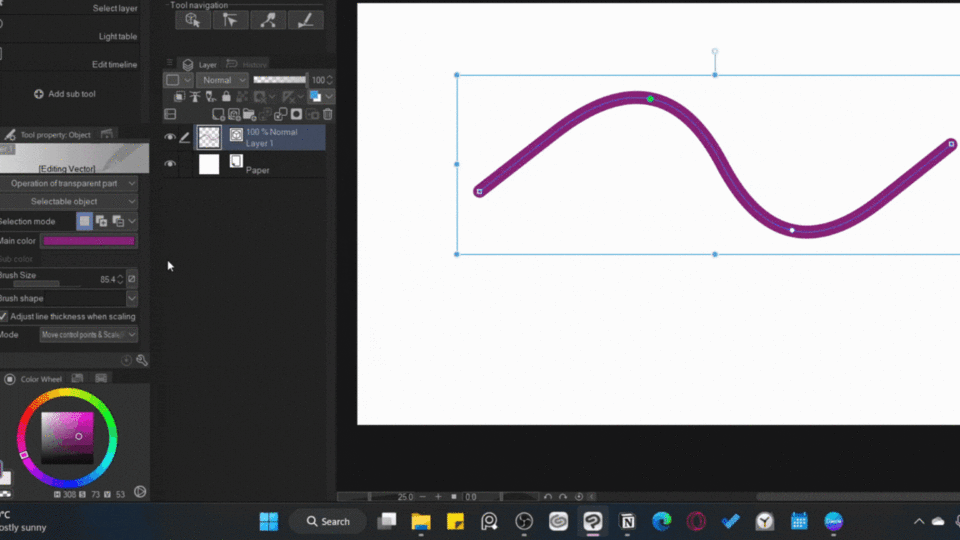
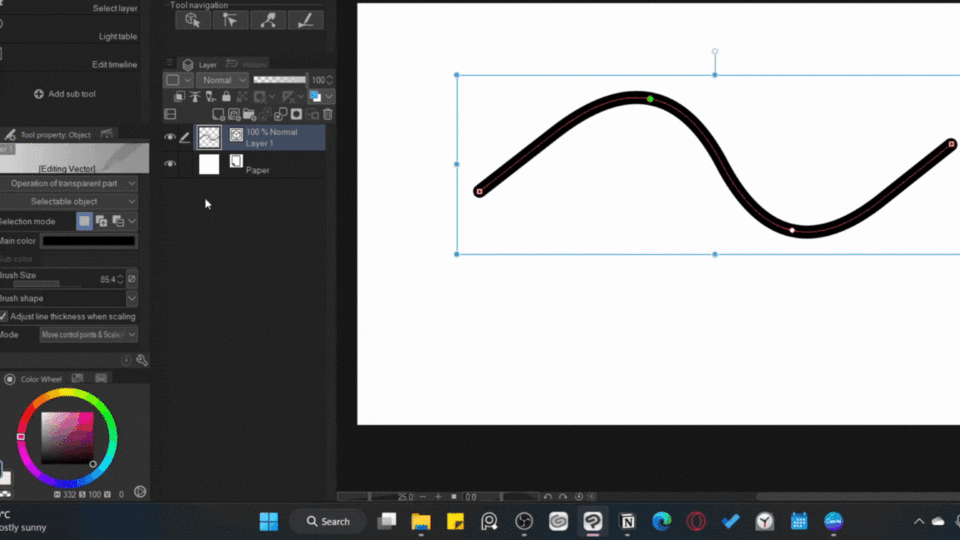
Some people may not know this but there are actually TWO ways to change the colour of a line while using the [Operation] Tool.
The first way is to select to the [Operation] tool (and then select your line or Lines) > [Main Color] > Select the colour via the dialog box pop-up.
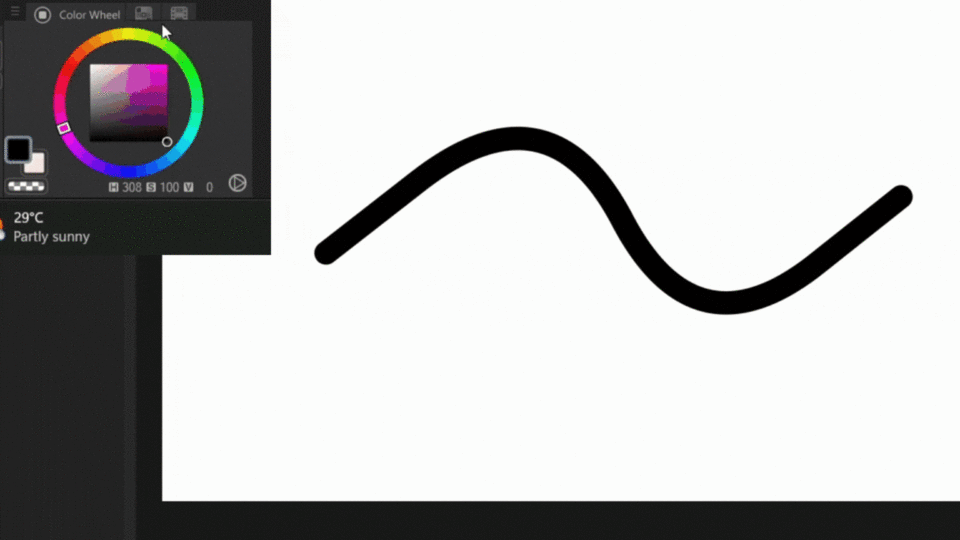
The second way is to select to the [Operation] tool> go to the colour wheel and drag the colour picker across it. This will change the colour on the fly changing the colour of everything on the canvas. If you want it to change a specific line, select the line before changing colour. 🙂 This way only works with the main colour selected; not the sub colour.
Selecting multiple vector lines when you have a ton of them
When actually drawing, multiple vector lines will be created which can become a hassle when you need to select a portion of it.
In order to quickly and easily select multiple vector lines at once, go to the [Operation] tool. Select the dropdown that says [Operation of transparent part] > turn on [Select area by dragging].
Here you can select whether you want it to affect objects or control points. Select [Object].
Now you can click and drag the cursor over your vector line-art, and it will create a selection box. once you release the cursor, you will now see that all the vector lines within that selection are now selected and able to be moved together.
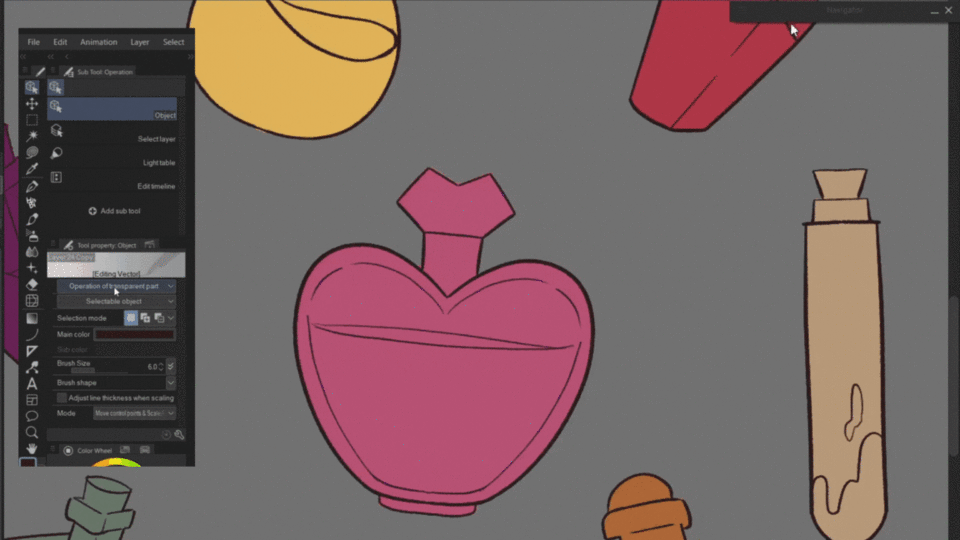
Manipulating Vector Lines - The Correct Line Tool
Vector lines can be further manipulated and managed by using any of the sub tools within the [Control Line] tool. To get to the [Control Line] tool you can either click on the tool or use the shortcut Y. The [Control Line] tool allows you to pinch, simplify, connect, resize and redraw vector lines. These sub tools will all be explained below.
A. Control Point
This tool allows for you to manipulate & adjust control points. You can change what the tool does by selecting a different adjustment. The adjustments are as follows:
1. [Move Control Points] - drag control points to move them.
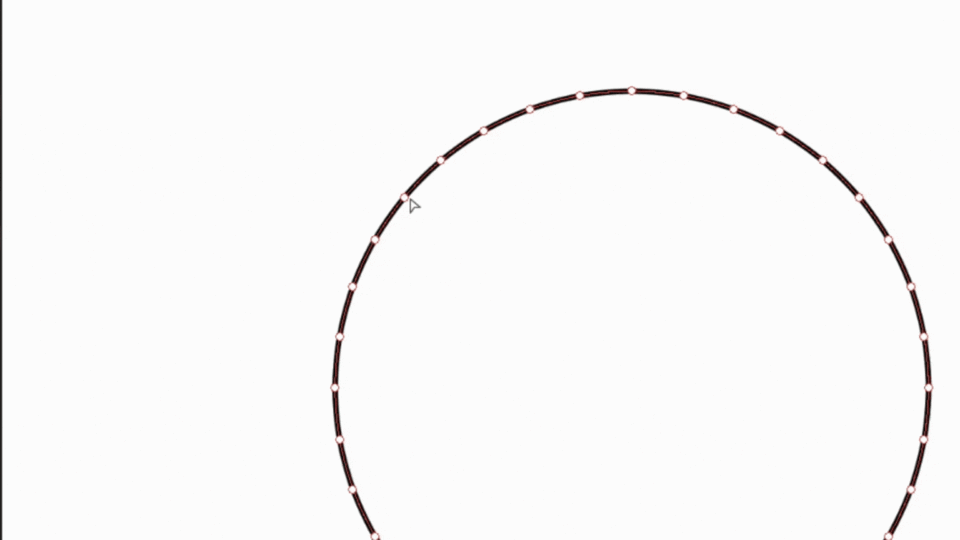
2. [Add Control Point] - Add a new control point by clicking on a path where the “+” cursor is displayed.
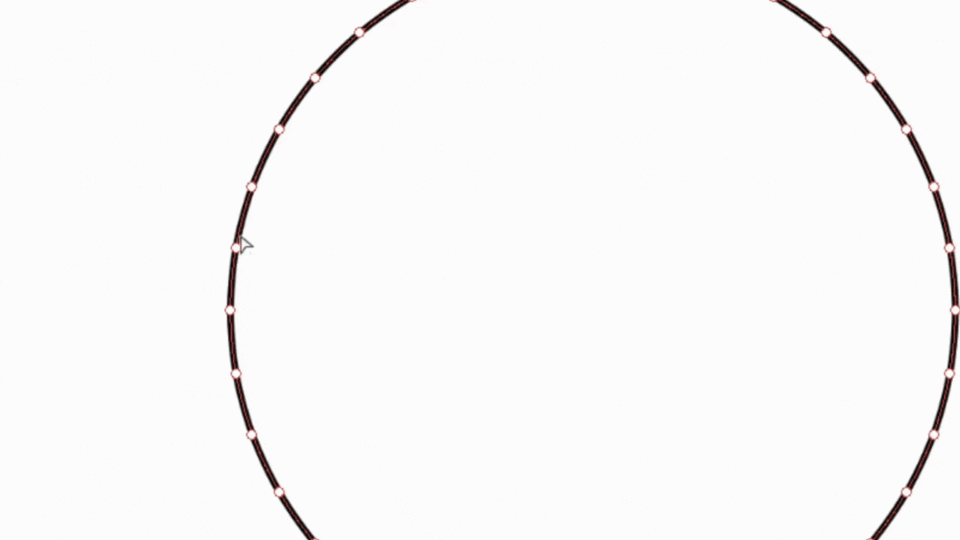
3. [Delete Control Point] - Move the cursor over the control point you want to delete. When the cursor changes to the “-” cursor, click on the control point and it will be deleted.
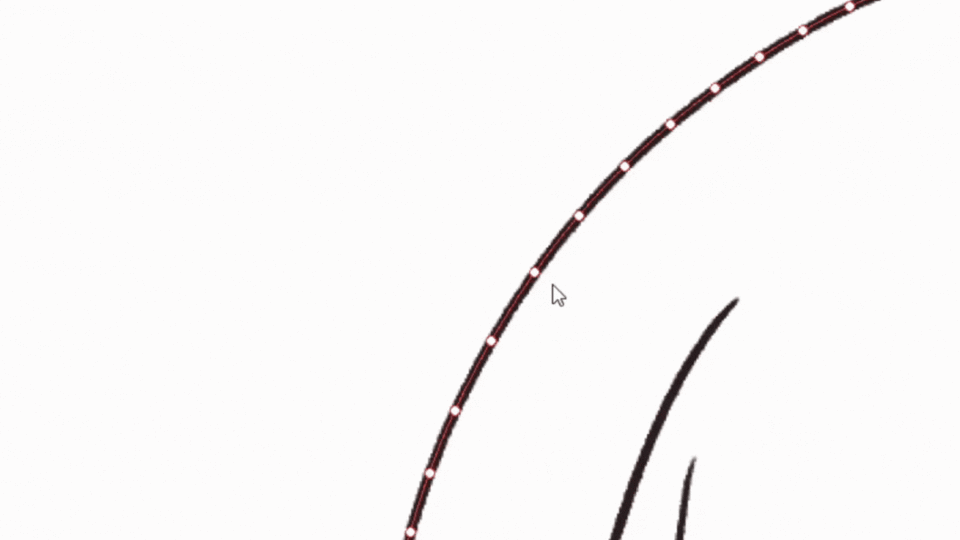
5. [Switch Corner] - Click or drag points to switch between turning them into corners and curves. The control points will change between squares and circles.
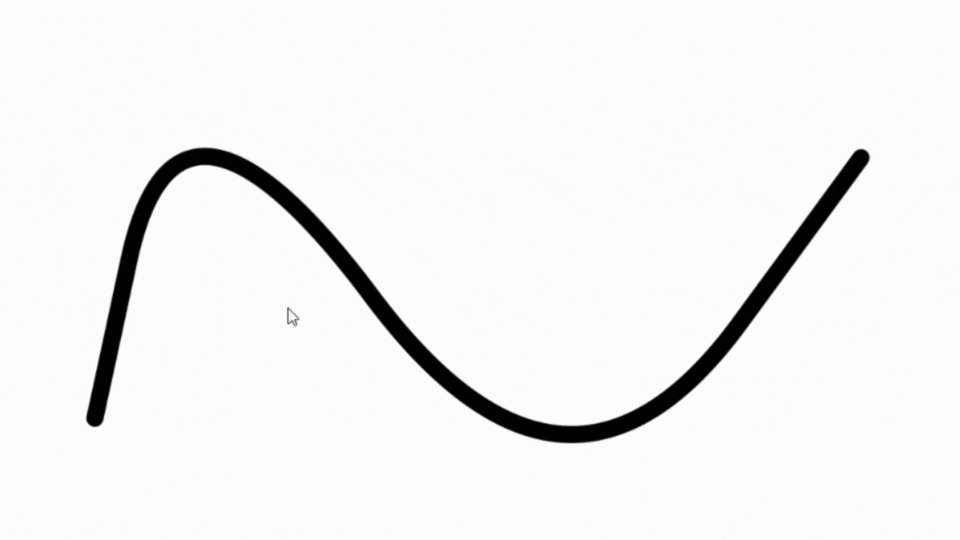
7. [Adjust Line Width] - Drag a point to the right to make the line thicker and to the left to make the line thinner.
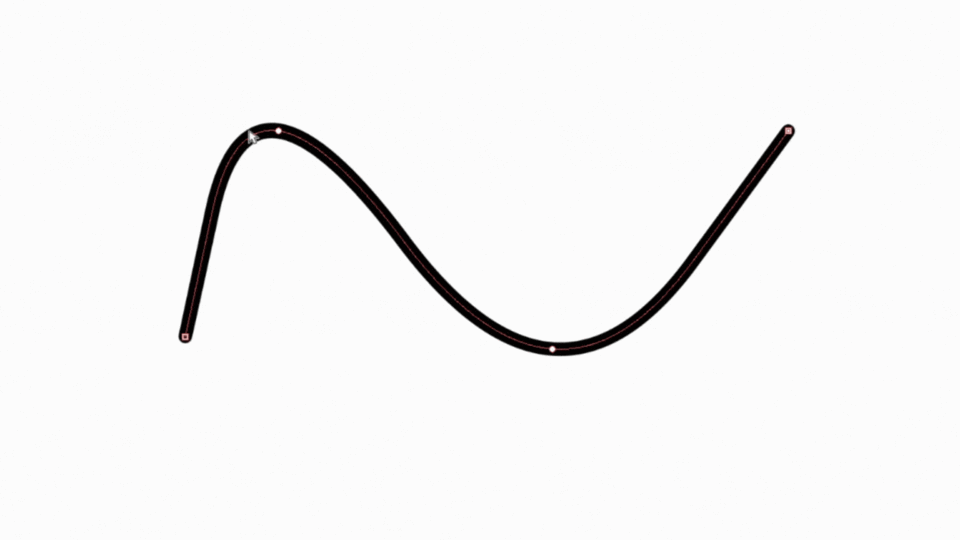
6. [Adjust Opacity] - Drag a point to the right to make the line opaquer and to the left to make the line more transparent.
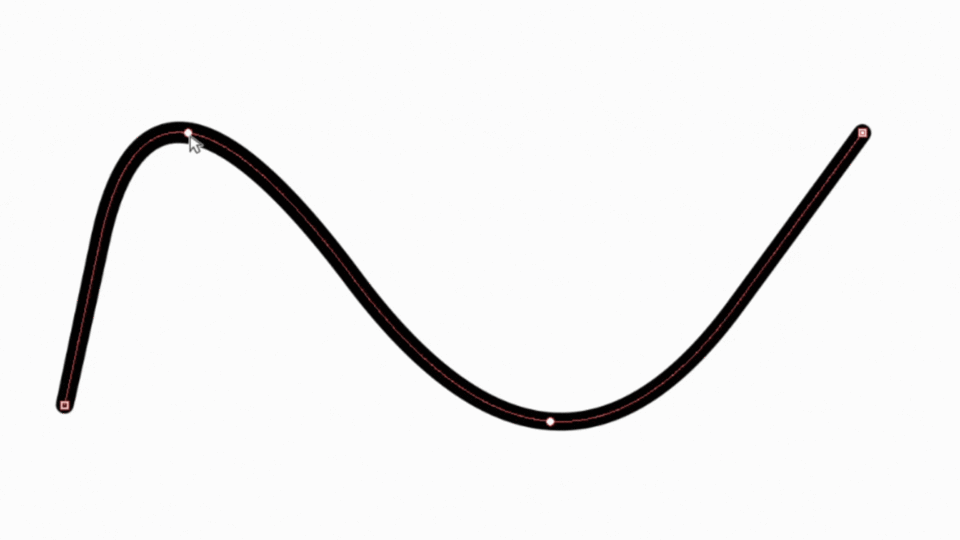
[Split Line]- Split a line into two at the clicked spot. The start of the new line will be indicated by a box control point.
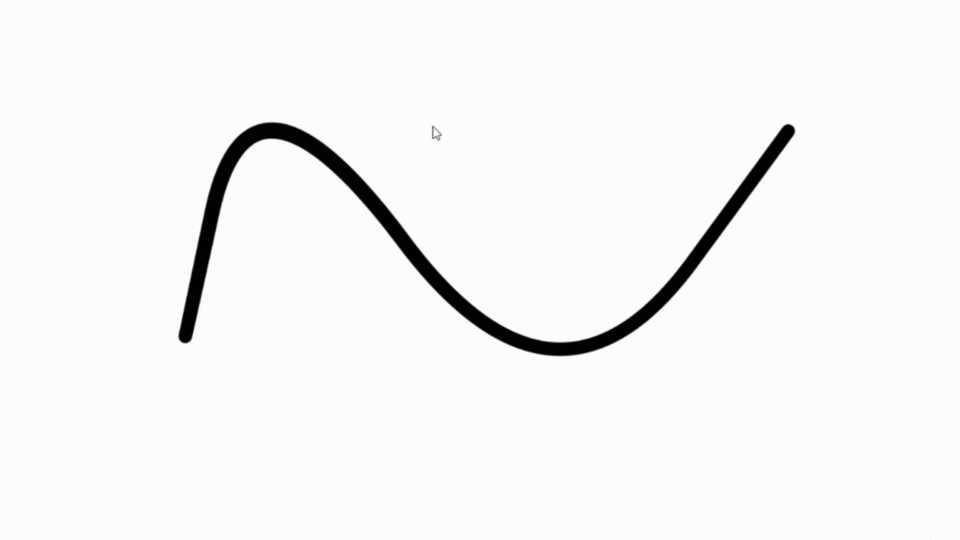
B. Pinch Vector Line
This tool allows you to “pinch” and drag a line or a portion of a line in any direction. The settings, for which this tool can be manipulated,to affect your line are:
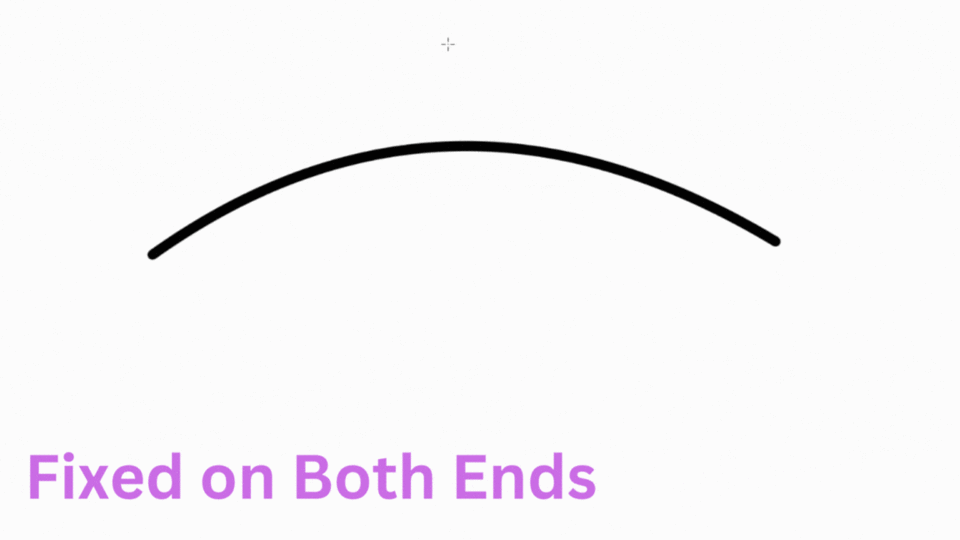
1. Fix End
[Fix both ends] - fixes/ locks the control points of either end of the line. Only the points in between can be manipulated.
[Fix either end] - fixes only one end of the line allowing for the points in between as well as the the other end to be manipulated.
[Free both ends] - No fixed points. Both ends can be manipulated.
2. Pinch Level
Adjust the level of bending for a line for increasing or decreasing the value on the slider.
A lower pinch level = smaller bend
A larger pinch level - wider/larger bend
3. Effect Range
the [Effect Range] tool changes the area for gathering up lines to be dragged. It acts similar to that of a brush curser in which a larger brush affects a larger area and a smaller brush affects a smaller area; in this case that brush would be the value given to the [Effect Range].
smaller value = smaller range
larger value = larger range
smaller pinch level but large area.
larger pinch level large area
C. Simplify Vector Line
You can simplify a vector line by using the [Simplify Vector Line] sub tool. This tool makes it so that when you brush over a line, it simplifies the line by reducing the number of control points and adjusting the degree of the line.
D. Connect Vector Line
Connect two separate vector lines into one. If the option to [Connect Lines] is unchecked the lines cannot be connected. If checked the gap between lines will be recognized and you can connect the lines.
Adjusting the value on the [Connect Lines] Slider/Indicator, allows for you to choose whether overlapping or close enough lines can be connected & changes the degree to which lines can be connected. How I understand this is that larger values = a better chance of being connected because the range is larger, similar to how the [Fill gap] tool property works.
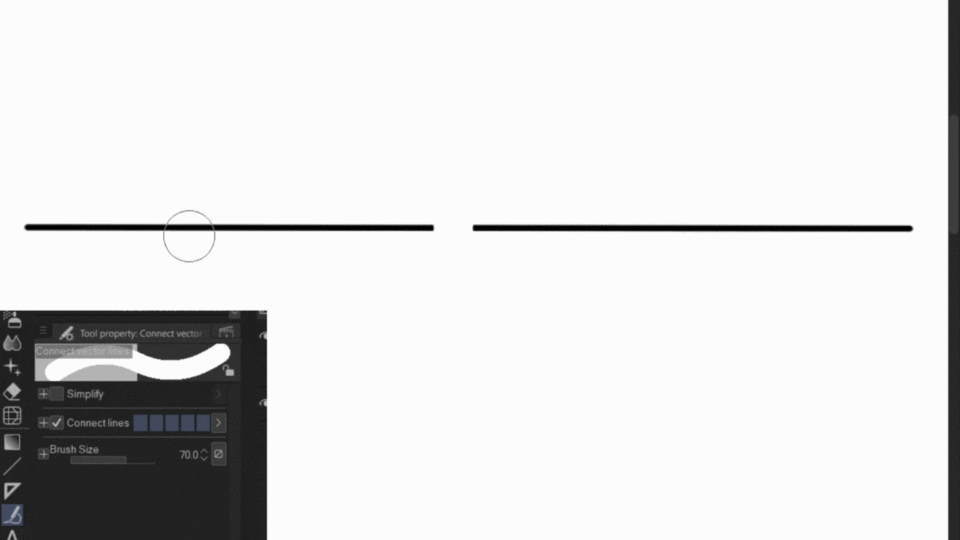
📝 NOTE: Lines that are too far away will not connect even if you set the value to 100. Lines need to in a close enough (within range) for the tool to work.
E. Adjust Line Width
The [Adjust Line Width] tool allows for you change the width of your line by highlighting the area. If you turn on [Process whole line] the entire line will be processed in comparison to the just the area highlighted.
[Thicken] or [Narrow] works by adding or removing respectively, a certain number of pixels to the line. This tool also works on Raster Layers.
[Scale up width] and [Scale down width] adjusts the width of the line by multiplying the line by a certain ratio.
[Fix width] allows for you to change the width of a line by specifying a thickness value.
Once you have selected the type of adjustment you wish to make, the number on the right-hand side with the up and down arrows, will indicate by how much will either be added to /removed from the line or multiplied by.
F. Redraw Vector Line Width
Allows you to redraw the width of vector line by adjusting the brush size and tracing the portion of the line you wish to be adjusted. Please note than pen pressure is also applied unless disabled.
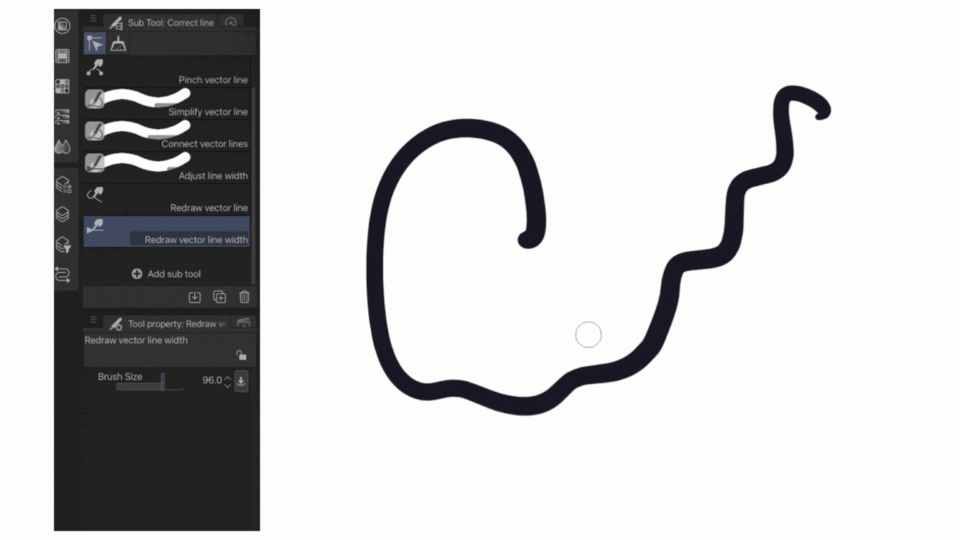
G. Redraw Vector Line
Allows for you to redraw a vector line by tracing over an already existing line.
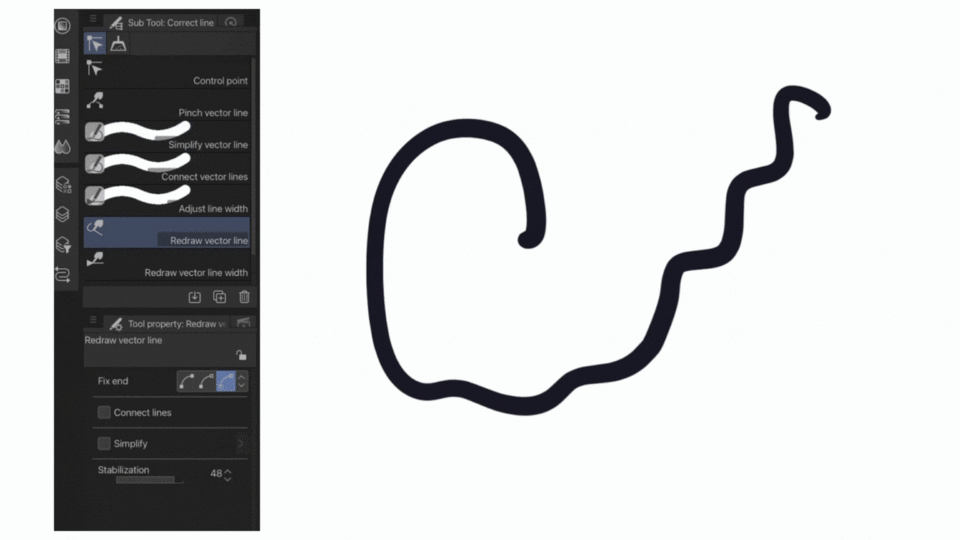
The Vector Erase Tool
The Next tool on the list of Vector Layer besties is the Vector Erase tool! Lines drawn on a vector layer can be erased with a regular eraser, however, this still leaves a vector path which can leave a not so fond effect on your work. the vector eraser erases everything associated with the vector layer, path and all! The best part is that you can turn your regular (or any eraser) eraser into vector eraser and have it attain features that will only work on vector layers.
To find the [Vector] (eraser) sub tool go to the tools or press E (shortcut) on your keyboard > [Vector]
With the [Vector eraser] tool property turned on you will now have the following three options available for selection: 1. [Erase touched areas], 2. [Erase up to intersection], & 3. [Whole line] .
[Erase touched areas] - erases like a regular eraser in which only the parts that are touched on a line are erased.
*[Erase up to intersection] - if you have two lines intersecting, once the eraser has touched the lines, the lines will be erased up to the intersection. This feature is definitely one of the best features with working on a vector layer.
[Whole line] - erases the entire line on that vector path
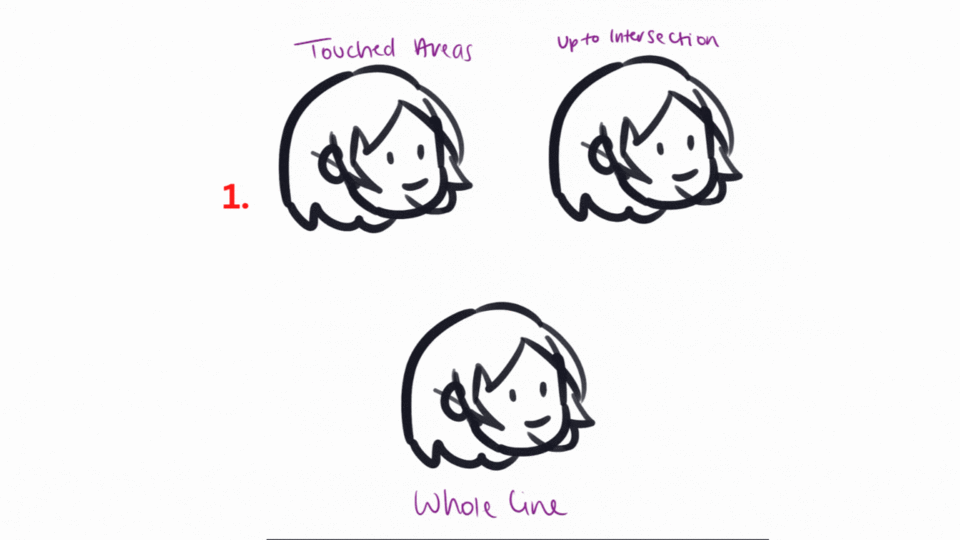
The [Erase up to intersection] is a great feature for efficiency and cleaning up your line art.
Converting another Eraser into a Vector Eraser
The effects of the [vector eraser] are only applicable to vector layers. In Clip Studio Paint, you can allow for any other eraser to operate in the capacity of a vector eraser when using that eraser on a vector layer. In order to do so go to your eraser tool > select your eraser > and check on the option to enable [vector eraser].
If you do not see the option to enable the [vector eraser], click on the [Sub tool detail] palette > go to [Eraser] > click the eye icon next to the vector eraser. Now the property will show up on your tool property palette.
Wrapping it Up.
To conclude, vector layers are one of the most useful tools of Clip Studio Paint. The information provided here, is only a fraction of what can be done with vector layers; however, it covers all the basic aspects and most important functions of vector layers.
Thank you reading and have fun creating on vector layers!




Comment