Getting Creative in the making of game/profile avatar
Introduction to avatar character creation
In an avatar creation process, they are so many things we need to put into consideration but in today's tutorial I would like for us to go through them one after the other.
Hi my name is annady, come with me and let us dive into the creation of avatars which we can either use it for game or social medias profile.
💥 Things to put into consideration or questions one need him/herself when wanting to create an avatar character:
1) What do I understand by an avatar [?]
2) Why am I using the Avatar character [?]
1) What do I understand by an avatar [?]
------------------===========
This question may come simple to many beginners or irrelevant to others but it is necessary for you to consider this within yourself cause creating an avatar without having a full concept knowledge on it drags its creation to the point of making it boring and on interesting to The Creator and the viewers or audience.
2) Why am I using the Avatar character [?]
What I meant by this question is that knowing what you want to create health better its creation in a sense.
Let me elaborate by saying, Like take for example in today's tutorial now, I would like for us to look at the Avatar creation process for both a game character and a profile character,
------------------===========
With that idea now in mind, we can now create a game character and a profile character, I will start by considering the following;
• Creating an Avatar for a social medias profile.
• Creating an Avatar character for a game station.
3) Creating an Avatar for a social medias profile.
We start by first doing the following:
• Decision making
We need to first make a decision on what the style of our characters should be Which for this particular aspect of creating an advert for a social media profile of which I want to make use of a chibi character.
------------------===========
As we do know profile pictures are specific identifying picture that individuals use in online social medias to represent themselves, which can be any type of picture, and it reflects how the individuals view and shape their online self-representation. Those representations often relate the individuals cute, fitness, personality, loneliness and among many more.
Hence the different representation of the individual's personality can be represented in the character using something I like to make use off often which is known as SHAPES and SYMMETRY RULER.
• Use of Shape representation and symmetry ruler to creating an Avatar character.
SHAPES help blocks and play a vital role on telling viewers what the personality or appearance of the character entails.
Take the below variety of the chibi characters faces created using shapes which entails what the character is all about.
------------------===========
Over the years I've come to learn that one can easily create the face of our character using modern simple processes in clips studio named the SYMMETRY RULER.
To create a front view face of a profile character using shapes and symmetry rulers start by drawing a circle using the [Eclipse] sub tool,
------------------===========
Select the [symmetry ruler] sub tool, on another Layer draw a straight line from the top of the circle to bottom splitting the circle into two halves,
------------------===========
• Use of Vector Layer
The reason why I am using vector layer instead of raster layer in character design is due to that whenever the size of the character in a Raster layer is reduced using the transformation tool, the line art of the character tends to lose it's quality, Meanwhile when the size of the character in a Vector layer is reduced its still retain it's quality.
------------------===========
For as we do know when our character is uploaded or image uploaded onto social media the image tend to shrink in size but when we use our vector layer when the character or images shrink in size we can still clearly see our line art.
If you would like to further learn more about this vector layer hang these function, you can do so by going through the following below tutorial articles.
🔗🔗🔗
With that done we can now draw out the outer line and nose of the chibi character by drawing on one half side of this splitted circle, because we have the symmetry ruler enabled on the layer, it will also affect the other half side of the splitted circle,
------------------===========
• Draw eyes of characters with accuracy using the [symmetry ruler]
Do you know the drawing eyes has never been more easier which they use of the symmetry to one can draw similar eye positions on our character with accuracy All you need to do is start by Create another new layer repeats the same above process by setting the symmetry ruler and then draw the rest of the character facial features.
------------------===========
And there you have it our chibi character face is now done.
------------------===========
Next to give our character another emotional eyes expression, we need to first duplicating the formal eyes layer by LONG PRESSING on the layer a mini dashboard will appear with various options, select the [Duplicate Layer] options.
------------------===========
Now, on the duplicate Layer draw on the left side of the chibbi character another eye and mouth expression which the right side of the chibbi character will replicate.
------------------===========
And with the above done we are now having another facial expression for our chibbi character.
------------------===========
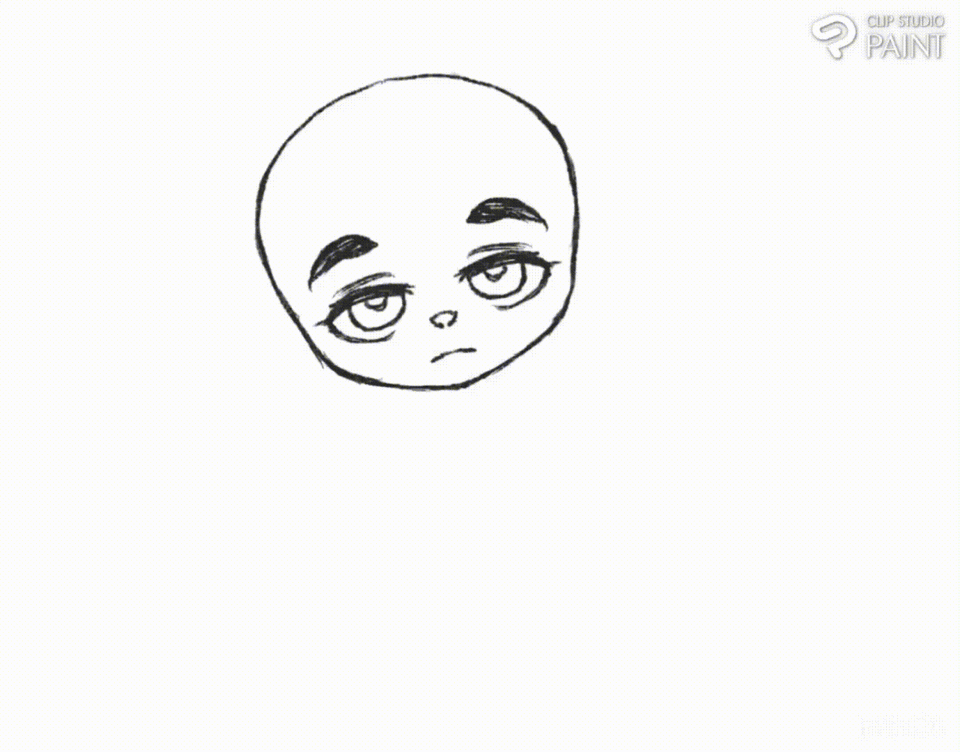
• Manipulation creation process
As the name of this aspect goes we will be looking at how we can use these two above created facial expression (as named by A and B) to create another facial expression by manipulating them both will get another set of feature expression (namely C).
------------------===========
• Choose the facing positioning
In this aspect, we will be considering how the face should be positioned in the profile picture when one is taking a profile picture we normally take our profile pictures from either the front view, 3/4 view or side view, So as for viewers to easily know or identify who's social media it is and to show the emotion of feeling your expressing on the feet picture.
------------------===========
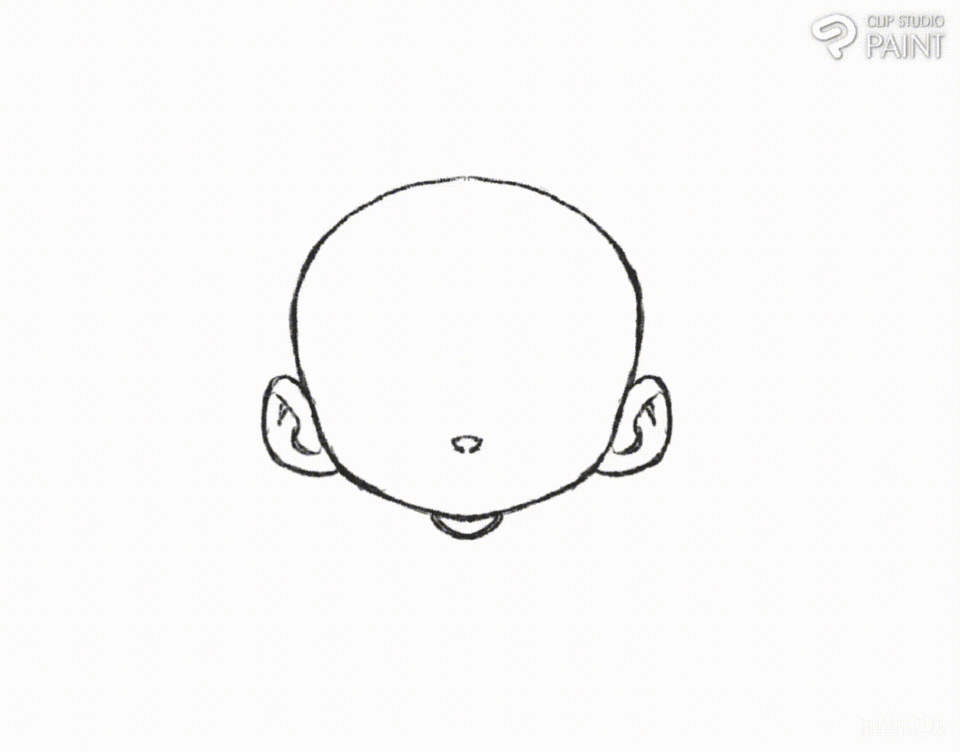
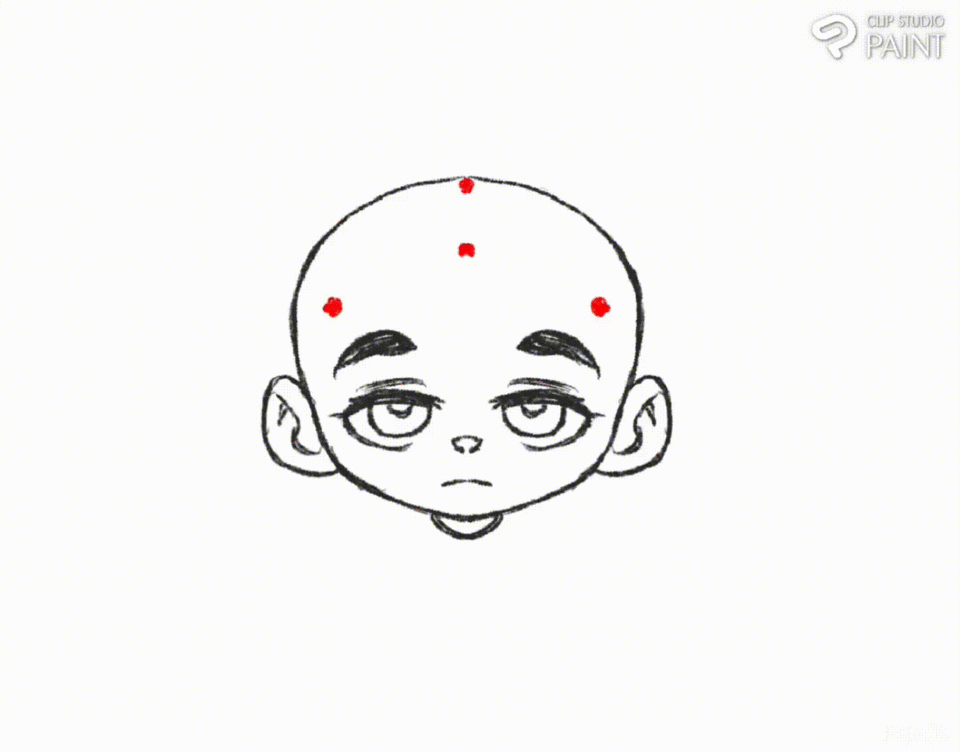
• The drawing of chibbi hairs using symmetry ruler
Create a new layer, reduce the Opacity to 25% and enable the layer color set it to a Blue color,
------------------===========
I will be growing the hair according to how the arrows in the image below is drawn.
------------------===========
On one Layer, I then use the G-pen 2 to draw the hair strains inside the character,
------------------===========
Meanwhile On another Layer, I also use the G-pen 2 to draw the hair strains on the outside of the character creating the hairs outlines.
------------------===========
That concluded by adding a little flat color to the artwork.
------------------===========
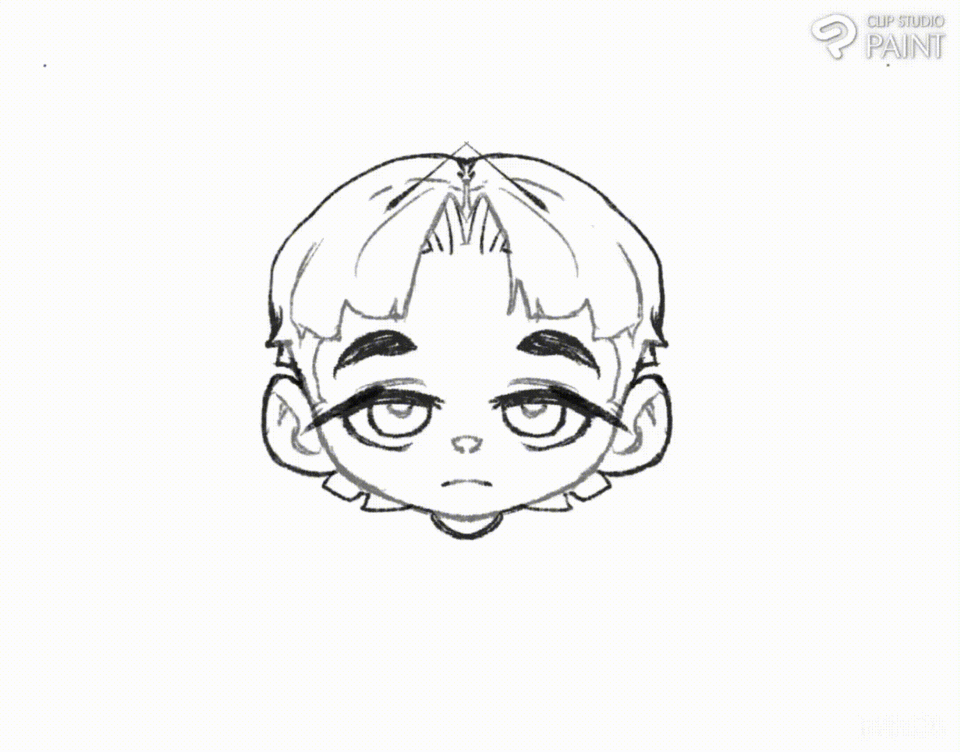
And looking below is the step by step process to which I created the hair.
------------------===========
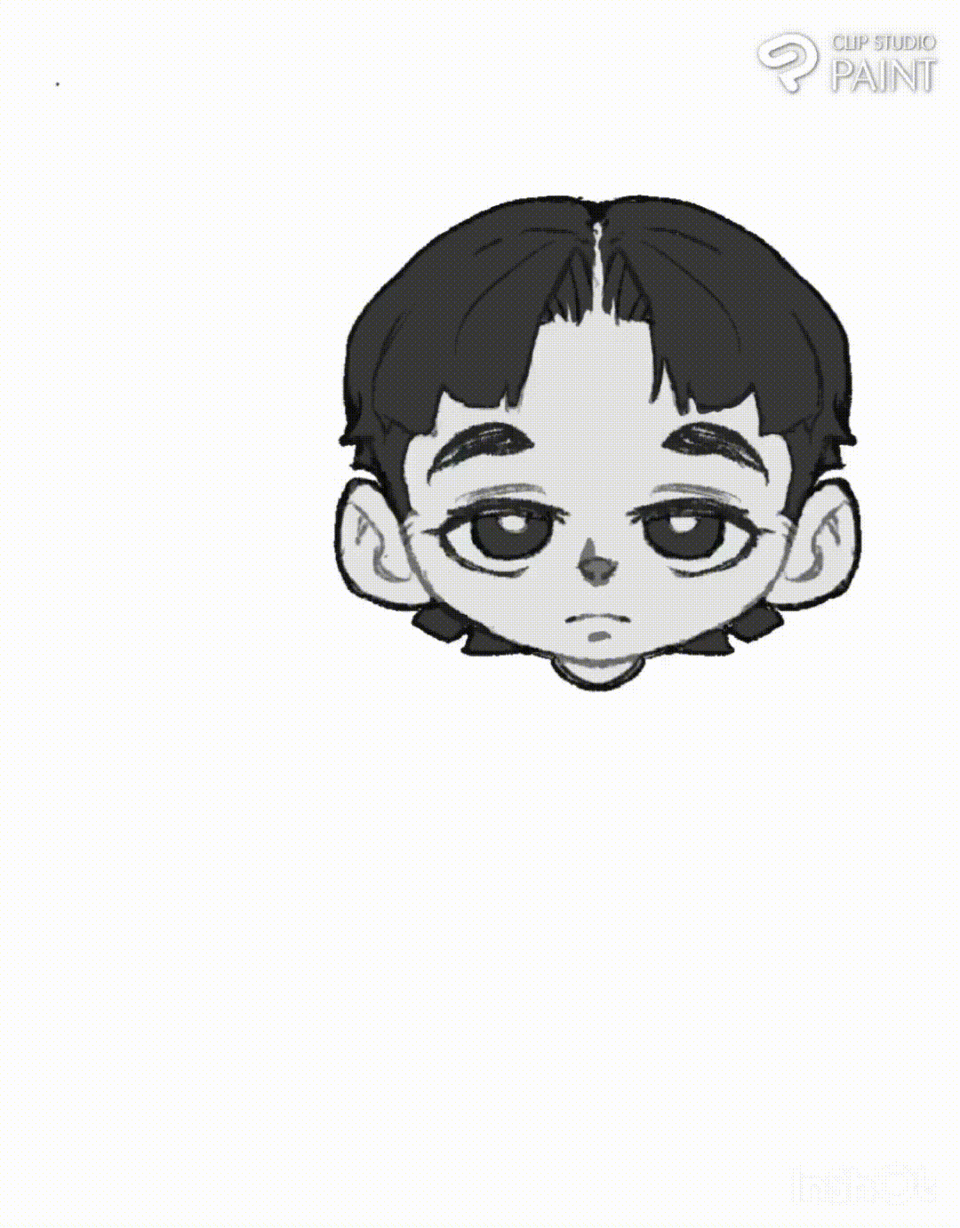
• Chibi body structuring
For the body part I start by define the top and base of the chibbi avatar body with the blue horizontal lines. Afterward I create a new vector layer and using the Symmetry ruler sub tool draw a vertical line dividing the body parts into two halves.
------------------===========
Now, using the G-pen sub tool on a new created Raster layer I draw out the body structure of the chibbi avatar character using basic shapes like that of the head I used circle shape and for the torso, and hands I made use of a triangular shape and last day for the then lastly for the for the legs are used a rectangular shape to base the structure of the chibbi avatar character.
And with the shapes acting as a guide I the body of the chibbi avatar character using the G-pen sub tool again.
------------------===========
• Color rendering process
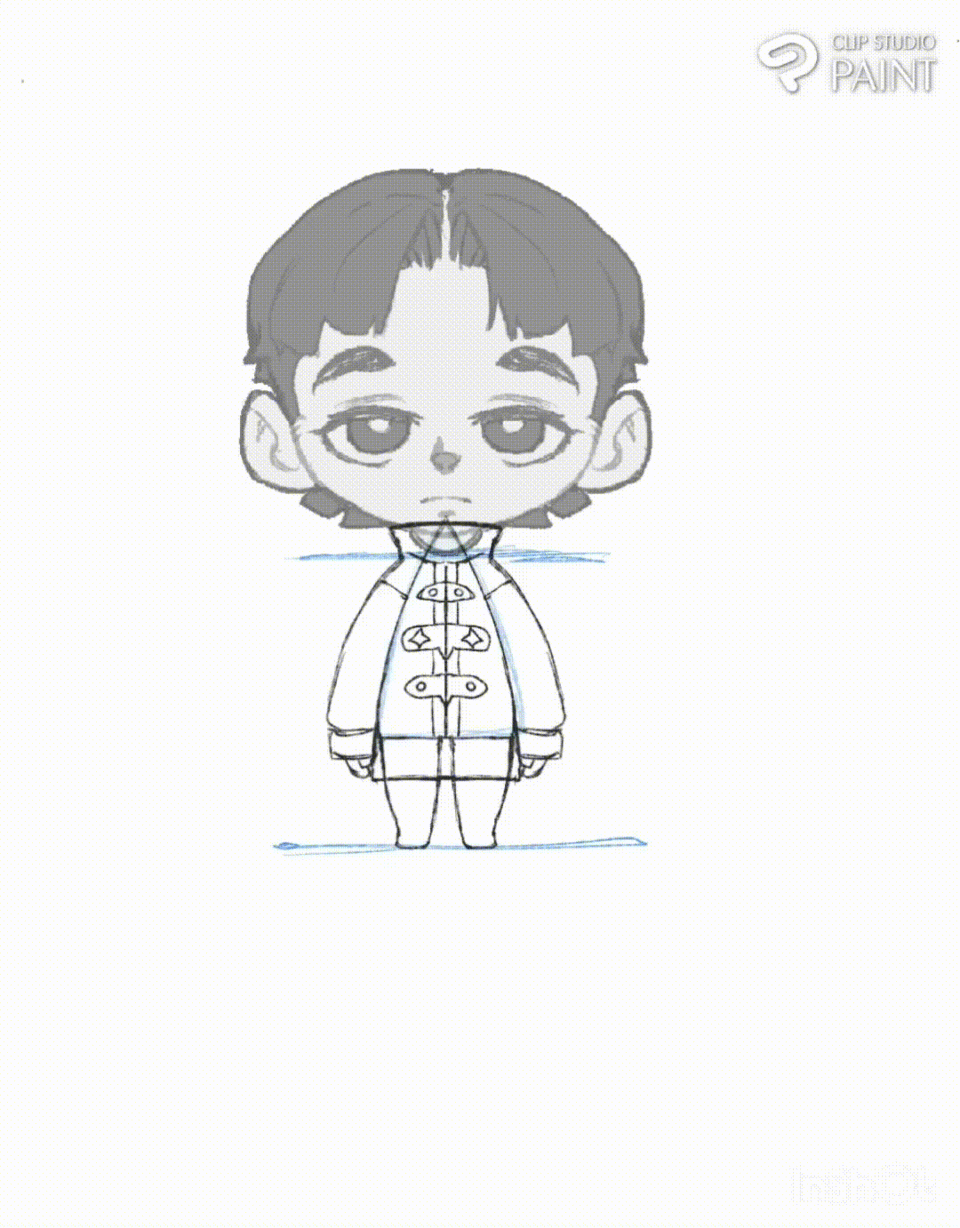
For the coloring process, I start by adding the flat colors using the lasso fill sub tool with the symmetry ruler to enable on a newly created Raster layer it helps color my rendering process more fast and easier which by just applying my base color or one half of the chibbi avatar character it affected the other half of the chibbi avatar character.
------------------===========
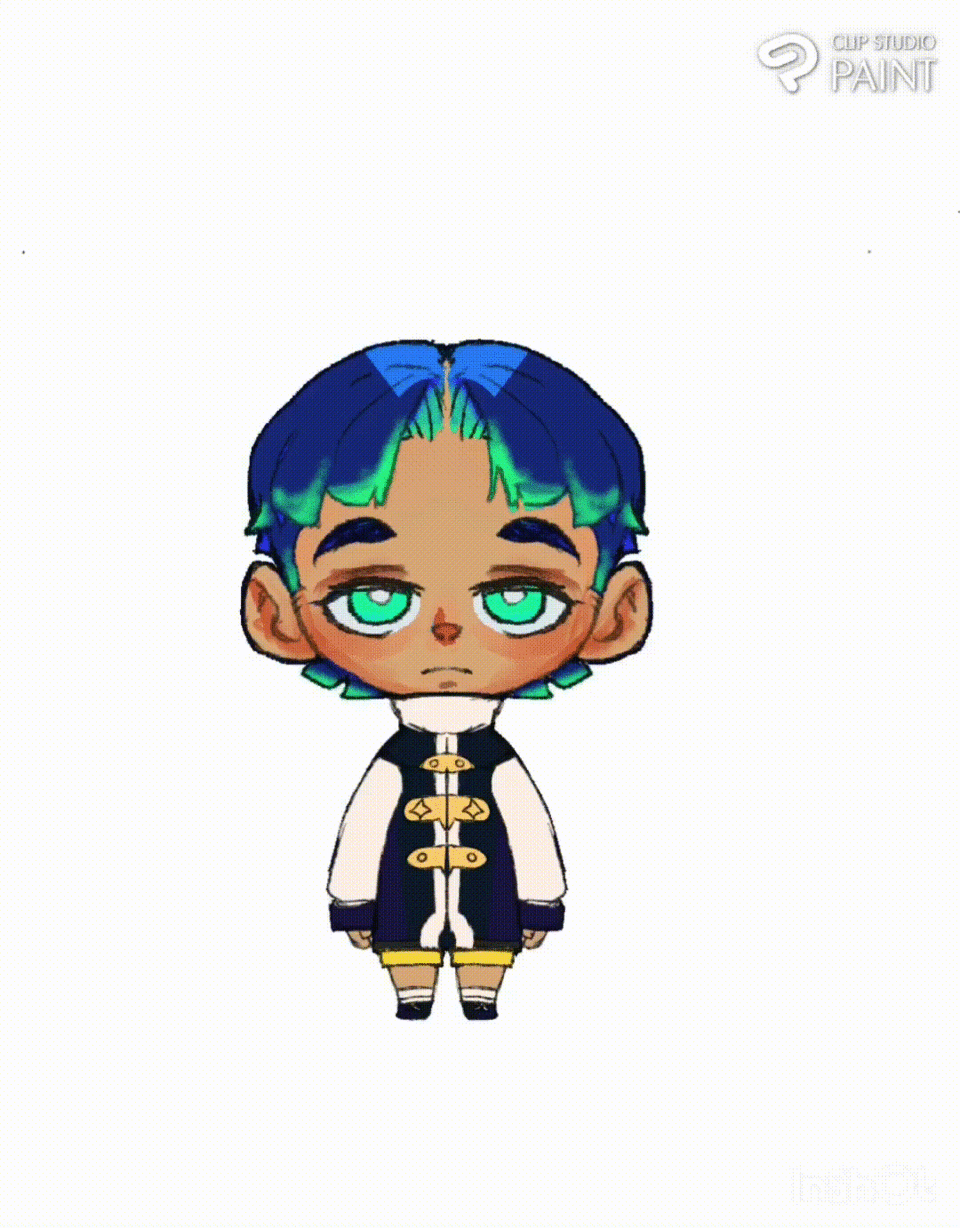
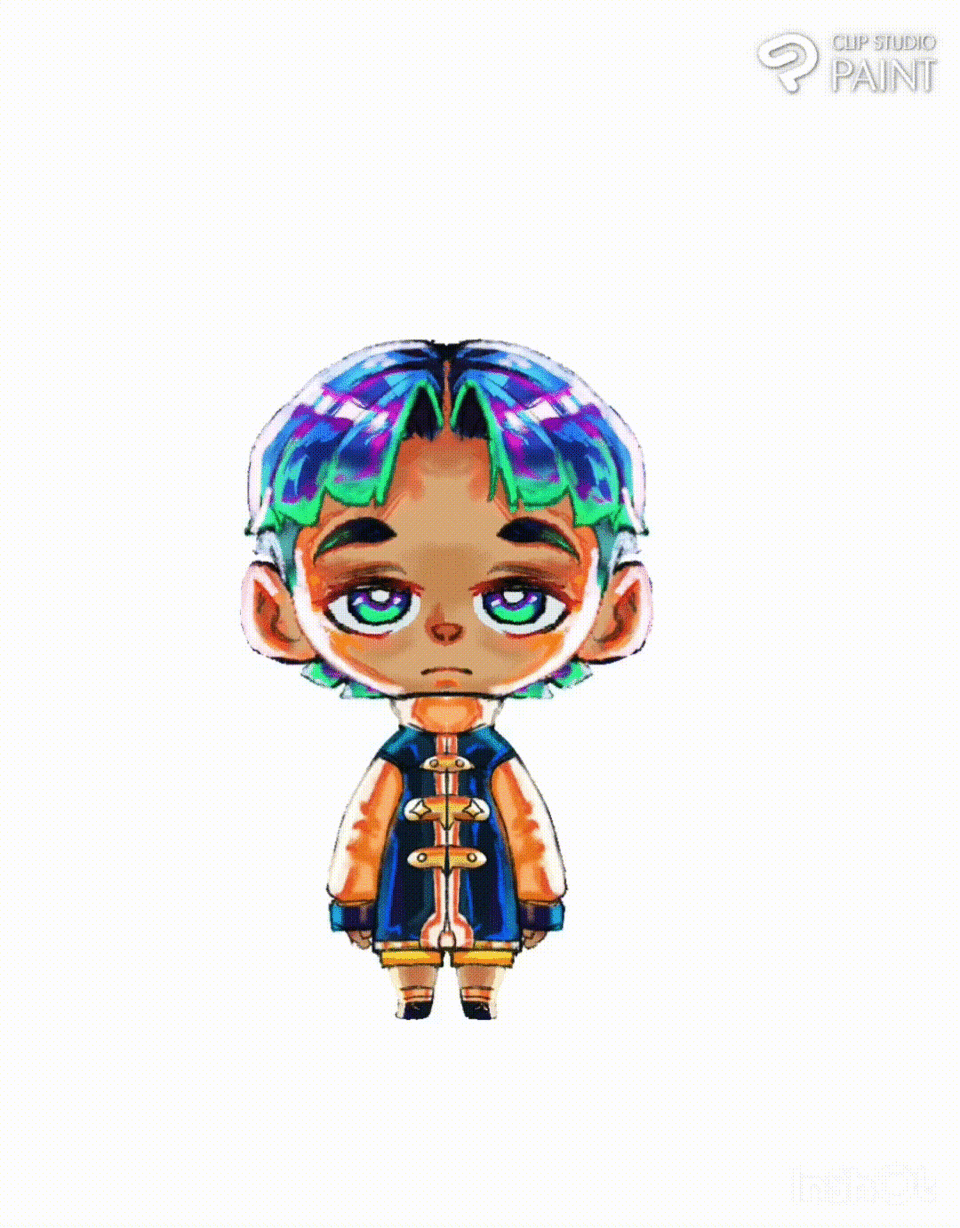
On another layer, I went ahead to further render the color of my chibi character giving it shadows and light areas so as to turning chibbi avatar character from a two-dimensional (2D) Avatar to a three-dimensional (3D) Avatar,
------------------===========
Next with the character full render, I created a Raster layer below all the previously mentioned layer with the layer acting as a background layer I then enable the symmetry ruler to the layer and using the G-pen I was able to draw a heart shape on the background layer.
------------------===========
And with the Line art of the background layer now drawn, I then use the Noise airbrush sub tool to add some colors to the heart shape. Also I enabled the borderlines effect to the background line art with the color set to White.
------------------===========
To better the light expression on the avatar character, I added a hash light effect for the edges of the character and with that we have finish created our profile avatar character ready for use.
------------------===========
Whereas using the same background making process mentioned above, I was able to create different shaped background with different colors expressing the emotion of the chibbi avatar character.
------------------===========
And if you considering maybe you and want to give your background a cool frame you can try some of clip studio free or purchasable frames which are located in the asset store.
------------------===========
4) Creating an Avatar character for a game station.
The following below steps are necessary things which are need to be done if you want to create a game avatar character for a game station which I have breakdown into steps.
Step 1: Create a big canvas
As noted above to have a good quality game avatar character which for Today's tutorial I will using the (canvas size of 1536 × 2048 px and resolution of 300).
------------------===========
Step 2: Think Through and Pre-Plan Your Character structure design
Layout what kind of game character you want create.
Like for example
• Pubg mobile (military game design)~ characters a designed with weapons and combat clothes.
• Overwatch (A cyberpunk game design)~ characters are designed with futuristic weapons and clothes.
------------------===========
Step 3: make a template.
This is a form of a rough sketch that shows the characters basic features ringing from style of the Avatar pose and more.
Say If you’re using a real person as inspiration for a character design, there are a few ways to capture their essence and make your illustration recognizable. Even when cartoonishly simplified, adding unique features to your flat character design helps tether it to the original person, especially if used as an avatar.
------------------===========
Note: this character is a game station Avatar character which I design for a game but due to this tutorial I want to show how I come came up with designing this avatar character.
Step 4: Adding Of Identifying Signature Features.
Include any signature accessories like a necklace or glasses.
Notice any identifying marks like dimples, freckles, a mole, or the shape of someone’s hair.
------------------===========
If you like to sketch ideas, this is a great way to preplan. You can draw the likeness of a person and block out the shapes that comprise their features.
With the identifying various character features layout, we can now move on to the next step of drawing out the Characters Line art.
Step 5: draw the Line art on a vector layer
Create a vector layer above the pre plan rough sketch of the game characters, I then enable the layer color setting it to a Blue color.
------------------===========
Step 6: use of the Symmetry ruler Sub tool
Now, using the symmetry ruler sub tool I drew a symmetry line dividing the character into two house A and B,
------------------===========
Next, I create a vector layer, using the g pen sub tool I then draw on one side of the characters and let it replicate on the other side of the character and this process was carried out for both side division of the character (A and B).
—----------------===========
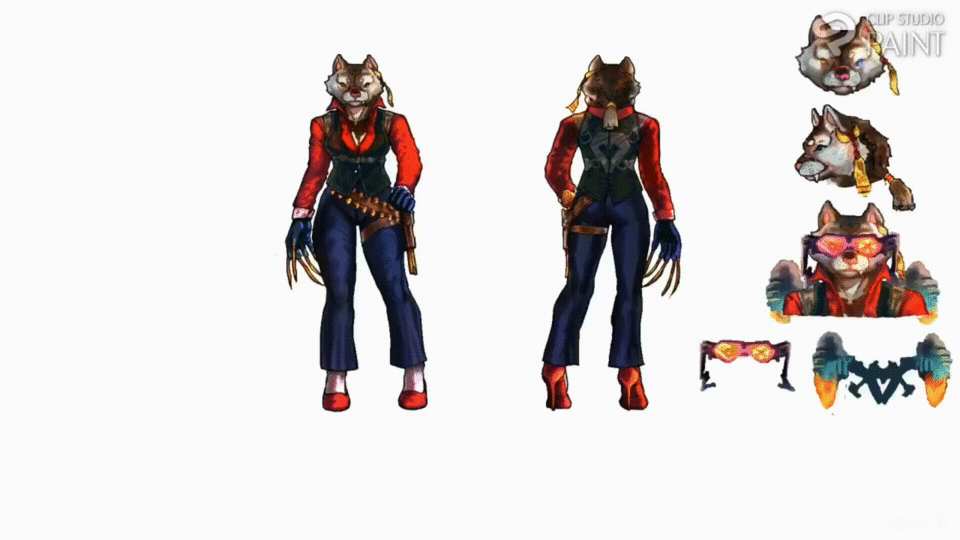
And by doing the above mentioned, I was able to have two replica of the character but I work is not yet done for it to look like our rough sketch reference drawing. Start by dividing the two replicas (A and B) into equal halves using the lasso sub tool,
------------------===========
Now, take the right side of the replicated character A and the left side of a replicated character B, and with those two have I done do what I often love doing whenever I want to create a new character from two existing characters by join the half's of both (A and B) together.
This process I call manipulation process.
------------------===========
With the above process done with, we now have our third character which I will be naming (C) for now.
------------------===========
Step 7: add of colors which were hand picked colored.
At this point we are not looking at adding of colors to our character, start by creating a new Layer but this time a raster layer, add the base color to the character using the round mix brush, real oil sketch and milli pen sub tool on three different layers.
------------------===========
Using the round mix brush, real oil sketch and milli pen sub tool I move on to add more details color rendering to the character on four different sets of layers which are clipped to the previously created flat color layer mentioned above.
------------------===========
Now this above processes where done on both the front view and back view of the Game Avatar character.
------------------===========
As we can see below image, we are now done with our game character.
------------------===========
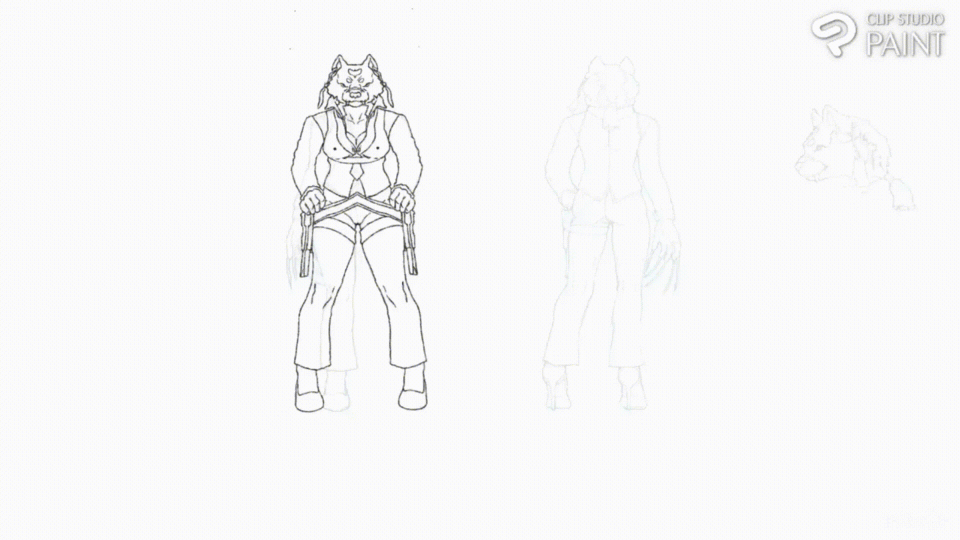
Step 8: turning a game avatar to a profile avatar
Going through the above tutorial aspect one May wonder can I use a game character from my social medias profile, the answer to that question is YES YOU CAN, for there is no restriction for the image used on your social medias profile page if you have a right to it.
Converting my game avatar character to a profile character I first consider the size of my game Avatar character which is two large for the profile page so I first from the the character lower parts off and I added some few signature devices to make the character look unique.
------------------========
Next, I added the background layer made up of a kite shape image and using the magic wand sub tool I select the inside of the kite shape image,
------------------========
Now that the inside of the kite shape is now selected, I then click on the invert icon on the selection bar located below whenever an object is selected (switching the area of selection and the area that is not selected).
------------------========
Afterwards I move on to click on the Clear icon to crop out the area's on top the background image making the object appear like it is inside the shipped image on the background.
------------------========
Now the same above mentioned process was carried out for the different set of profile images located below.
Hence, all the giving character below is now giving different colored shaped background which tends to help tell the viewers what kind of emotion will feel at the moment.
------------------===========
End of the tutorial article
At this point I believe I have covered most of the processes I used to create most of my profile or game characters.
And a big thanks to those who went through this tutorial article I say to you kudos and I hope to see you on my next article if I may even have a chance that is, bye-bye for now.
# Annady




留言