
Chibi Video Tutorial
Hi! This is Kamapon! I made this video as a complementary asset to the full tutorial here posted. I've tried to explain how I draw chibis, in my style, including the different stages of the process.
Apart from this video, I made a comprehensive tutorial with many examples you can read in the paragraphs below.
I really hope you like it!
Types of chibis, differences with a “regular” figure.
As you already know, the regular anatomy for manga is a head-body ratio of 7 to 8. This means that the height of a character must be as close as possible to the equivalent of the height of the character’s head 7 to 8 times.
However, the physique of a chibi character works completely different. A chibi must look cute therefore the head must be SUPER BIG compared to the body.
The regular height of a chibi chara is from 2 to 3 heads, being the most common 2 and 2.5 heads chibis.
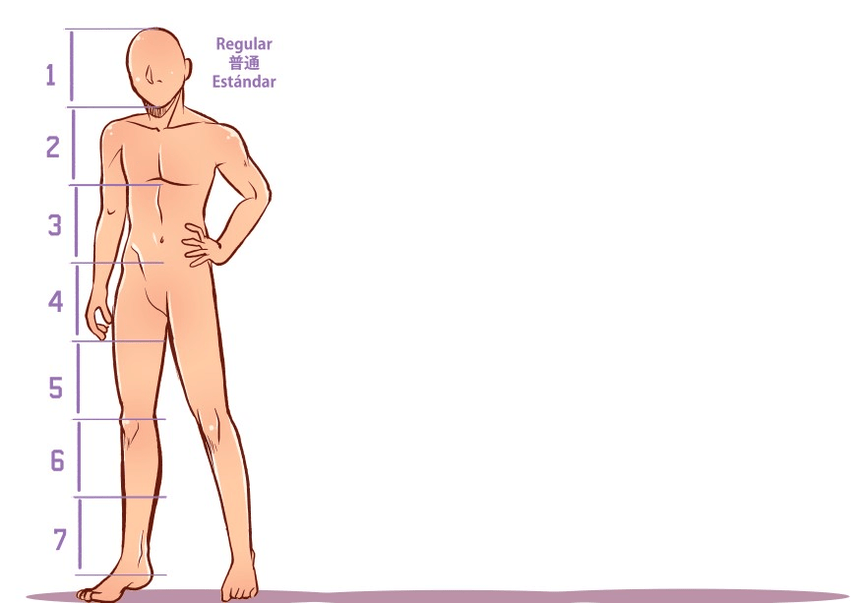
I feel most confortable working with 2.5 heads chibis and I’ll try to show you how I make my chibis and how I colour them.
Body, head and limbs, how to draw them cute.
Firstly, there’s some science behind drawing chibis and it’s not as easy as it may seem. There is a balance between the head and the body when you draw a chibi character, and also you’ll need to pay attention to some details if you want to make your chibis look extra cute!
Head & body
The head is, in my opinion, the main part of a chibi. A chibi’s head is not totally round, to make it perfect you’ll need to make the face shape, as in a regular character, but rounder.
Avoid angles when drawing a chibi!
Also, make the upper part of the head bigger, as if the character was wearing a helmet (think of a balloon :) )
A chibi character has almost no neck to be seen, but drawing it makes it more “realistic” and cute.
Regarding the body, I like to make a soft shape that reminds me of a bean, giving more weight to the hips.
Start with the two and a half circles and then make it softer, with round angles. Divide it in two, one part for the body and one for the legs. That being done, draw a pearlike form like in the image bellow, and, again, divide it in two, for the chest and the hips being the latest bigger and wider. It’s very teddy bear-like.
Then add the limbs accordingly!
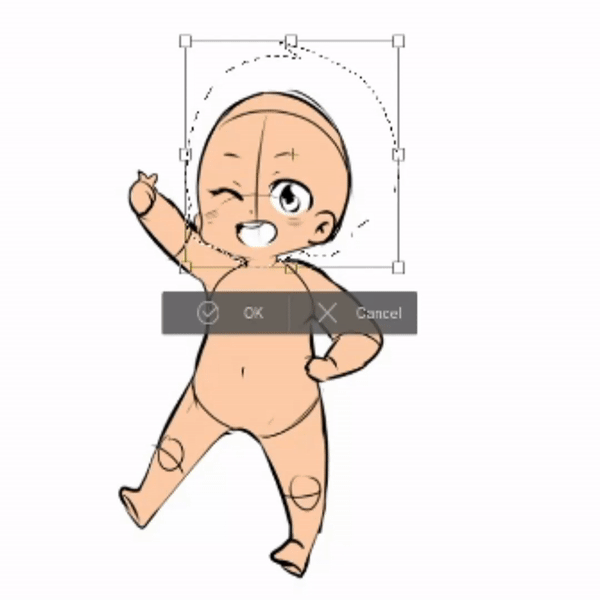
Limbs, hands and feet
Let’s complete this chibi adding some arms and legs (lmao).
First, think that although we’re drawing a mini character, they, too, have joints! But keep in mind that roundness and soft shapes are the rule here.
Arms don’t have to be longer than the body, and legs will be have the length of the body itself in the case of a 2.5 heads chibi.
If you’re aiming for a 2 heads long chibi, then the whole body, including legs, has to be the same length as the head. So I recommend you to draft your chibi first and rescale the head if needed.
This part is not easy to master, actually and I still have to correct the size of both head and body when drawing my chibis.
This part is not easy to master, actually and I still have to correct the size of both head and body when drawing my chibis. 。(^▽^)ゞ
Remember that a chibi can’t touch the top of its head, lol.
Chibis’ hands are feet are SMOL. This part will help making your chibi look super cute.
Back in the 90’s, chibis used to have very big feet, but not anymore. Don’t you think that small hand sand feet look adorable?
Don’t forget about fingers and toes. There’s no need to draw all of the toes, if you don’t want to, but try to draw all fingers in the hands.
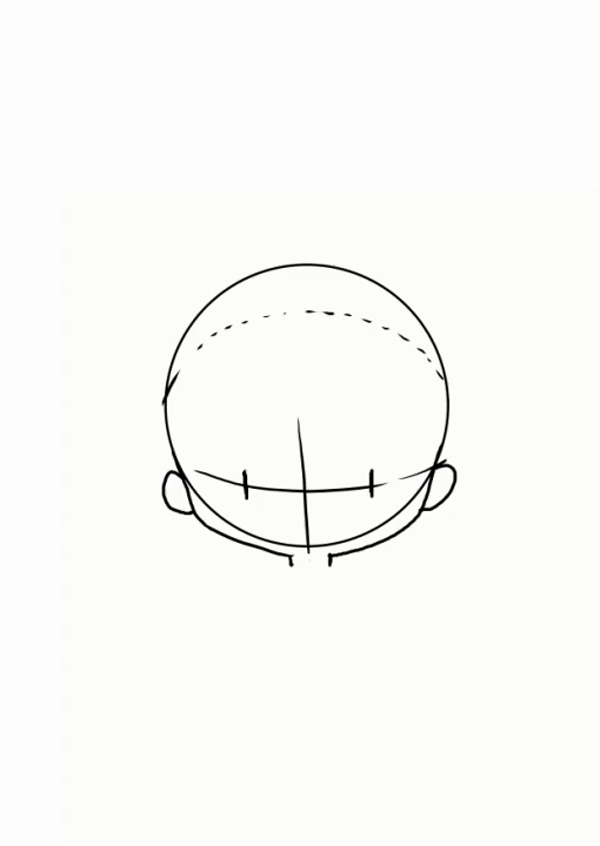
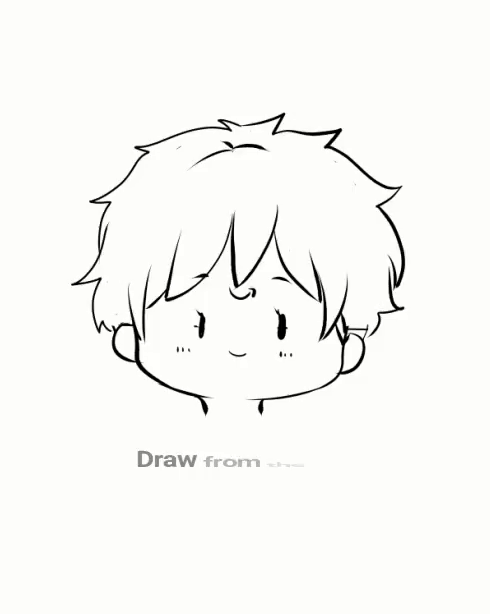
Facial features, expressions.
Pay attention to your chibi’s face. It’s the most important thing of the whole “Kawaii” feature in a chibi.
First, Don’t draw the eyes, nose and mouth in the way you’d do in regular characters. The trick here is to draw everything as close as possible to the middle of the face (not the head!).
In this way, you can see, how facial features are close to each other and can be drawn inside a small circle in the lower part of the head.
For the eyes, you can follow this rule and divide the face in three parts.
Draw them big and round, but not too much.
There’s no need to draw your chibi a nose if you don’t want to, but I like to shadow it when I colour my mini charas. <3
Try to keep the mouth small, and close to the nose.
Regarding expressions, think of an emoji! Simpler=cuter and that applies here, too.
Adapt the typical manga expressions following the rules above and you'll get that 'cute' feel to it.
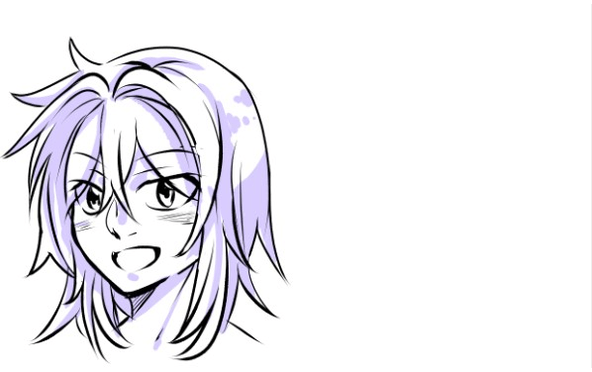
Hair
Now let’s draw the hair!
A chibi’s hair has to be as simple as possible, and also as round as possible!
When you draw your character’s hair, you’d want to give it a lot of volume. This also helps making the face smaller and therefore, cuter.
Start with a “hat” on your chara’s head, give some space between the scalp and the line of the hair.
Try to make lines as simple as you can, no need to add a lot of bangs! Also, remember to soften it and avoid pointy ad square angles.
Make it the fluffiest you can.
Colours! Simple and vibrant!
When I started drawing chibis, I first applied colours the same way I coloured my regular characters, but I soon noticed something was off…
I really think that the simpler, the better. There’s no need to add a lot of layers of shade, or highlights to a chibi to look good. It will also take less time to draw and you’ll get more free time (Lmao).
Let me show you how I get the job done through this video! Say hello to Kon-chan, the hostess of the show!❤
Choose a vibrant palette that can enhance your chibi’s whole appearance. Chibis are thought to be dynamic, cute, never dull. Avoid using dark/black colours for shadows!
Little details to add quality
here or some dots there…. Details that will give your drawing that special something it may be lacking!
In my case I use this dot brush here and there. I also like to draw little shiny dots on top, like hightlights!.
I included a little "assets" section below so you can use them too, if you like ^^
Assets
Finally, if you feel like you need some extra help, there are a lot of assets that can help you drawing your chibis!
I personally recommend to use these 3D pose figures to help you out
✔ Chibi Chara Model Type2 by 黄鼠[YellowRat] ちびキャラ素体 Type2
✔【3D Design Doll】Nekomimi Chibi Chara Model( revised version) 猫耳ちびきゃら素体(修正版)by 寒天ねこ- 500 CP
✔ 3D Mini Chara v2! 3Dミニキャラv2! by bluewatermelon - 1000CP
Also, for the video I used the following assets:
The stars of the Background are from "80'sパターン - 80's Pattern by 爪瓜"
The white shiny dots I like to add as a finishing touch are
"筆圧感知シンプルしぶき" (Hitsuatsu Kanchi Shinpuru shibuki - simple splash that looks like made with a brush)- by 27pt
For the kimono I party used this paws brush: "ねこ肉球ブラシ" (Neko Nikukyuu Burashi - Cat paw brush) by 中川中
For lineart, I make my lines with the "Real G-pen" (CSP default).
I also use this asset to fill my linearts with a base colour: "隙間無く囲って塗るツール (Sukimanaku kanatte nuru shi-ru - Tool to paint + erase without gaps For reference layer) by K96
The kimono base patter I used was: ELMO角麻の葉(ELMO kakuasa no ha -ELMO_ Square Hemp leaves) by せんと★えるも
And that’s it! I’ll now add a video of the full process of a chibi bellow, the way I draw them, hoping it can illustrate my words better than the examples above.
Let me know in the comments if you've got any question or want to know more about how I draw my chibis ^___^
About me
If you liked this tutorial, you can follow my art on:
Dieser Beitrag gefällt


Kommentar