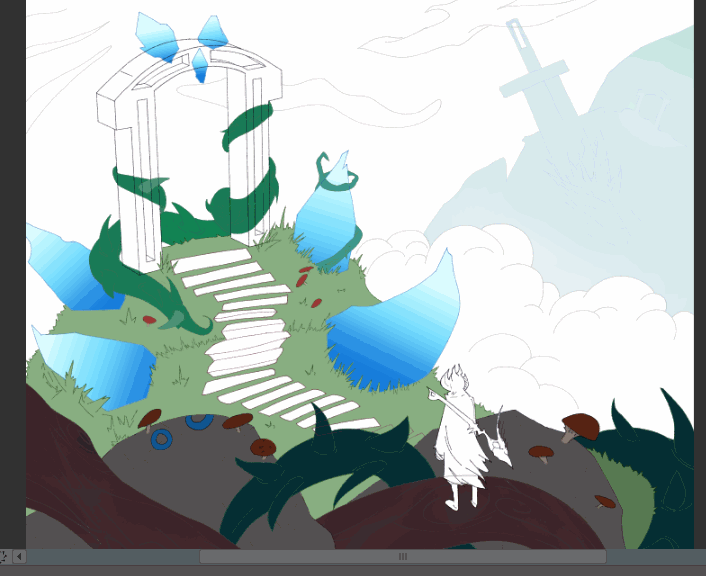
Part 2: Flat Temp Layers
To block in our colors use the fill tool. Consider making a new layer for each object's color and putting it an appropriately labeled folder.
Important - instead of setting it to refer to multiple layers, set to refer to reference layer. Have make your reference layer the line-work of the object you intend to fill in.
And don't worry too much about your color choices. These are flat temporary layers. If we lock transparent pixels on our layer we can instantly re-color an entire layer later!
Tip: Play with the 3D sphere in the tool property object tool to change the alingment of the shadow and light source of your 3D object. This helps you to visualize an appropriate lighting for that object in its environment.
The reason why I fill in colors, in a separate layer folder called color, and keep the colors of each object on a different layer is to stay organized. Also so that we can easily edit them later. Please name your layers.
At this stage, sometimes I use a watercolor brush to paint a bit of a lighter color on some objects. My flat color layers actually aren't completely flat.
I will now fill in the sky's color using the gradient tool
Pro Tip! Toggle the arrows I highlighted in red to alter the intensity of the gradient. Play with your gradients to create something you like.
Make sure to take advantage of the fill tool to safe time.

A note on composition:
It is good to have a person in your landscape to communicate scale to the viewer. My character is a horned, cloaked, staff wielding magician. Perfect for a fanciful fantasy world. They are about as tall as a crystal. This communicates a bit of wonder to the viewer.
Tip: Zoom in and out with Ctrl + space to save time. To quickly move around your canvas with the move tool, hold space. This will allow you to really get a feel for your composition. Be sure to flip the canvas too, to catch any errors.
See you in part 3!


Comentario