Easy Hologram animation effects for your cyberpunk artwork
When thinking about something in the cyberpunk theme, it will contain vivid lights, designs from the future, a lot of cables, and mechanical stuff. One always in a cyberpunk theme art is the hologram!

In this tutorial, I will show you a very easy way to add a hologram animation to make your art look cooler than ever!!
Video tutorial
Preparation
You have to prepare 2 files for the animation, the main image, and the hologram display
For the main image, I simply draw and paint it. I didn’t put too much detail into the background to make the hologram pop out more.

For the hologram, I made it animated with the frame-by-frame method to make a bit of movement like he’s talking in the recorded video
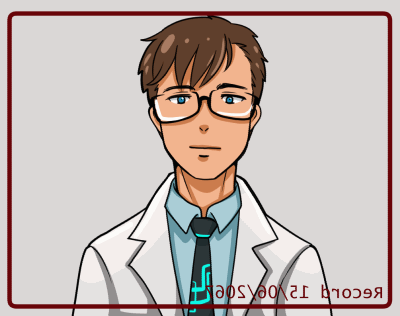
Making the Hologram image with frame-by-frame animation
We don’t need so much movement in the hologram video, just a simple talking video log
The movement that appears is to make it a bit lively. The lips movement and eye blink
Create a new file.
Then create a new timeline with this setting.
(You can set it to a higher frame rate if you want better movement, but here I am making a small animation for the image, so I prefer the minimum smoothness)
Note: if you use Clipstudio Paint Pro version, the maximum playback time is 24 and it will still work smoothly with 8 fps framerate
Then create a new animation folder
Inside the folder, create a new animation cel and draw the first frame
For editing, just drag the layer to the ‘new layer’ icon to duplicate the frame for easy editing.
Then right-click on the timeline and set the keyframe
Also use the onion skin to easily edit the drawing
Now you can make simple frame-by-frame animation for the hologram by repeating these several frames
For the line art, create a new vector layer. If the new vector layer is inside the animation folder, move it outside
Only draw the unmovable parts of the image
Create a folder for the sketch keyframes. To put the ink layer inside, drag the layer to ‘Create New Folder’ icon
Then drag the ink layer to put it inside the folder, also copy the layer to another keyframe folder, then edit it.
Tips : when the mouth opens, the jaw will drop a bit
You can easily edit by using the ‘pinch vector line’ tool in the ‘correct line subtool’
You can simply drag the jaw down like magic!
And remove the unwanted line to fix it.
Learn more about what cool vector tools can do in the animation process on my past tutorial:
You can create ‘new raster layers’ and paint directly inside the folder for the keyframe.

Tips: shift the image a bit when the character talks. This will make the movement more lively. ^_^
When finished, save the file in .clip format for later use
Apply the Hologram effect
For the non-animated image, the hologram effect is easy to make by using ‘layer blending mode: Add(Glow)’
It also adds the transparency look into the image
To add a stronger light to the hologram, make sure it appears with a dark background area
And also add highlights to the objects behind to make them look more realistic.

Let’s work on the easy hologram for the non-animated image
Create a new canvas and import the hologram and background image
[File > Import > Create file object]
Note: if you’re not going to animate it, you can also use the [File > Import >Image]
With this import, you don’t have to confuse the layers of both files
Adjust the position of the hologram
Then set the layer binding mode to ‘Add(Glow)’ and it gives the drawing a hologram looks instantly
To give it a more transparent look, you can edit the file object.
[right click on the layer > File object> Open file of file object]
Delete the paper layer, and set the background layer to lower transparency
To add some line effects to make it look like it’s from a digital device, apply the line effect on the hologram.
Create a rectangle on the raster layer with the rectangle tool
Pick the horizontal line in ‘Material panel’ and drag it onto the canvas
Clipping the hologram layer with the tome to make it show above.
You can edit the tone later in the ‘Layer Property’ panel
Make the thick strips
Rasterize the tone layer, right-click on the layer > [Rasterize]
Also, remove the mask by dragging it to the ‘Delete’ icon
Make the selection by right clicking on the background layer and
[Selection from Layer > Create Selection]
Then on the tone layer right click and go to [Layer Mask > Mask outside selection]
Here you must make the hologram object [Normal] mode and the strips to [Add Grow] mode
You can also move the rectangle to clip with the layers and create the light effect
To add the floating dimension to the hologram, group the layer and set the folder mode to [Through]
Also, clear up the mask so you can easily edit it by right clicking and [Apply Mask to layer]
Now you can click the folder and transform it [Edit > transform > free transform]
And your easy hologram effect is ready!!
^_^
Adding the light and glitch animations
To create the animation for the hologram, you must create a timeline with the same frame rate as the hologram file
The playback time can be adjusted later by right clicking and [insert frame]
Now you’re ready for the Hologram Animation!
>>The light effect
The light effect will make the hologram look like it’s from an unstable light sort.
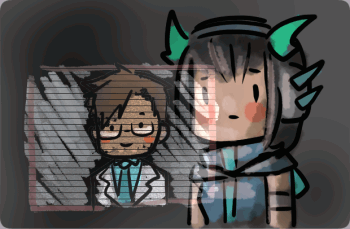
We can simply edit the opacity of the layer folder to create this animation
Select the hologram folder and enable the layer keyframe
Click on the [+] icon to view the opacity on the timeline
You can just click one point and adjust the opacity on the layer panel
The keyframe will automatically appear on the timeline, you can click and drag to adjust
Varies the opacity on the timeline
You will get a very easy light effect for your hologram
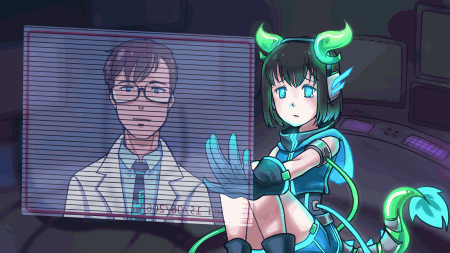
>>The glitch effect
There are two main types of glitches, color and distortion.
But both are the same concept, it will happen in a sudden and short time.
Let’s start with the color glitch. The cyan and magenta layer will appear for this glitch
I use the method of the layer color effect in this type of glitch.
Duplicate the hologram folder and disable the layer keyframe
Delete the color filter layer
On the object layer inside the folder, set the layer color for it
Repeat the step for magenta too
Tips: set the layer color label to avoid confusion
When enabling the keyframe again you will see the opacity from the original animation I’d made
Clear it by right clicking and [Delete all keyframe]
Then right-click on the point where we want the glitch to happen on the timeline and [Set at first display frame]
And set at last display frame after 2 frames
The glitch will only appear in timeline length
Move the layer folder with the ‘move layer’ tool
The keyframe will automatically be generated
Repeat the step at another point of the timeline
With the frame split like this, the movement will not relate to another block.
To make it less vivid, set it to a lower opacity than the original hologram folder down at the point of the timeline where the glitch appears.
If you also want to move the original layer, create keyframes before and after the glitch
Then select the middle frame and move the hologram layer folder
Now the hologram has the color glitch

For the distortion glitch, we use the same method as the color glitch, copy the layer, and set up the appearance time on the timeline.
But instead, use the [split clip] on the main hologram timeline.
Split the gap, select the split timeline, right-click and [Delete]
The timeline will look like this
Disable the layer keyframe and make a copy of the layers
Select multiple layers (Shift select) then free transform (ctrl+T) or [Edit > Transform > Free transform] to move the layer altogether
Use the [Polyline] in the selection subtool to cut parts of the image to make it a glitch.
Cut on the black strip layers(the layer under all clipped layer)
Easy distortion glitch!
Copy the layer for another glitch on the timeline
And it’s done!!
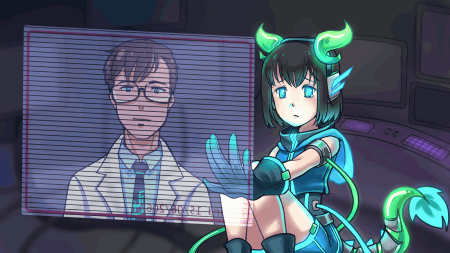
Final touch
For the final touch, I add details onto the background for more context of the image.
I made it in a simple flat color so that it does not pop out too much from the background.
Then enable the layer keyframe and adjust the opacity to make it look shaken like another light screen image.
I painted more shadows on the new multiply layer above the background to create more depth
And the highlights on the glow layer
Also, enable the layer keyframe to the highlight layer, and adjust its opacity related to the hologram opacity.
The highlight will be related to the hologram
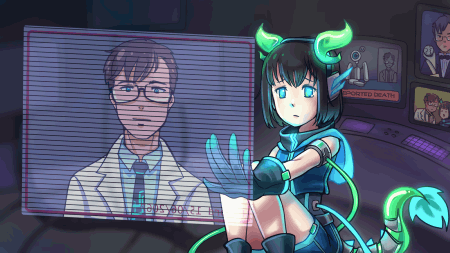
Optional: Add some bouquet light on the background for some more details.
Also, add the glow layer with airbrush paint with some blue and purple color, to add some enchantment the image
And the hologram is done!!
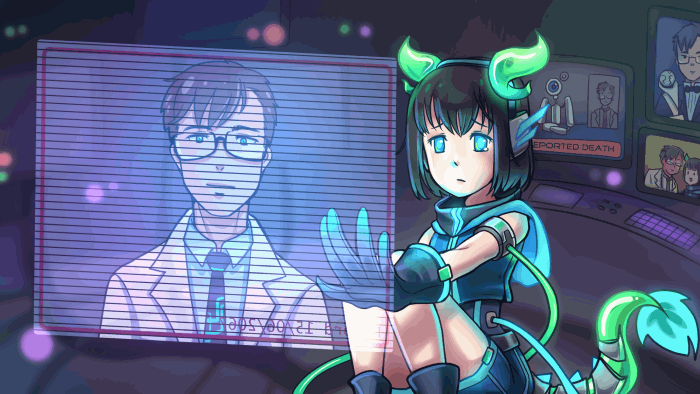
I hope this tutorial helps you get some ideas on adding hologram animations for your art <3
Enjoy animating and have a good day!!


Comentario