
Hi guys! I got this Idea a few days ago and I really wanted to create this tutorial to break down the process of how I incorporate figure tools (especially lasso fill tool ) into my animation workflow.
Hopefully this tips will help you speed up your own process and teach you to create cool VFX like energy blasts and explosions!!
Scroll to bottom for bonus on how to draw other elements!
Small Warning- this isn’t a guide for beginner animators! I'll be using animation features and keyframes so I suggest you try out some of clip studios official tutorials to understand how to get started and animate in clip studio first before diving into this tutorial.
I'm using clip studio EX since there is no frame limit but you can get very similar results with the PRO version as well!
Don't forget to like and subscribe if you enjoyed this tip!

Planning and Thumbnails
Decide what is going to happen in your scene!
Create thumbnails to decide the placement of all the objects or characters -
In what way is the energy/element moving? The goal is to create a quick rough idea that you can follow later.
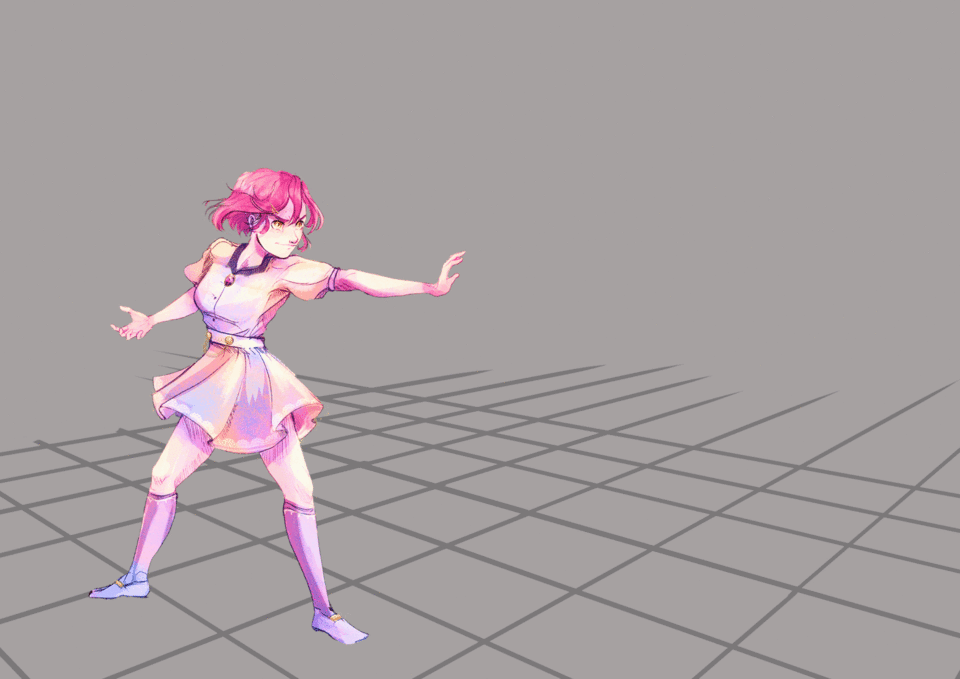
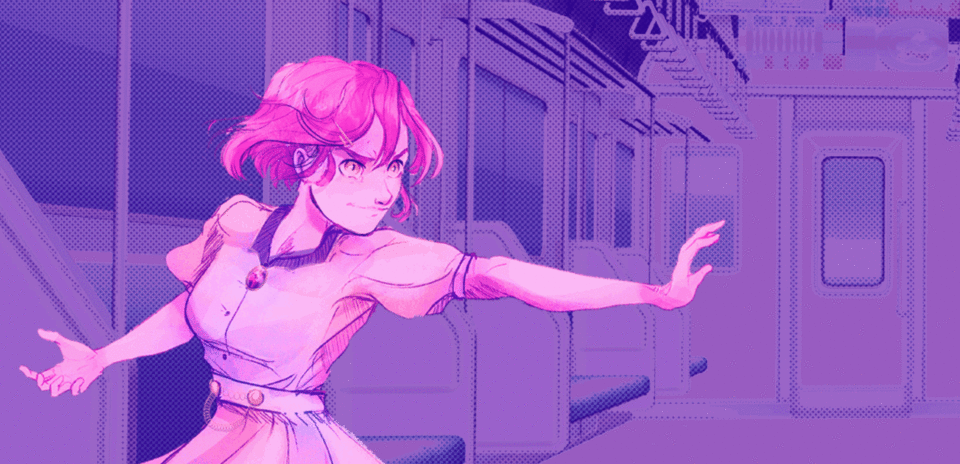
I decided to add my original character and make her fire an energy beam from her hand.
Rough Draft
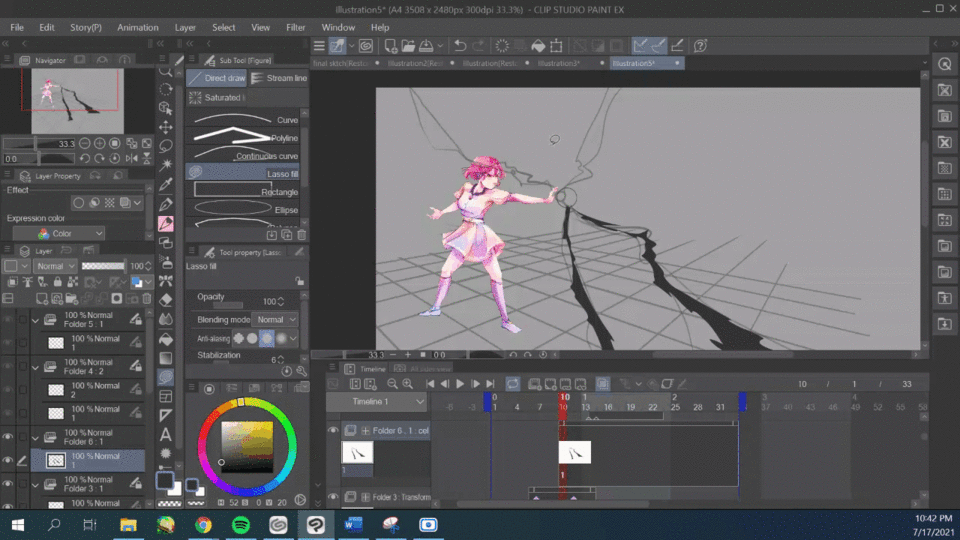
On a new canvas, create a new timeline. You can find the timeline by going to "Window > Timeline" or use the little arrow at the bottom of the screen.
I set the frame rate to 12 frames per second.
Animate a very quick rough version of the shapes you want.
I inserted my character and started sketching the energy beams and blast. I tried breaking it into simple geometric and amorphic shapes.
eventually I ended up adding a bit of dust by the feet as I want the character to be pushed back by the blast.
Pro tip: adding a ground plane or perspective grid will help ground your effects and make them fit into their surroundings.

You can even test the camera angle and movement by inserting the animation folder into a 2d camera folder.
I added a slight shake with keyframes set to hold mode and a camera pan out as the blast explodes with smooth type keyframes.
Animate with Figure tools
Lower the opacity of the draft layers and add a new animation folder. I highly recommend using a different folder for each element so you can adjust and add keyframes later.
first up we'll use
ECLIPSE TOOL
The first element is the ball of energy. To create it, use the eclipse tool. you can find it by going to "figure tools> direct draw" sub tools.
Hold shift and drag the shape for a perfect circle.
I use two key frames to make the ball start small and grow big.
drag the animation cells edge and adjust to only show on frames the ball appears.
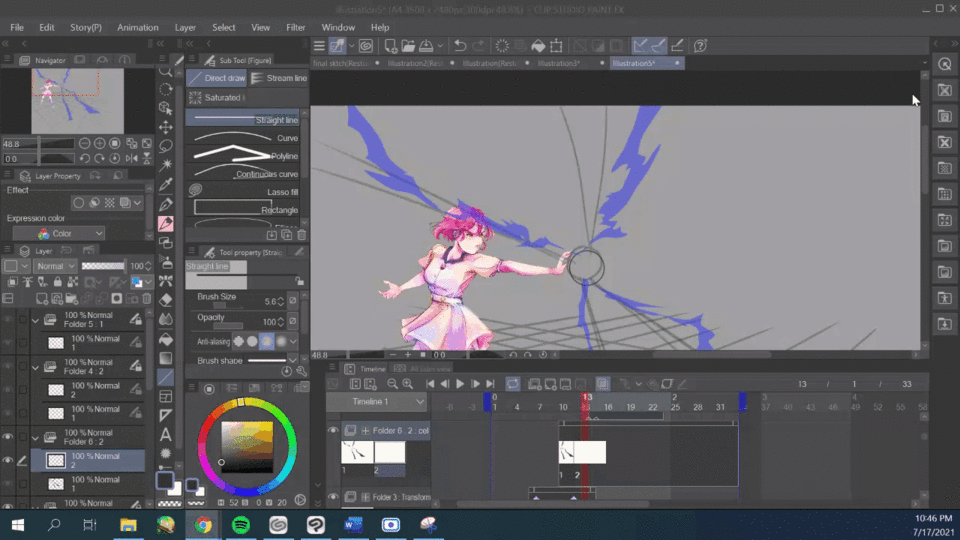
Now let's create a force field/ripple:
Use the eclipse tool to draw loops around the hand, I drew each one on a different folder. Add keyframes to make them start small, move forward and become bigger.
Progress this far:

Next let's add the light beams:
I'll use two different tools to create them- LASSO FILL and STRAIGHT LINE
Use lasso fill tool to add quick sharp squiggly line-like shapes. This tool is great because as soon as you select a shape, it automatically fills in with color.
it also works as an eraser!
On a new frame, use the straight-line tool to draw straight beams where the squiggly lines were.
use this tool by clicking and dragging it out to the place you want.
Next let's create the energy blast.
Use the lasso fill tool to create different shapes according to the draft.
I added an explosion shape and slowly made it disappear by breaking it into smaller shapes.

On a new animation folder I add more detail to the power blast using a darker color. I clip the animation folder down to the previous blast animation folder to easily draw inside the lines.
Put this two animation layers into a single regular folder.
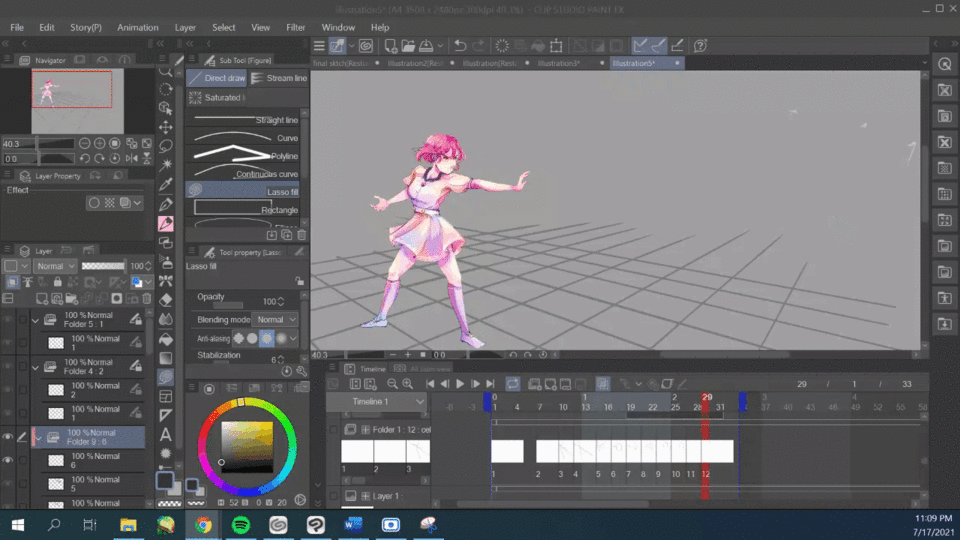
Progress so far:
Adding Colors
Next, on a new animation folder, use the bucket tool to fill in each frame
(for the ball and light beams)
After you are done you can hide the line layer or change its color to match the filling.
I also hand drew with a G pen over the eclipses them more dynamic and fizz out.
Optional: Add in-between frames and details


Add color to the effects by selecting their layers and choosing "add color" option. pick colors based on the type of element the energy is.
(for example: blue for electricity, oranges and yellow for fire, etc..)
You can put the colors together in a folder, add correction layers and an overlay gradient inside the folder for the perfect color change!
Finishing Touch
Add a glow over the shapes with a soft brush in a new animation folder.
Add a background and correction layers. I used one of clip studio's 3D options.
Fix timing issues if necessary, Crop the canvas size to wide screen proportions.
Insert everything into a 2d camera folder. add keyframes for shake and pan out.
optional: I put the character and dust layers into a single folder and added key frames to push them further into the back once the blast is fired.
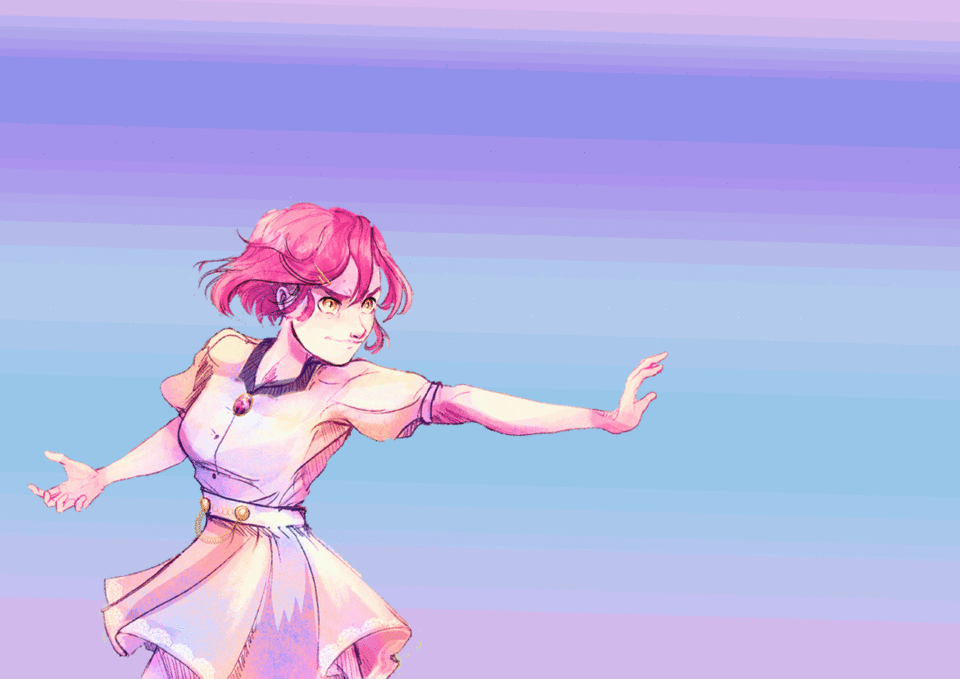
FINISHIED RESULT!
Bonus Elements
You can apply the Lasso fill method to create different elements for your animation and drawings.
Remember:
1. Block out the shape
2. Add secondary color on a clipped layer, repeat step with third color if necessary.
3. Add glow or overlay layer above
Usuarios a los que les gustó esta publicación


Comentario