How to shade skin
Introduction
Hey there, Miyuki here. Here I'm about to explain on how to shade and color skin That I'm usually done in most process of drawing. Skin by far... the easiest yet fastest part to color personally, simpler than coloring folds or hair compared to them.
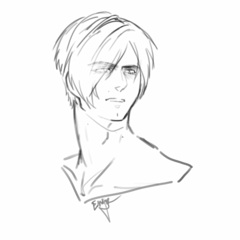
Today, we're going to have my oc and some doodles as for this tutorial as a sample. Let's begin to the first step.
1. Base Colors
First of all, we need to prepare our sketch or lineart if you are neat enough to do so. The sphere on the left would be useful later for deciding light source shown later on the video process
Select the magic wand tool with "refer to all layers" option, then click the part outside the lineart, (make sure there a no gaps present).
Click invert layer (2), Fill (3) layer with neutral gray (As shown in color wheel)
After that, we make a new layer above, clip to the "base" gray layer.
The rest, the hair was colored on the same base for the skin. The lines are colored with brown, light orange then set to multiply layer giving a softer look. I did the eyes first so it won't look too empty. To give a bit of expression to the face.
2. Shading the skin
Important! Before you shade the skin, make sure you have decided where the light source is. Since this is a tutorial, we'll just use the "front facing light" for easier explanation.
Samples of different light source will be shown below.
1. In my process, as shown in the video, I click the skin part using "magic wand". Then add soft shade by using "soft airbrush" tool on the cheek, forehead, and neck.
By this step, use the eyedrop tool , then slide down the hue from orange to red-orangish hue followed by sliding the saturation to make a bit more saturated, reddish tone.
I usually eyedrop both the base color and 1st shade to enable myself to refining the colors until i like it by pressing "X" on the keyboard to quickly change a color to another.
2. Done with soft shading, I switched from airbrush tool to watercolor tool. I used "Dense watercolor" shading the parts under the hair and neck. Blending with "Opaque watercolor" using the current shade color and base again.
3. Third part, slide the hue down then slide down and right the saturation. This time the shade would be more saturated + darker than before. As shown on the picture below.
In this step, switch from watercolor tool to pencil tool, click "Lighter pencil" tool on the parts shaded with 1st shade color on the previous part. Change the tool again to "Opaque watercolor", soften and mix with 1st shade.
4. On the darker shadows area, I chose blue-violet tone for adding the contrast shadow to look a bit more liverly.
Choose "Lighter pencil" tool, blend and mix with "Transparent watercolor"
5. This part is optional, but if you like a cool shadow to add more color/contrast, you can add tint of mint blue. Almost near to white depends on your preference using soft airbrush tool.
3. More Samples
I summed up all the other samples on 1 gif. Showing various lighting source from front to back light

Other skin color tone samples (from light to dark):
But the most Importantly, have fun experimenting with many colors and effects!


Kommentar