
In this tutorial we will learn how to use 3D figures as a “skeleton” base to be able to make our own designs more easily in 2D.
1. Creation of the file
As soon as we open the program, we slide with the cursor to “File-New” to create a blank page. We can choose the measures that we like the most, we will name the file as we want and we will click on “Accept” to give way to the new blank canvas.
2. 3D anatomy
What interests us in this tutorial is to be able to perform anatomy using a 3D base, therefore we will load an anatomical structure. To do this, we slide the cursor to one of the arrows that are located at the top right to break down the various material options provided by the program.
Next we select the 3D option. We can see that there are different options of bodies and poses, in addition to being able to modify to our liking the same structure of the body.
We select the anatomy model we like (male or female) and drop it on the canvas.
In the upper and lower part of the character we will see a series of tools that will be very useful to achieve the desired perspective and pose.
3. Modification of the 3D anatomy
If what we want is to modify the pose of the character, we will use the tools provided above and below the 3D model. In this case I have changed the physiognomy of the original design with this tool a bit, by sliding the cursor up, down, right, left and / or diagonally.
It is also interesting to know that we can not only modify the height and proportions in heads, but also their volumes, in addition to being able to modify their height in the “Height” section.
These are some examples of bodies that we can get:
Within this same option (where it says "ratio between head and body") we can also provide the body with respect to the head according to the type of body we want to make.
For a small girl of 5-6 years old, 5.5 heads (figure on the left) would be used, for a 13-year-old pre-teenager about 6.5 heads (central figure) and a 25-year-old adult between 7 and / or 8 heads (right figure).
These proportions are indicative, there may always be exceptions.
In this case I will rely on an adult body of approximately 7.5 heads.
If deemed necessary, we will modify the original pose for another one that we like more.
We will make these changes by selecting above each fragment of the body and using the lines offered in each section.
In this way we can perform any type of pose and modify it until we find the desired result.
4. Pose and final perspective of 3D anatomy
Once we have made the desired changes in the anatomy, we can look for the perspective that pleases us the most. It can be in ¾, profile, counter dive, dive and countless different options. In the end you have to consider what kind of design we want to do; It is not the same to want to conduct a study of a character, where it should be easily seen, than an illustration that reflects dynamism and perspectives (as in a "splashart").
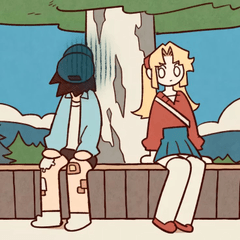
In this photo you can see some examples of poses to carry out different studies:
In this case we will focus solely on the study of the character. To do this we will create a pose that is located frontally and slightly placed in ¾ to create dynamism and naturalness to the concept.
Curious fact; We can also use 3D anatomy to make a complete study of the character in different perspectives and thus be able to easily transfer it to the final 3D modeling.
5. Draw our 2D concept
Once we have the chosen posture we will proceed to carry out our 2D design using this 3D anatomy base.
To do this we will create a new layer by selecting the cursor on the right inside the "Layer" option.
Once we have the new layer created it is important that it is above the design made in 3D to improve the visualization of the strokes that we want to interpret in 2D. For this we will lower the opacity of the layer where we have created the 3D anatomy up to approximately 50% (or less if necessary).
We can start working on the sketch of our character in the new layer. To proceed with the first strokes, I am going to use this type of pencil called “Real Pencil”, since I am interested in the textures it has.
Thus the first strokes with this brush will be fresher.
First I made a tracing of the 3D anatomy modifying small areas that I was interested in marking more or less.
The fact that they want to make X number of sketches is subjective. For my part, I have opted to make 1 sketch, 1 outlined more neat and 1 figure with simulation of clothes (I make it red to differentiate it from the black lines).
If you have noticed, from the second sketch I used a textured pencil called "Darker Pencil". This type of tool helps make the strokes look cleaner.
6. Breaking down the anatomy - Basics
In 3D design we can see some lines that will help us a lot to carry out the realization of our character, such as the one that crosses the navel vertically, the strokes that have curves and define volumes, etc.
Even so it is very important to have some basic knowledge of how to draw the anatomy and to be able to dispense in some cases of the 3D structure, so it is convenient to break it down to understand it well.
6.1 Proportions in heads
Before you start drawing our character, you have to be clear about how old or proportions you are going to have with respect to your head, since this will give you a completely different personality and character or another.
For a child we will make fewer heads (height and proportion) compared to those of an adult.
6.2 Head
For the realization of the head we will draw some strokes that will help us know how the elements that compose it are distributed well: Nose, ears, mouth, eyes, etc. Keep in mind that there are areas that maintain proportions of each other, such as ears and nose, eyebrows and nose, separation of the eyes through an imaginary eye in the center, etc.
6.3 Torso
Drawing a torso can involve the use of several ways to understand it correctly. Initially I use square shapes to see its volume and perspective, in addition to taking into account the curvature of the ribs, the placement of the clavicle, defining the height of the pectoral, etc.
The next step could be to try to transform these elements into more rounded shapes to see how the volumes would work in this case.
We can also incorporate the pelvis, since it has a close relationship with the torso and the spine that joins both.
6.4 Tips
Keep in mind that to draw the limbs, the arms and legs are made up of bones; some longer than others.
For the arms, the humerus is longer in proportion to the radius and the ulna. For the legs, the femur is longer compared to the tybic and fibula.
We can also incorporate the simplified muscles that are more important.
It is important to consider the ankles and wrists (in this case, I draw it with rounded shapes).
6.5 Hands and feet
The hands and feet can become as expressive as the face or body, so it is very important to know how your bones and tendons are structured to correctly interpret these postures.
In this example I show a set of hands and feet in different poses with differential colors to break down the phalanges and important areas.
7. Clothes and their folds
Clothing is an important characteristic to define our character and for this we must be clear about what type of textures, fabrics and shapes it will have.
In this character I wanted to interpret a baggy clothes since it is an explorer and it is more common to wear comfortable clothes to move without problems.
In loose clothing, more folds are easily created than in a tight one. In this case we can see that prominent folds are formed in the chest, waist and pelvis. Folds are also formed in the gloves because of the joints and phalanges of the hands. In the socks folds would also be created, since the tissue falls by gravity and tends to wrinkle.
7.1 How to draw folds
As we have said before, the folds are formed according to how loose the clothes are, the shapes they have and the area in which they are located.
The shapes that can be drawn to create these folds are many and different from each other, but what you have to keep in mind is that they are drawn in the same direction, in addition to having gravity in mind (if any). It is also very important to consider the structure of our character's anatomy.
I enclose examples of how they could be done:
8. Outlined
It is very common to use the one outlined in the final illustrations according to the style that you want to interpret. Normally I use the outline in most illustrations to detail elements or to give them more or less importance.
A thicker line is usually used in areas where intersections are created, shaded, elements close to the viewer or to separate zones.
In my case, I draw thinner lines for minor areas or sensitive areas.
9. Final character design
Here you can see the result of the character made clean with gray and basic shadows.
A little bit about me
I am Raquel Arellano, Concept artist, illustrator and teacher.
I attach the social platforms on which I publish my work:
Instagram: https://www.instagram.com/rarellano_art/
Twitter: https://twitter.com/rarellanoleo
Artstation: https://www.artstation.com/rarellano
Twitch: https://www.twitch.tv/rarellanoart
See you in the next tutorial! 😃
Users who liked this post


Comment