HOW TO DRAW FLOWER FROM YOUR PHOTO
Hello everyone! It's me again, meomeongungu!
Today I'll show you how I draw flowers based on photos. It's easy and you can make your own collection of flowers to use in your drawing.
1. TAKING PHOTO
I often take photos from flowers I see everyday: gift bouquets, flower vases at home, flowers on the road/park... It's best to use photos you have taken yourself because photos from the internet may need permission to use (and in some cases you can't use them for reference at all).
These are some of my photos, taken using my iPad. You don't need them to be perfect, just need a clear image with readable color. I'm not good at taking photo anyway.
Even this photo of a beautifully decorated cupcake can be used as reference!
There are some free stock image website on the internet you can use. Be sure to read the terms & conditions before using them.
2. TRACING THE FLOWER
Import the flower photo into your drawing file. If you only draw a flower for future use, make the file large enough so they can be resize later without blurring.
Resize the photo as you see fit, using the handles (if your photo is rasterized, use Ctrl + T to resize).
Create a new layer on top of the photo. I prefer vector layers for lineart.
Lower the opacity of the photo so you can trace the flower easier.
I use a pencil brush but you can use whichever you like.
I also draw the details like the leaves' veins on a separate layer because I may not need them, depends on how I color the flower later.
Using vector layers has many advantages. You can:
- freely move and resize each line.
- use the vector eraser which save time.
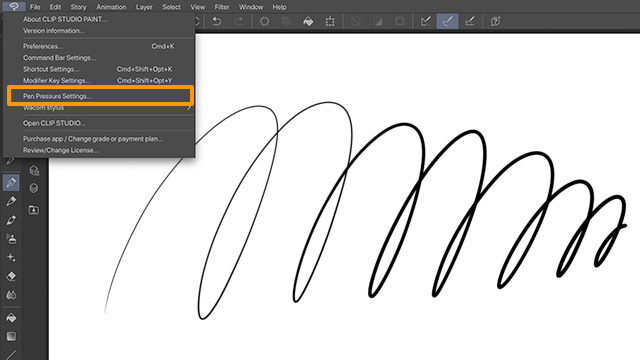
- change the line width with the Correct line tool (shortcut key: Y)...
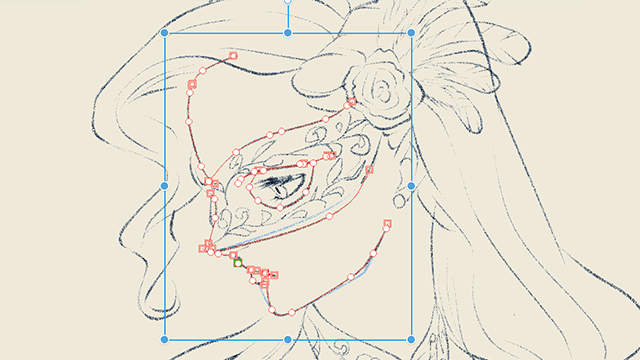
... or using the Object tool (shortcut key: O), which changes the line width of the entire layer.
- change the brush shape (and color) using the Object tool.
Line shape, width and color customization helps when you use the flower for different projects.
3.1. COLORING - PREPARATION
- OPTIONAL PART (but essential)
You can begin coloring the flowers however you like. But if you want to use them for later projects, I strongly advise you to do this:
Create a new, normal (non-vectored) layer below the lineart layer
Color all the flower with white (or your preferred background color) at 100% opacity
You can draw a continuous line of white then use the bucket tool to fill, or use Close and fill if your lineart is closed already.

Note: if you draw the white line then fill, remember to turn on Refer only to editing layer, or turn off all reference layers.
Do the coloring on a new layer(s) then clip it onto the white layer, or Lock transparent pixel of the white layer and color on it.
That way you can use it on another project without transparency mistakes.
REFERENCE PICTURE
You can open a Sub View of the original photo for reference.
3.2. COLORING: BASIC DIGITAL STYLE
Pick a base color for each part and draw each color on a separate layer. Clip all of them onto the white layer (if you don't use the white layer described above, then just choose Lock transparent pixel on each layer). Lock transparent pixel if needed.
In this example I have pink, red, yellow and green.
I opt for the upper left light source regardless of the light source in the photo (because it's my most used light source in my drawings).
Pick a slightly lighter/darker color than the base, then draw a gradient on each base color layer using a soft airbrush. It does not need to be precise, just follow your chosen light source and observation.
ip: if you don't know which color to choose, pick the base color. Then on the color wheel, move the circle to the upper left + the rectangle up for a lighter color; move the circle to the lower right + the rectangle down for a darker color.
I continue to paint different color values on each layers, using the oil paint brushes and watercolor brushes in Sub Tool [Brush]. I add more layers for the veins of the petals and leaves (turned off the lineart of the veins because I feel using color only is better).
Add the white spots on the petals with a crayon brush. I lower the opacity of the layer so it won't stand out too much.
To mimic light and the transparency of the petals, I add another layer in Screen mode and use a big air brush to paint a warm white color onto the upper left parts of the image and a cool white onto the lower right part of the image. Remember to paint very lightly, or lower the opacity of the layer afterward.
The painting looks good already, but the black line stand out too much. Add a non-vector layer on top of it, clip it onto the lineart layer and paint the line with color similar to the painting below it.
Put those two layer into one group, duplicate the group (ctrl + C then ctrl + V), merge the group into one layer. Choose Filter > Blur > Gaussian blur...
Play around with the opacity of the original line layer and the blur layer as you wish.
Finished image:
3.3. COLORING: OIL PAINT TRADITIONAL STYLE
The steps are the same as the basic digital style above, but try to use broader, rough strokes with the brushes in the Oil paint Sub Tool. Try to use fewer layers (if you are confident, use 1 layer). The lineart only serve as a guide to color; turn it off in the final rendering.
Base color with rough lighting:
Color each petal, using the lineart and original photo as reference:
Add screen and overlay layers to lighten/darken certain areas, using a soft airbrush:
Turn off the lineart. If you find the white layer's border is too rough, add another layer below it or unlock transparent pixel of the white layer and paint on it using the color nearby.
Finished image:
3.4. COLORING: COLORED PENCIL STYLE
Turn the base white color into an warm white to mimic drawing paper's color.
Change the color of the lineart.
Color each petal with the Real pencil in the Sub Tool [Pencil]. Add global shadow color, I choose light blue in my case. I also use the crayon brush to add big strokes of lighter colors on a separate layer.
Add paper texture for a realistic look. Be sure to choose Overlay Texture button on the Layer Property panel.
Fine-tuning the lineart color. Finished image:
3.5. COLORING: WATERCOLOR STYLE
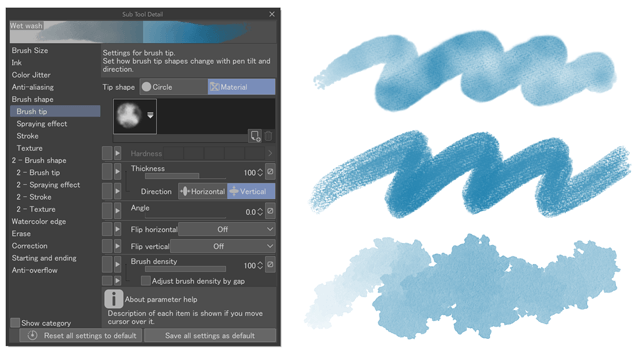
Choose Sub Tool [Pencil] > Real pencil > Tool property [Real pencil] > Sub Tool Detail > Brush shape > Register to preset.
Now you can turn any vector line into pencil line. Choose the lineart layer(s), Object tool > Brush shape > Real pencil. Rough pencil lines are more suitable for watercolor style. I also adjust the brush size and turn the line color into medium grey.
Create a new layer, use the Round watercolor brush to color the base. Try varying the pressure for better effect. Tip: if you press hard enough you'll create the watercolor border effect.
If you can't color a large and complex area in one go, change the Blending mode from Multiply to Replace alpha. Switch back to Multiply afterward to achieve the glazing effect of watercolor.
Lock transparent pixels of the color layer then use a soft airbrush to add gradient.
Unlock transparent pixels. Define shadow with Rough wash brush; erase the watercolor border with Textured blender. Lighten too dark area with the Watery brush (this act as a light, "wet" eraser).
Add detail with Round/Flat watercolor brush. The Flat watercolor brush create a harder edge than the round one.
Try to get the watercolor edge lines up with the pencil line. For example, I color the petal using the Flat watercolor brush:
... then use the textured blender to lighten the outer of the petal, blending away a part of the hard edge:
It's tempting to change color while you draw, but since the Watercolor brushes have Multiply Blending mode, doing this may make your color looks muddy. Instead, whenever you want to lighten color, lock transparent pixel on the coloring layer then use the airbrush to draw. I use this technique to add a light yellow in the middle of each flower:
In short, build the "opacity" value of your drawing with the (multiply) realistic watercolor brushes; change the "color" (hue and/or saturation) with lock transparency + airbrush.
For the leaves, I try the soft bleed brush. It create a nice wet effect.
Add details with the Round/Flat watercolor brushes.
For the flower to pop out, create a new layer below the white layer and use the Soft bleed brush + Watery brush to draw a simple background.
The flower is nearly finished. You can add white droplets (mimicking masking liquid) or salt effect if you want. Create another layer on top of everything. Pick white color/drawing paper color. Use Sub Tool [Airbrush] > Running color spray for salt granulating effect and Droplet for masking liquid droplets effect.
Add rough paper texture for an even more realistic look.
Finished:
3.6. BLACK AND WHITE MANGA STYLE
Use the Sub Tool [Operation], turn the lineart into an inking brush of your choice. I choose the Milli pen.
Duplicate the original photo and clip it onto the white layer at 100% opacity. Right-click (or long-press on an iPad) and choose Rasterize, if needed.
On Layer Property panel, click Tone icon. The image will be turned into screentone in an instant.
Go to Edit > Tonal Correction > Brightness/Contrast... (I use a shorcut I created on my iPad). Change the sliders till you are pleased with the result.
You can then use any brush to draw directly on the tone layer, darker color results in darker tone and vice-versa. I use a soft airbrush to lighten the flower to make it stands out from the stem.
Add white droplets to mimic the pollen.
You can also mess around with the Layer Property to change the tone's dots to the type you like.
The tone make the line harder to see so I thicken it with the Correct line width tool.
Add some black lines on another layer and the image is finished.
That's it! I've showed you how I use photo to draw flower, in many styles. You can use these flower as material for your brush or simply import them to your other drawings. Thanks for reading such a long thing, and forgive me for any mistake I may have made.
If you like this tutorial, visit me at my pages! Let's have a chat:D


Comment