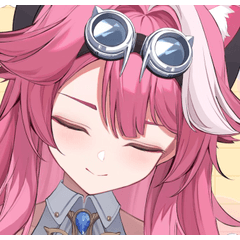
Dramatically show illustrations with shadows and highlights [Video]
Introduction
It will look beautiful if you consider both shadows and highlights when painting the illustration.
Here we will explain how to paint shadows and add highlights.
Each hair, clothes, and skin will be applied differently.
If you want to watch the video in languages other than Japanese, please watch the subtitles on → automatic translation.
1. hair
First, I will explain how to apply hair.
Not only the hair, but also "Clipping in the lower layer" is used to paint.
Click the icon in the upper left of the layer window.
It is OK if a red bar appears.
Hair is painted with the image of shadow and gloss.
I will explain with a simple diagram.
(1) First, apply the tip of the hair, the area near the toothpick, and the inner part. (Red part)
② Next, draw the luster. Apply only to the back of the head.
Applying it around the middle of your hair will give you a good balance. (Purple part)
③ Finally add a thin shadow. It makes a delicate impression. (Green part)
Shadowing is now OK.
Next, I will highlight it.
(The shadow is hidden.)
① Draw a line around the top of the forehead.
② Partially erase with a transparent color or extend the color with a sharp watercolor brush.
(3) Use "Lock Transparent Pixels" and apply a bright color to the light source side (right side) with an airbrush.
It looks like this when the shadow is displayed.
That concludes the highlight.
Finally, use an airbrush to apply gradation to the bangs.
It gives the impression that your hair is transparent.
It is a layer structure.
(From above
highlight,
watermark,
Shadow,
undercoat)
This is the end of applying hair.
2. Service
Brush clothes with a soft brush.
I think you should customize and use opaque watercolor.
(Uncheck the color mixture of the background and use it with a brush density of 23.)
Clothes
(From left)
"Paint as it is",
"After painting, erase with an eraser to make a curve",
"Erase top or bottom with transparent color after painting",
"Place a dark color on the boundary between light and dark",
I will combine 4 patterns and apply.
Apply the blazer shadow.
Apply while changing the opacity of the brush.
The wide area is thin and the narrow area is dark.
I feel that adding a thin shadow near the seam makes it realistic.
Apply the shadow of the head and tie. Apply with a darker color.
Socks look like this. After applying
to erase. I will also paint a little shadow along the contour.
This ends the blazer and socks.
Apply one piece. The procedure is roughly the same, but here we use the multiplication layer only for the light shadows.
Shadows are usually layers.
The pleats are painted in a light color along the pleats. I feel like applying it while leaving a border.
Dark color and shadow. Apply on the back and on the pleats.
The tie is a normal layer for both light and fall shadows.
This completes the dress and tie.
3. skin
Apply on the skin. I paint the shadow with a little purple color. I will use a darker color because I will add a gradation to the undercoat later.
I paint my hands. The inner hand painted the whole with light purple in the image of aerial perspective.
The front hand was painted pink.
This is the end of the skin.
4. pupil
Paint your eyes. I will briefly explain.
First, paint white eyes and shadows. The white of the white eyes will be calmed down by changing the brightness to a little white.
Airbrush the ends of the eyelashes.
Paint your eyes. Put a bright color on the bottom.
Draw a pupil etc.
Draw the reflected light. The bottom is slightly blurred.
Draw a glitter on the additive (emission) layer. I used blue. It makes your eyes moist.
Turn on highlights. Draw it as if it were a little triangle.
The eyes are now complete.
5. Processing
At the end, we will make it a little dramatic.
First is the processing of hair. Fill the whole with a new multiplication layer.
At this time, put the multiplication layer under the highlight.
Create a new normal layer and put a strong highlight on the light source side.
(Please put this layer on top.)
It is a layer structure.
(From above
Light source highlights,
highlight,
Overall shadow [multiplication],
watermark,
Shadow,
undercoat)
Hair processing is finished.
Clothes are almost the same procedure,
Here, shadow colors are added to the borders of highlights.
The highlights are very noticeable.
As for the one piece, I put a highlight around the red circle.
This completes the processing of clothes.
Apply only the skin with a normal layer instead of multiplying.
Use the gradation tool to paint.
Select "Drawing color to transparent color"
① Drag from upper left to lower right
② Drag from the lower left to the upper right
To do.
If you add gradation, you can dye your cheek
I put in highlights.
I think it's a good idea to put the highlights on your face in triangles.
If you insert a bright line along the contour on the shadow side, it looks three-dimensional.
Layer composition.
(From above
Back hand,
Shadow,
highlight,
Shy line,
A line along the contour,
Cheek dyeing,
The front hand,
Gradation,
undercoat)
This completes the skin processing.
The hairpin was roughly painted with 2 layers.
6. Finish
It was completed! !!
A version with 10% blue overlay on the background and people, and 36% light blue on the light source side.
Thank you for reading this far!
↓ Twitter ↓
↓pixiv↓


Comment