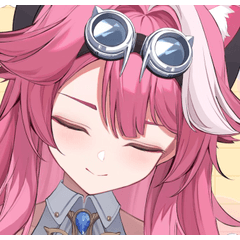
How to add a shadow to an anime-style illustration [Video]
I will explain how to add shadows for anime-style illustrations (paintings with crisp shadows).
(I will not explain this time because the eyes are painted differently. In the video version, you can see the coloring process so if you are interested please click here)
If you want to watch the video in a commentary other than Japanese, turn on the subtitles and watch it with automatic translation.
Since there is a chapter in the video summary column, you can jump to the place you want to watch by clicking.
Introduction to lizards
There are two types of lizards: lizards that give the object a three-dimensional effect (shadows) and lizards that cast objects on the ground (shadows).
In the case of thick paint, the shadow is often made darker, but in the case of anime paint, both colors are painted with the same color.
The simple idea of how to add a shadow is to "attach to the opposite side of the direction in which light exists."
If there is light on the left, it will be on the right, and if there is light on the top, it will be on the bottom.
If you remember this much, I think it's good for now. (Details vary depending on the shape of the object, but this is a rough idea.)
1. Apply the skin
Apply on the skin.
Since it is a clear paint, I will paint it with a round pen and a paint tool.
First is the light source setting.
Depending on the illustration, this kind of pop impression is
I think that it is easy to apply if you think that there is light in the direction the character is facing.
This illustration is looking to the right from this side, so
I will paint on the assumption that the light is coming from the right side to the upper right side.
Apply drop shadows on the bangs, shadows on the head, shadows on the clothes, etc.
Apply a little shadow on the hand.
I feel cute when I apply it in pink.
It is wrong to consider the shadow of the wrist here, the right light source
Because "the palm is facing left" and "the shadow range is narrow"
I thought of it as the left light source and cast a shadow on the right.
If the illustration is not realistic, you can change the position of the light source depending on the parts.
Apply air grade to cheeks, fingertips, and elbows, put cheeks on the cheeks, and highlight the nose to finish the skin application.
2. Paint clothes
First, apply the shirt.
Apply a large shadow on the head (red circle) and a small shadow on the shirt (blue circle).
Small shadows are placed in a triangle along the line drawing, or with the image of adding a drop to the tip of the line drawing.
Let's paint all socks on the back side. It is sharp.
Also put a drop shadow on the bent part of the knee.
Other parts are also painted by combining "large shadows" and "small shadows".
I got my clothes painted.
The highlights of the skirt and ribbon should be painted with the triangle in mind.
3. Apply hair
The last is hair.
This is basically the same as with clothes, but it has a small, delicate shadow.
The shape of the shadow is conscious of a thin triangle.
It will be beautiful if you align the direction of the point where the shadow is sharp with the tip of the hair and the toothpick.
I think it's nice to combine a shadow that tapers upward and a shadow that tapers downward.
A large shadow is added only to the back of the head to bring out the sharpness.
I think that adding a drop-shaped shadow near the toes of the bangs gives a three-dimensional effect.
Put highlights and grade on the bangs to complete the hair.
4. Finish
I used this material for the background. ↓
Process ↓

This is the end of this course!
Thank you for reading this far!
In the video version, you can see the rough line drawing process a little, so please take a look.
↓pixiv↓


Comment