
🎥 Video
Into
Hello there, this is Tamil. Today I wanted to talk about Vector inside Clip Studio Paint. It is a very powerful tool that comes in handy for any line art. I will go over major tips and tricks that I have found useful in my line art workflow.
Watch the video if you prefer watching over reading. I am a visual learner, so I like to watch videos too :)
Let's get started!
What is vector?
Before getting into it, let's just briefly go over what is vector. In short, vector uses math to show colors and line.
Don't worry, you do not have to do any math to use it. Just remember that Vector can be enlarged at any size!
If you have 1080x1080 pixels, you can make it 25000x25000 without losing any quality. It's great choice if you want to print your work for manga for example. It's also great for logos.
Here I have a simple drawing. Left is vector and right side is raster ( normal drawing ). If we make it bigger, raster image will start to pixelate = lose quality.
If vector is so good, why not use it for everything?
Main problem with vector that it has to be very precise. You can't get "sketchy" with it. Also painting is a bit of a problem. Vector has a hard time with transparency, so we can't use it to mix color very well. ( There are work around, but it's a bit time consuming )
Start with layers
The first thing you need are vector layers. How do we get them?
You can go to layer -> New Layer -> Vector Layer
or
In the layer panel, you can find the little cube next to new layer button. That will make vector layers.
Once you make it, it is easy to find them in your layer panel. There will be a little cube icon next to it. This means that anything you draw here will be vector based.
Draw and edit
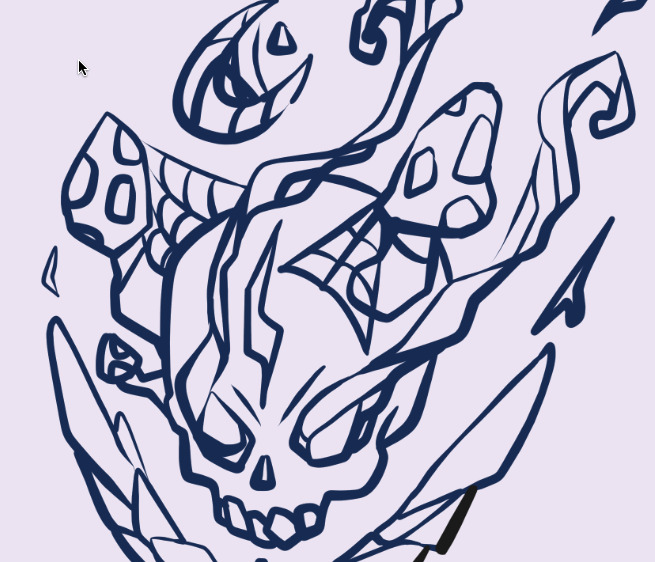
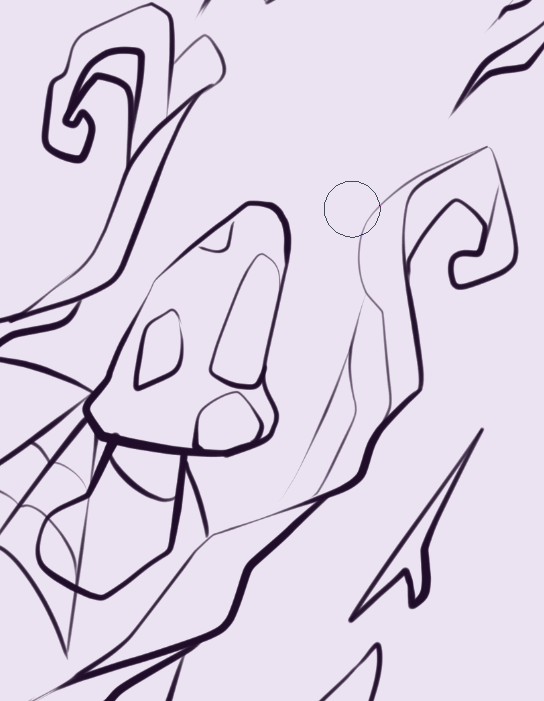
After that you will be able to use almost any brush you want to start drawing. I usually just use my own ink brush, but even standard G-Pen will do amazing. I did a simple sketch with ink to demonstrate it ( timelapse of it will be in my video on youtube at the end )
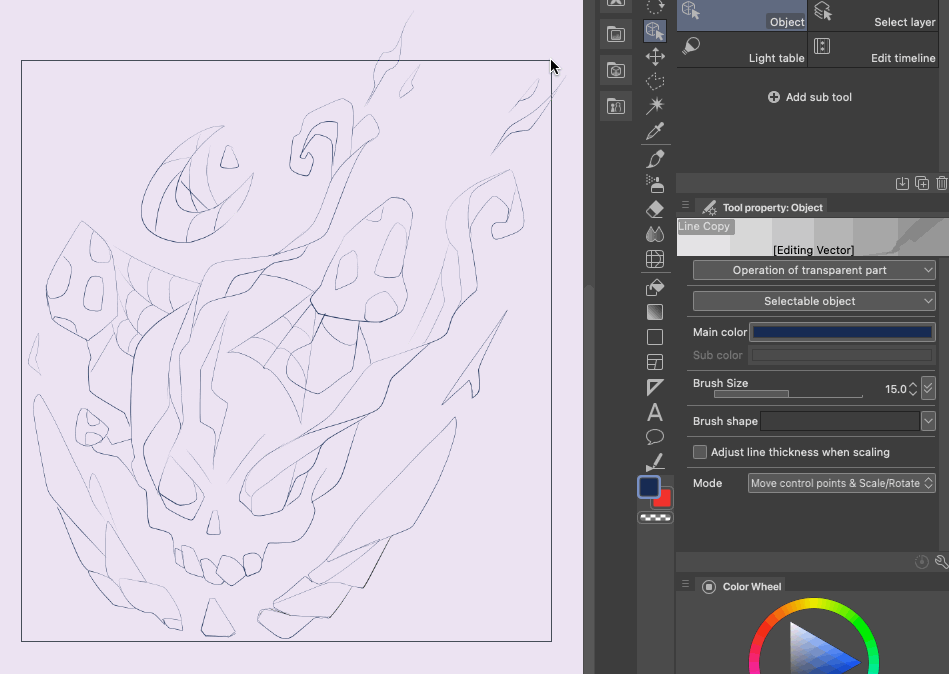
So once we have this, we can manipulate our line work. To make any changes to vector line art we need to use Operation tool!
Make sure you have Operation -> Object tool selected. As per usual you also need tool property. They are usually open by default, but if you cannot find it, then just go to Window -> Tool Property.
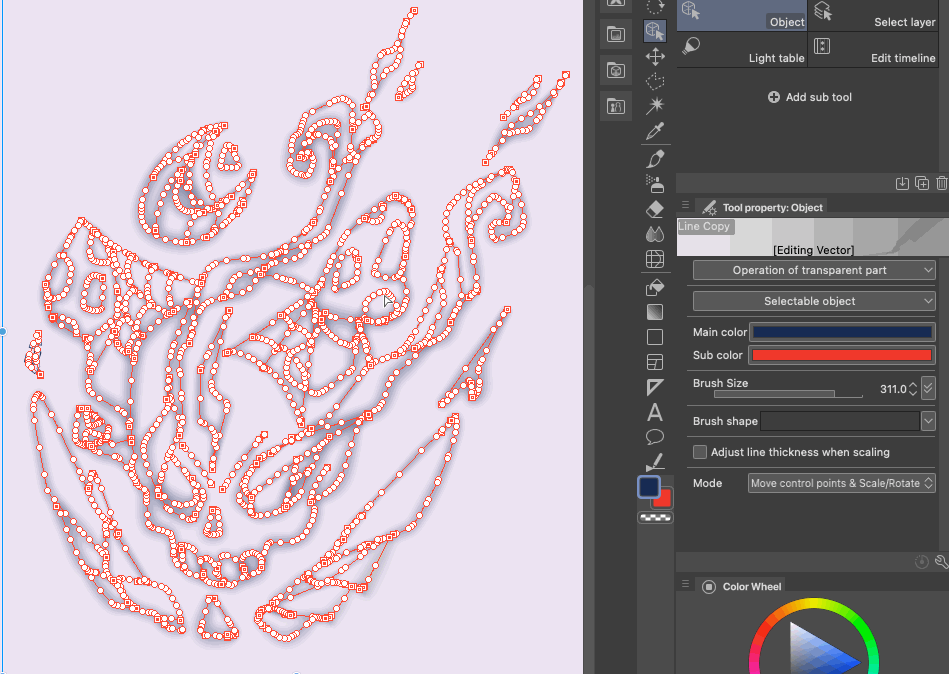
Once you have the tool selected, you can click on lines to select them. It will allow us to see points that make up the line path.
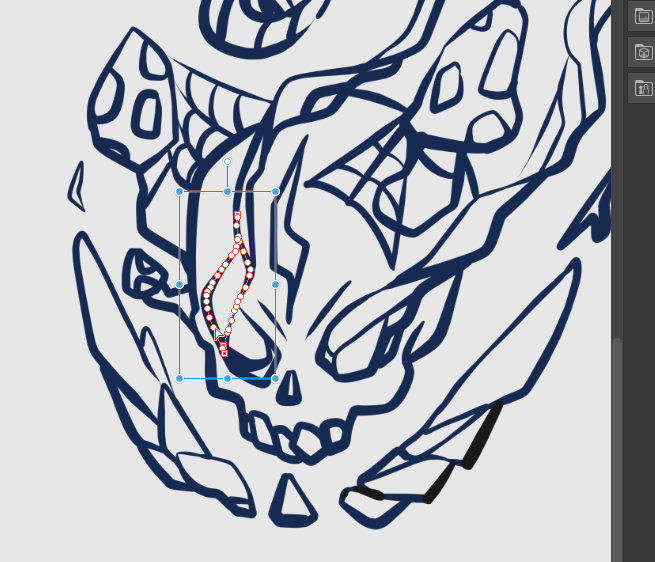
If you want to change size of entire picture, you will find hard to select everything one by one. There is a small setting you need to change to fix that.
This will allow us to drag select a lot of paths all at once.
Now we can scale, move, and rotate any path we want with selecting.
What are some other neat tricks we can use for vector?
Change Size for all strokes
A cool trick is that fixing line thickness is now possible for any time.
We can make it thicker or smaller with no extra work. Just write down the number that works for you and see magic happen. Just select it with object tool and use Tool Property later.
Change line art Brush
You ever drew something you like, but wish you used a more textured brush? Or maybe the opposite, something more smooth and simple?
It's not going to be a problem anymore! In tool property we can change brush shape to any other preset.
What if the brush we like is not registered yet? Well it's pretty simple to add one.
1) Select the brush you want to add.
2) Go to advanced brush settings.
3) In Sub Tool Detail, you can find Brush Shape section. In here just click "Add to presets".
Now the brush should be registered as a preset.
4) Final step, be the coolest artist in the world :) Experiment with brushes and see which work better or worse for your final image. I really like sketchy and pencil feel when I am working with my art. Hopefully this will help you get creative with this.
I also have a separate tutorial about brush settings in case you never opened setting before.
Liqufy / Pinch line
Vector can be a great tool, but there is always a tool for other tools :D
There is a section in CSP that will help us make vector work even better.
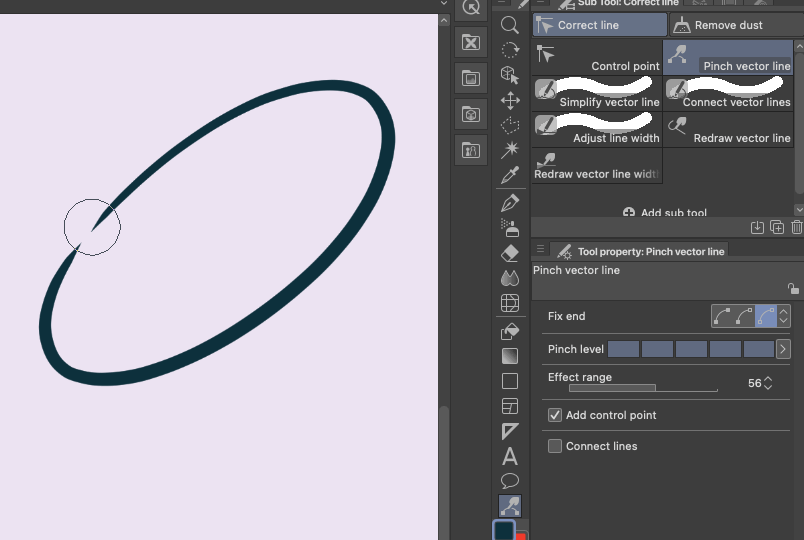
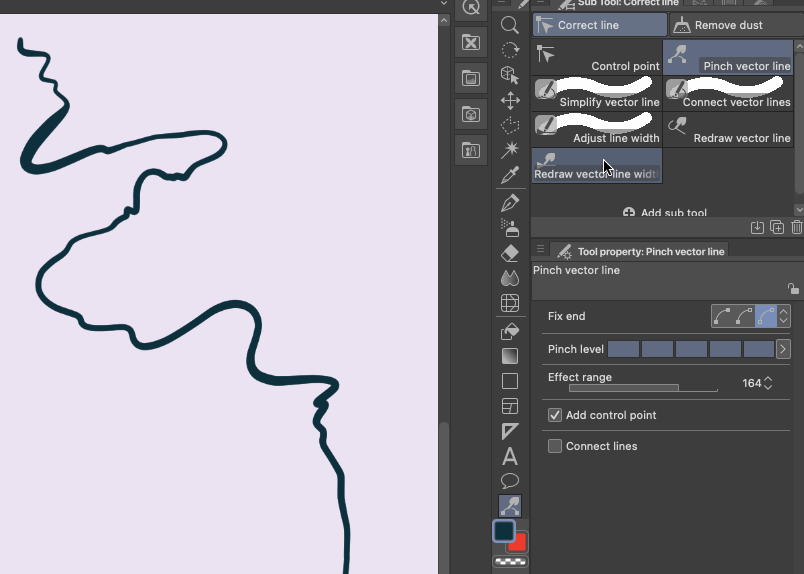
Shortcut Y. The tool is Correct line!
There are many tools in here, but I like to use only a few.
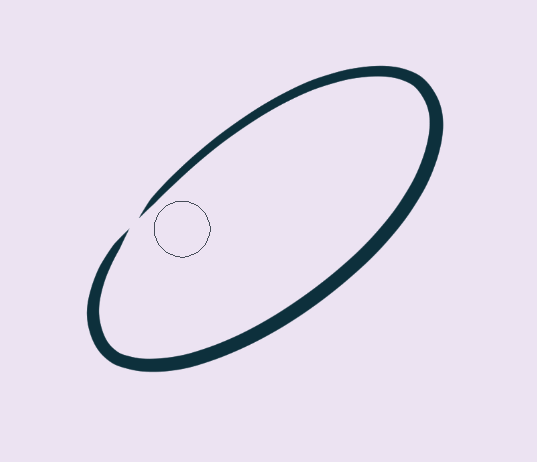
The first one is pinch vector line.
What does it do? Well think of it as a very fancy way of saying "Liqufy", but only for vector.
I really like this tool. It helps me fix small mistake if I am ever messed up my strokes. It is especially useful if you ever messed up your circles or ovals. It is a great way to fix it, instead of making a new circle infinite amount of time.
You can adjust size and pinch level in Tool Property. Pinch level will make it work stronger or lighter. Size will affect the area of pinching. I suggest separating lines into different layers in case you looking for some specific adjustments.
Another thing to watch out for is mode that is being used. There are three main ones:
1) Fix both ends.
2) Fix either end
3) Free both
Connect lines
If you made a line that is hard to move, a lot of times it is because it is disconnected.
Let's say we have a line, and we really need to move it on that corner. A good way to fix this will be connect line.
Just move it closer together. After that select connect vector lines. This way you can make one big circle and edit it after.
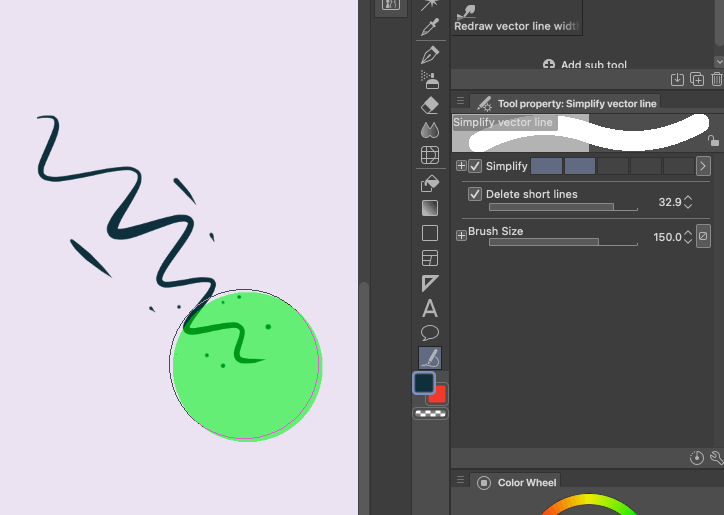
Simplify / Clean up Lines
What if our shape is very complex? A lot of times the lines we make have lots of points, which makes it super hard to edit it. It is also very taxing on our slow computers. What is the solution?
Simplify vector line.
The tool is very simple. Use the simplify slider to reduce amount of points. ( Do not go too far tho, as it will start distorting your shapes a lot )
Delete short lines is also great feature to have on. If you accidentally made small strokes that you do not want to be on your canvas, simplify line will delete them for you. A great way to clean up.
Line Weight
Another great feature for vector is going to be line weight. Many artists know that in order to make line art look more interesting you can add thicker lines where the shadow is. Make lines thinner when there is light.
Let's say we have a simple sphere. We can use the line tool to make it thinner or thicker.

There are different modes that will help you getting the results you want.

Using narrow will make the lines thinner. Bit by bit, we can add more variety to our final look.
If I had to draw that manually, it would take me hours of trial and error to get it right. That is why I love using these tool. They make everything faster.
I have used it in my final drawing to make it look more interesting. Thicker lines for shadows. Thinner for lighter parts.
Vector Eraser
Another great tool is vector eraser. It makes things very easy when making good line art.
There will be a small checkbox at the bottom that says "vector eraser". That is the most important part.
A lot of time we want to overshoot our lines to make it work, but then we have to erase behind manually. I will give you an example.
When we draw a cube we want to overshoot out lines to make sure it flows correctly. For this we can use our magic vector eraser.
Make sure you pick the second mode that says " erase up to intersection ".
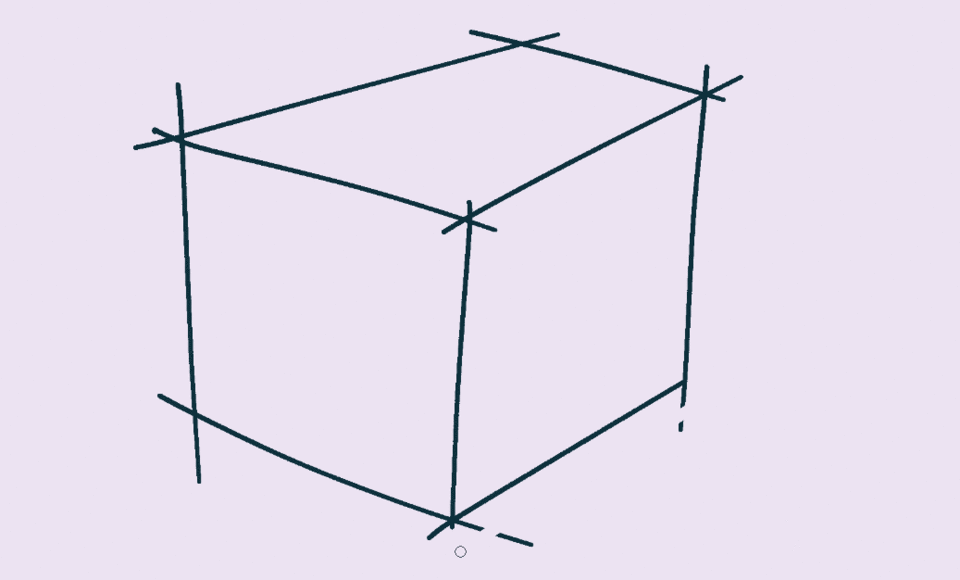
Effortlessly, we can start deleting lines that went way too far. That is the most amazing feature I have ever used. I have yet to see it somewhere else.
Other modes are pretty simple:
Erase touched areas - it will work as a regular eraser
Whole lines - it will delete entire line even if you touch it slightly.
Secret tip?
Last but not least, my favorite part about using vector is Fill tool.
What? Fill tool?
Well yes. Vector line makes it super easy to create complex line work that is always clean. When we sketch, there is a lot of messy lines that get in the way, but vector fixes that.
A small thing to keep in mind, vector does not allow to use certain tools. In this case. fill has to be made with Raster layer ( usual layer ).
In fill section you will find "Enclose and Fill". Makes great for filling in line work of any kinda. If you have a very complex piece. You can fill it in seconds!

After creating this fill. Just use a clipping mask.
Make a new layer, and click the button that says clip. It will only allow us to paint inside that layer.

It's kind of like a mask, but way better.
The end
Thank you for reading. I hope this was helpful.
The only thing I asked is to like and share my video if you found it useful. Comment what was your favorite part :) It will mean a lot to me.
Happy painting!
My art links:
Users who liked this post


Comment