
INTRODUCTION
I’m a self-taught comic artist, and I have worked on several webcomics for 3 years now. Today, I’m going to share basic steps and simple tutorials on coloring your own comics, using Clip Studio Paint. Now, plug in your tablet and open your Clip Studio, and let’s get coloring! :D
(Take Note: Device using is MacBook Pro. And shortcut keys might be different from Windows and other PC’s)
CREATE NEW CANVAS:
First, create a canvas with your preference size (I work on 1600 x 20000 px canvas). Draw the rough sketch.
ADDING FRAMES:
There are two different ways on how to make frames.
Option 1: Click [Frame Border] (U). Select [Rectangle frame] in the Sub tool. This tool will allow you to draw within area of the frame. In the Tool Property, you can choose to:
[Create a new folder]:
This option will create individual frames; or [Add to selected folder]: all frames will share the same folder. Anything you draw in a layer will be shown in every frames.
Option 2: Click [Figures] (U). Select [Rectangle] in the [Direct draw] Sub tool. In the Tool Property, in [Line/Fill], select [Create line]. The rest you can choose the Brush size and Brush shape of your preference.
(Note: The next steps I used Option 1 for the frames)
Once you are done with your lines, click your Line layer/folder, and set it as Reference Layer.
BASE COLOR:
Create a [New folder] and name it as COLORS. Add a [New Raster Layer] and name it as BASE (this will serve as a guide once you start filling your colors later).
(NOTE: Clip Studio has a default Fill Tool. But since I’m not comfortable using it, I found a Clip Studio Asset that helped me filling the colors easily. Image below)
Select any color you want as your BASE COLOR. Using the tool [refer to the image above], add the BASE COLOR. Add colors to gaps and erase some extra colors as well.
Next, select your [Base Color] layer and right click. Go the [Selection from Layer] > Create Selection.
Select the Colors Folder and click the [Create layer mask]. With the Color Folder with layer mask, you can now start coloring inside the Lines.
COLORING:
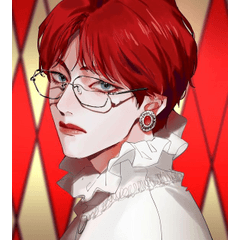
Start adding colors of the character’s skin, hair, clothes, eyes, and other details.
(I’m meticulous and I prefer to separate everything in an individual layers.)
Skin: Click [Eye dropper] (I), and select the current color of the skin. In the Color Wheel, we will choose a darker color of the skin for the shadows. Create [New Raster Layer] above the Skin Layer, click [Clip to Layer Below].
We will be doing the simplest coloring to make your life more easier when you start making comics. Using your brush of choice, draw a shadow below the neck area.
Using the [Blur Tool] (J) , this will give a slight soft touch on the skin shadows. Add some blush orange-y blush using the soft [Airbrush Tool] (B).
Hair: Create [New Layer] above Hair Layer, click [Clip to Layer Below]. I prefer using gray to bluish colors for coloring hair shadows. The clipped layer blending mode should be in Multiply.
Extra: Here’s my preferred colors for any shadows. You can experiment any colors to your likings.
This part of the hair is where it is covered so add the shadows. If you are not contented with the colors, go to [Edit] > [Tonal Correction] > Hue/Saturation/Luminosity. Drag the bar under Luminosity until you are satisfied with the colors.
Add a [New Raster Layer] above Multiply layer. Using an Airbrush Tool (B), Choose any light skin-toned color and color the hair near the forehead as [Highlights].
Add another [New Raster Layer], and change the blending mode to Overlay. You don’t need to exaggerate everything and simplify the colors. As for myself, I simply draw lines for the hair highlights. You also have an option to use these free hair highlight tools that you can download from the Clip Studio Asset.
And the rest details will have the same process for the clothes, you use a gray-bluish color in a Rasterize Layer (blending mode: Multiply).
Eyes: For the eyes, I do it the simple way. Choose the eye color of choice. Then another darker color of the first one (as secondary color). Use the Auto Selection Tool (W), in the Line Layer/Folder, auto select the area of the eye balls. Using the Gradient Tool (G) in the EYES layer, fill the area.
ADDING BACKGROUNDS:
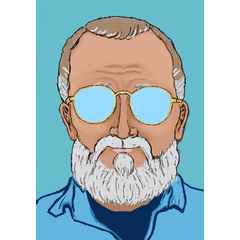
Lastly, we will add simple backgrounds to add mood to the character’s emotions. Our character looks happy and enthusiastic, we can add the default Material [Color Pattern]. You can choose from any images (or download an asset from Clip Studio).
Drag the image you want to use to the canvas. Click the Image Layer and drag it below the COLOR FOLDER.
And we are done! Thank you so much for reaching this far and good luck making your future webcomics!
Users who liked this post


Comment