
Hey guys, in this tutorial I'm gonna talk about some of my favorite layer property features and how I Use them for comic creation . Layer property palette features is an underrated feature that I USe almost every time I draw because it Saves me a lot of time while enhancing my art.
——Watch the video for visual explanation —
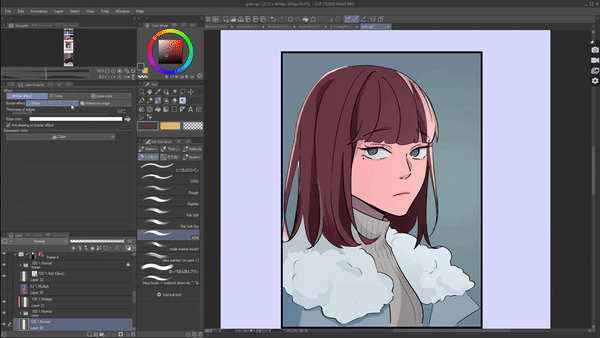
Border effect
Before we get into the uses . What is border effect ? Border effect is a feature under the layer property palette which allows you to add an outline to whatever is on the layer it can be a drawing or even text . Even if you make new brush strokes on the layer it will add outline to that too.
It is a very simple feature but it can be used various way especially for comic creation . So let's get to know how I use border effect in my comic creation process .
Before that just so you guys know some of these tips or uses that I'm gonna mention below may sound like a very simple trick or tip but remember that these simple things is what it takes to make a good comic visually .
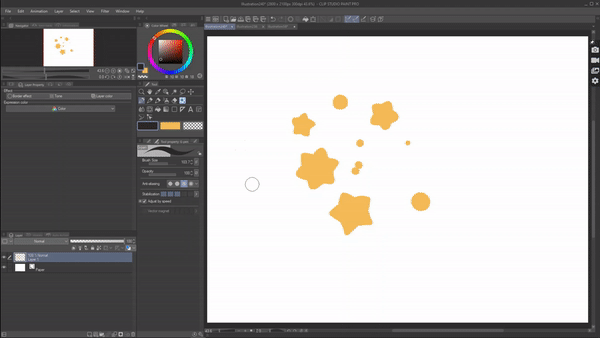
1- comedic effect:
—————————-
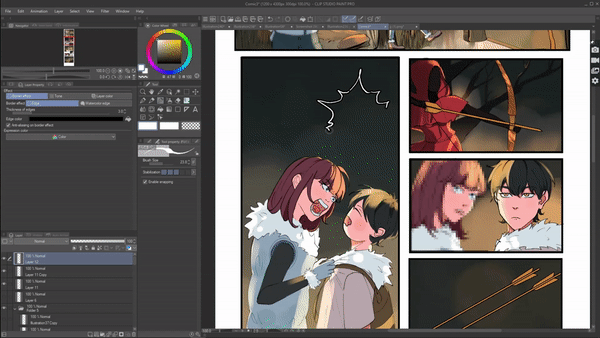
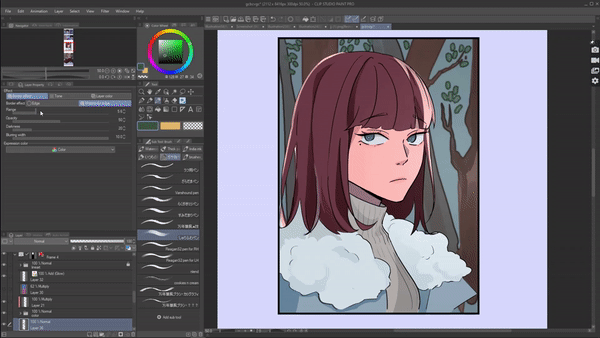
Starting off with my favorite and most used feature border effect. Have you ever noticed in comics whenever there is a comedy panel with very comedic facial expressions on the characters it always has this border around it .
or even in intense fight scenes you can See these borders around the character to intensify the scene .Ever wondered how that is created ?simple!Using The border effect. Just adding this Simple detail of a border it elevates the whole comedic effect.
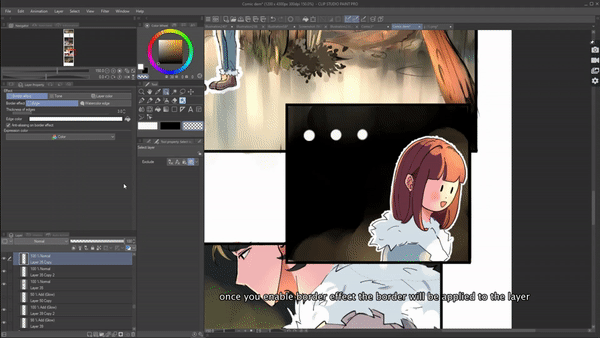
But how do we create this border? Now to create a border effect in this kind of Situation make sure you have the character to whom you wanna apply border in one layer separate from the background.Now just go to Layer property palette and enable the border effect .

you will see a bunch of settings appear. Where you can adjust the size of the border by dragging the “thickness of edge “ slider .You can even change the color of the border by clicking on ‘edge color’
2. To highlight
———————-
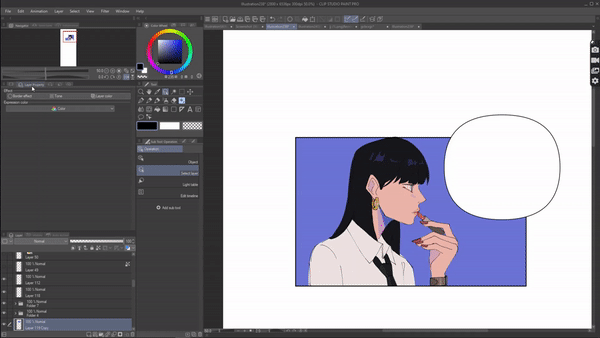
Another amazing way that I use the border effect is as a highlighter in my comic. You can highlight Character, objects etc. To give you an example :
I have two characters here and a Speech bubble in the middle , even though I have the tail of the Speech bubble to indicate who is talking, we can make it move obvious and visually clear to the audience by highlighting on who is talking by adding the border yet to the talking character .
Like in this panel this character is talking so ill apply border effect on him .
And in this panel this character is talking and so i'll highlight him using border effect
Now
You can visually be clear to see who is Speaking
Especially if you work with a small panel Where it's hard to see things , the border effect will help you make it clear.
Another way to use border effect as a highlighter in your comic , is if you have a panel where the character is looking/found for something . Like for example lets the character is looking for a book, we can use border effect on the book to Show the audience where the book is At.
or if the character found the book again we can use border effect to highlight it.
Basically any item you want to highlight in your comic Use border effect.
3. Small details
_________
Third way , I use the border effect in comics to add details. Have you ever found it annoying to draw small details like buttons , shoe lace , or jewelry? Drawing them in every panel takes a lot of time . Instead try using a border effect . You can add these details fast and easily.
For example: I want to add buttons to a character. Instead of drawing lineart and then coloring . try using the border effect.
Create a new layer on top , go to the layer property palette and enable border effect , choose a border color of choice.now draw the basic shape of the button . Now enable the lock transparent pixels, by doing this you will be able to draw inside the button without worrying about going out . Add details and you're done.
4. Customised speech bubbles :
____________
Border effect comes in handy when creating customized Speech bubbles of course they're So many varieties of Speech bubbles available in clip Studio which you can use easily but you can also create one easily sing the border effect.
If you can't find the exact speech bubble you Are looking for instead of wasting hours searching for the exact speech bubble that you have in your mind try creating one using border effect.
For example: If I want to create a speech bubble for a very angry and exciting text .But I can't find the exact one i have in my mind so that I can create a Speech bubble using border effect.
RememberYou can be a lot more Creative with your Speech bubble.And That will make your comic unique
5. Sfx and motion lines
_____________
In comics there's Lot of use of sound effects to make the comic more lively and understandable . We add these SFX to go with the action of the character/ object. But why is it important to add border effects to These SFX ? well to give you an example : when a door opens there is a creak sound. So we add the text 'creak' near the door but it looks Unreadable and goes unnoticed because it blends in with the background.
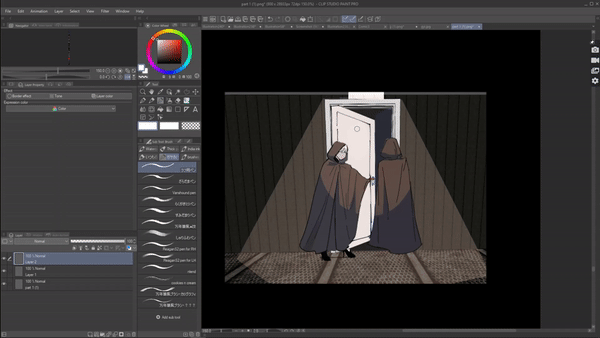
But when we enable the border effect it highlights the text..It is a very Small change, but these things Are what it takes to make a good comic.
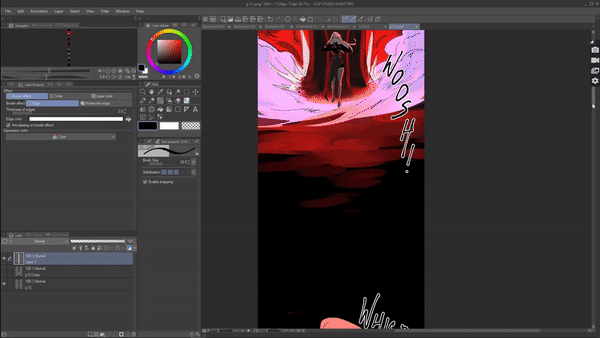
Asyou can see, almost all the sound effects have a border effect in my comic. This is why border effects are important in SFX.
Same goes for motion lines . Motion lines are lines that are drawn to indicate a motion of a character/object . For example: If the character is turning around like this , drawing a motion line in that direction will amplify the movement. But again the lines will blend in and go unnoticed if we don't apply a border effect.

——————-
Water color edge -
Now if you have noticed there is another option border effect which is the water color edge. This is such an underrated feature. When you enable it , it creates this watercolor type of border that we see in traditional water coloring
You can't choose the color of the border since it automatically gives the edge a color darker than what you're drawing with exactly like how traditional watercolor has that darker edge bleeds.
1. For background
___________
Now you might be thinking how we can Use this Border . well I personally use this feature for background since this water edge border has more texture to it compared to the border effect we saw above which is just a pain line.
so whenever lam drawing background like trees, plant l like to Use watercolor edge
When you enable the watercolor edge you will See a lot of settings pop up. you can use the range slider to make the edge darker or lighter
using opacity we can adjust the opacity of the edge.
Darkness to adjust darkness of the edge and Blurring width to adjust blur of edge.
I personally do not Change the water color settings.
2. Glowy elements
_________
Another way I personally use the water color edge is when I need to draw a glowy magical element in my comic . Since the edge of the water color edge effect is blurry it creates a perfect glow effect when the blending mode is set to add glow or glow dodge .
give you an example: I am going to draw a glowy glares screen in my video game fantasy comic . For that create a new layer and set the blending mode of the layer to glow dodge . Now enable the border effect and select the watercolor edge and Start drawing.
It definitely helps you cut down a lot of time .

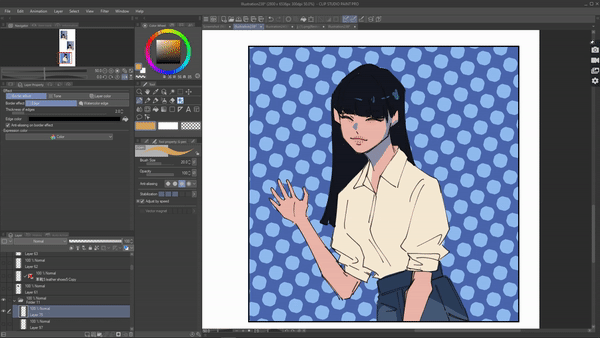
TONES
Tones often known as screen tones are commonly used in manga for literally everything.
But let me show you how we can Use tones in our coloured comicS. Seriously tones are underrated when it comes to coloured comics because it can really give your act that pop effect and can make your comic more textured and interesting visually.
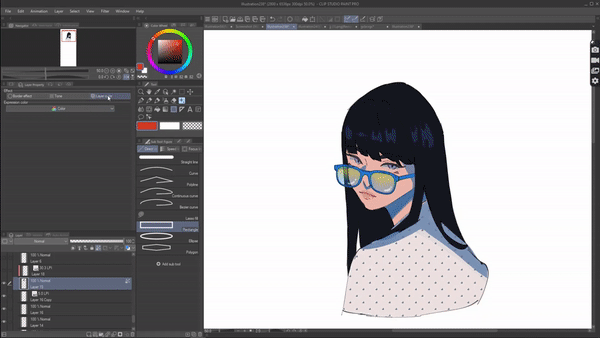
One of the ways I use tones in comics is to give the elements more texture. A lot of the time comics can look very dull and flat but by adding tones in some elements of your comic you can make it look interesting.
To give you an example : either I can draw boring normal sunglasses or I can give them these cool glasses that I created using the tones.
Not only the coolers , we can do similar Stuff to the hair, jewelry or even the eye.
Now you know where to use Them let's see how to create them.
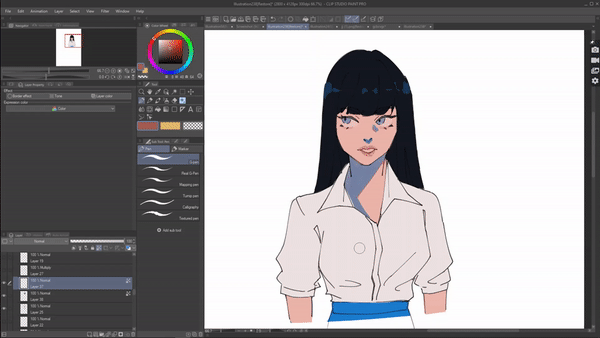
Start by creating a new layer and enable the tone in layer property.
Using a pen color the areas where you wanna apply the tone to .
Now under the tone you will see a bunch of options . I'll explain what these options do
—
Frequency -Indicate the quantity of screentone lines per inch. A greater value will result in smaller halftone dots.
Density - arranges the tone density based on the image color.
Use brightness of image - arranges the tone density based on the image brightness.
I personally like to set my density as “ use brightness of the image “
Under dot setting under will be provided with variety of shape of the tone .
__
For this panel I have lowered the frequency and set the density to use brightness of the image .
Then finally enable layer color from where we can change the color of the tone . I'll explain more about layer color later but for now just know that we can change the tone color using layer color which is a feature under layer property

Another way I use tones in my illustration is to create patterns for my character's clothing. if i want to add cute patterns in my character's clothes instead of drawing by hand one by one specially in comics where you have so many panels. Instead we can use tone.
Create a new layer above the cloth layer to which you wanna apply the pattern to . Now clip the layer to the layer below .
Take a brush and color the shirt once again then enable the tone .
Adjust the frequency to make the pattern look bigger or smaller
Set the density to ‘ use brightness of image ‘
Under the dot settings choose whichever pattern you wanna apply .
Finally enable layer color to choose a color for the pattern
This technique proves highly effective for comics, especially when you've colored the character's clothing consistently in a single layer across multiple panels. If you intend to add patterns to that clothing, you can effortlessly apply them using the method I explained earlier.
Moving on, ever felt like your panel looks so empty with NO background, especially in close up snots drawing the whole background will be too messy but leaving it empty makes it dull. Instead fill it with tones.
Or even if you have background you can Still add tone to it. It may seem unnecessary but remember that adding elements like this make your comic look fancy and well done
LAYER COLOR:
Layer color , you might already have a gist of this feature . Basically when you enable layer color you will see a option down from where you can set the layer’s color.
You can click on it and select whatever color you want to apply and whatever is on the layer will be converted to that color
A basic example : if I have a black flower on the layer and i enable layer color on that layer and choose a pink color under layer color . That black flower will be converted to pink .

Once again a very simple feature . But let's see how i use this simple feature to my advantage .
if you're a comic artist you probably have debt with this. Have you ever completely colored the whole comic but then you feel like the color of the shirt the character is wearing is just not good and I need to change it. But then you have to make alterations in every single panel.
well if you have coloured the Shift in the Same layer like l have then just go to Layer property palette and click on Layer color and Then click on color and pick the color you wanna apply. Then as you can see the shirt's color has been changed .

Just like that when you can use layer color to test out which color looks better. Especially when creating character design for your character you're gonna test out a lot of colors. Instead of coloring every time you wanna test out a different color just use Layer color . For ex: Here i am testing out which hair color will look good on this character. which l am easily able to do using Layer color.
Another way I use Layer color is to change my line art color. i like to draw my line art in black and even while coloring black line act helps me color inside the lines . But at final i want the line art to be a maroon color which I can easily change using Layer color. Instead of going panel by panel & changing it. With 2 clicks i can change it.

Users who liked this post


Comment