
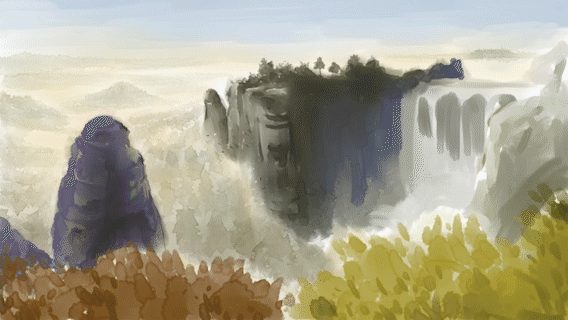
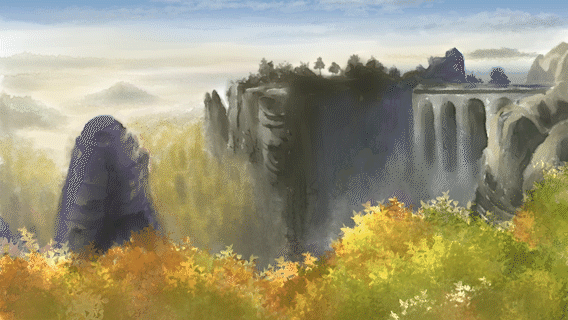
Today I'll to show you how to do the landscape above.
Referenced from photo.
https://twitter.com/kb0000001/status/1291670448984522752?s=20
Gathering Brushes
First we'll need to gather the necessary brushes.
I use the trusty watercolor brush that comes with CSP. I think I tweaked the settings a bit so here are my settings.
I use the Casa G-pen Edge Pencil for fine detail work.
In this set above, I use:
▲ Watercolor marker/bi-color
○ Hole Punching Marker/color
I use the Wind brush above but I had to tweak it.
The last is a brush for bushes. You can use any of the brushes in the link above. Unfortunately the one I have is no longer in the assets marketplace...
Ok let's get rolling.
Undersketch

Using the Watercolor brush, pick desaturated colors to create silhouettes.
"Desaturated" means picking colors from the left side of the color square.
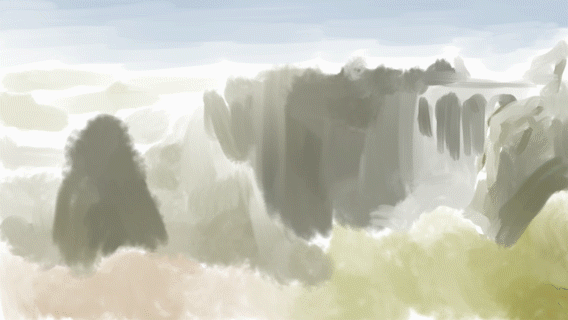
Create a new layer.
Use the Wind brush to add a bit of foreground detail.
Switch to the ▲ Watercolor marker/bi-color brush. Make the brush small. When drawing things in the distance, you have to adjust the brush size accordingly.
Add some trees in the distance.
Then use the standard soft Airbrush to add a brown haze over the trees and mountains.
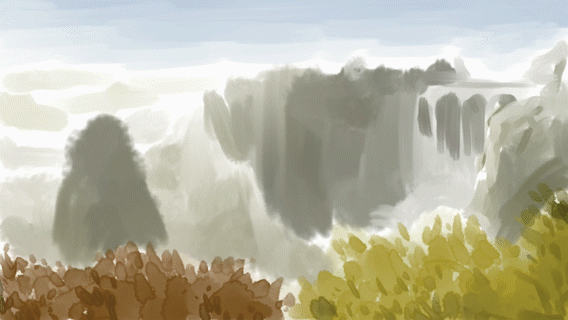
Sketching
Create a new layer.
Let's start with the foreground rock. We'll still be using the Wind brush but as you can see, the Wind brush does hard edges. We'll need to soften edges with the Watercolor brush as necessary.
Again, now that we've moved further in the distance, decrease the size of the Wind brush.
Continue with the same technique.
Use a large soft Airbrush to add a shadow on the dark side of the cliff.
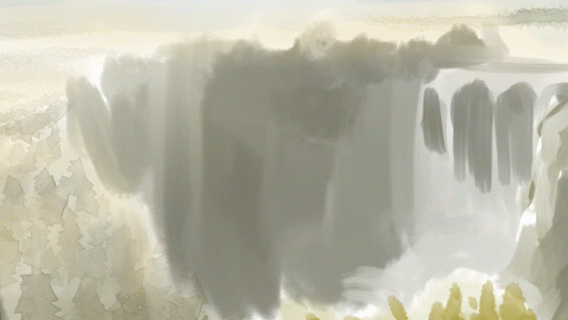
Next continue adding rocks and the bridge structure.
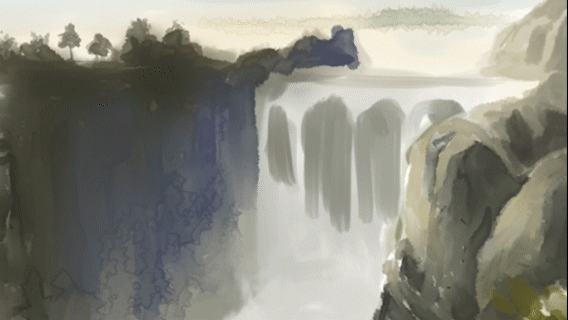
For the bridge, switch to the ○ Hole Punching Marker/color brush. Use it to create the cracked surface of the stone.
Switch back to the Wind brush to add the shadows of the arches.
Then switch back to the ○ Hole Punching Marker/color brush to blend the shadows into lighter tones. By doing that, you also create the 3d structure of the pillars.
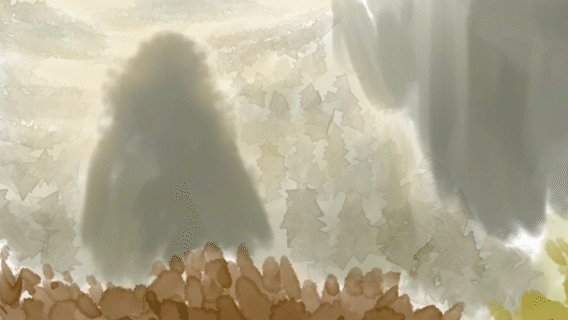
Detailing
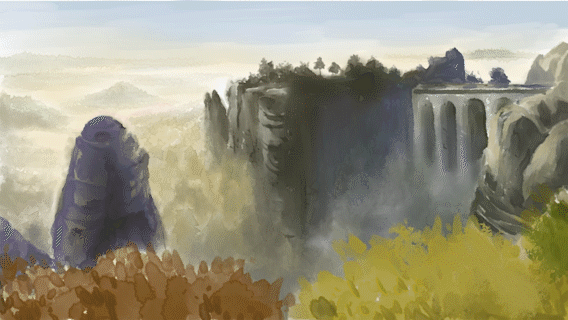
Create a new layer.
Now pick your favorite Bush brush tool and add the foreground brushes in nice autumn colors.
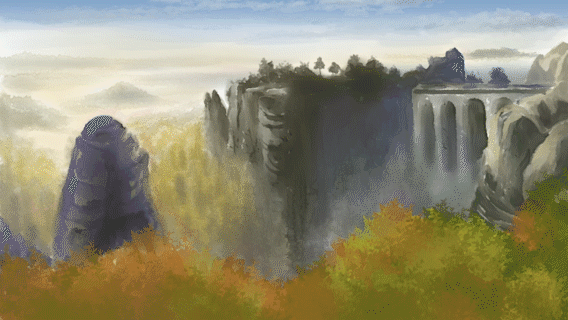
Create a new layer underneath your Bush layer and set the blending mode to "Add glow". Add glowing bushes.
Create another layer on top of your Bush layer and add glowing bushes as well. As you can see, you first add the big glowing bush and then erase out everything but the top edge of the bush. The key is, don't erase with the eraser tool. Erase with the Brush tool by clicking the checkerboard rectangle below your main color / sub color on the Color Wheel.
Lastly, these are just finalizing details. Create a new layer and set the blending mode to "Add Glow".
Use the Edge pencil to add detail and soft airbrush to add the sun and soft glows.
Add Watercolor Paper
Next download this Transparent Watercolor Set.
Drag the "Sketchbook Back" material into your layer panel on top of your other layers.
Change the blending mode to "Overlay".
There you have it! My watercolor technique. Note that the same techniques can be used on lineart such as my art below.
Users who liked this post


Comment