How to Draw Flowers
Flowers and beauty are almost inseparable. From gift, fashion to flowery background in shoujo manga, flowers has a ton of roles.
This tutorial will cover the anatomy of flowers, the drawing basics along with how to draw general flower types, followed by turning the flowers into various floral brushes—ready to be used for your artworks!
The video below doesn’t only contain the explanations, but also the timelapse of every flower drawn in this tutorial.
Anatomy
For the sake of this tutorial, let’s name flower's parts in simple terms.
1. Core.
The reproductive part of the flower, located in the center. It comes in different shapes and sizes. Some flowers like rose, peony and tulip has the core hidden by the petals, making it only visible in certain angles if at all.
2. Petal.
The most visible part of the flower, the most colorful and the one that gives a flower its distinct shape. It’s usually the biggest part of the flower.
Flower petal arrangement isn’t random, they come in several types depending on how the petals overlap.
Also, a lot of flowers have either U shape or V shape.
3. Base.
Known as receptacle. This part supports the flower and has small leaves like structure called sepal. It also connects the flower to the stem.
Fun fact, sepals covered the flower in the budding stage and opened up as the flower blossoms.
Another fun fact: although most flowers have leaf-like sepals, flowers like lily and tulip have sepals that indistinguishable from the petals. Instead of having six petals, they have three petals and three sepals.
The bud is usually green and changed color as the flower blooms. (For visualization: the red parts are the petals, the blue parts are the sepals.)
4. Stem.
The part that connects the flower to the rest of the plant.
5. Leaves.
Sometimes it’s located on the flower’s stem, sometimes near the roots. For flowers that grow on trees, the leaves grow on the branch instead.
U Shaped Flowers
Before we draw a flower, the most important thing to determine is the position between the top of the flower and the core. Simplify the top of the flower with a circle and the core with a dot.
If the core (dot) is inside the circle, you won’t be able to see the outer part of the flower. On the other hand, if the dot is outside the circle, you’ll be able to see the outer part of the flower.
First, let’s draw a flower from the angle where we can’t see the outer part.
1. Draw a circle as the guide for flower’s size and angle, then determine the core location with a dot.
2. Determine the petals by dividing the flower sketch with lines. Then divide the gaps between the lines in half to determine the size of the petal.
3. Draw the overall shape of the flower before sketching the whole flower.
4. Draw the clean line art. Done!
If we lower the gaze, we’ll be able to see the outer part of the flower.
Drawing a flower from this angle follows the exact same steps above.
The guide lines for petals might overlap with each other and look confusing. That’s why, for steps 2 and 3, used blue for outer petals and red for the border between petals.
Some U shaped flowers like tulip rarely have their core visible. Still, we can use the same steps we did for the first two flowers. If anything, it’s kind of easier to draw than flowers with its core exposed.
As I mentioned in the previous section, tulip has three petals and three sepals that look exactly like the petals. In case you’re wondering, here’s roughly how tulip look in top view.
1. Just like before, Draw the top in circle, then the core. The core is located further than the previous example because tulip is taller. After that, sketch the flower's shape.
2. Divide the bowl shape into three, then sketch the first layer of petals. There’s a gap between each petal.
3. Sketch the second layer of petals. There's still gap between the petals
4. Tulip’s petals are a bit split on the top and has more rounded shape, keep it in mind when drawing the line art. You can draw another sketch to finalize the petal’s shape before proceeding with the line art if you want.
V Shaped Flowers
One of the best flower for V shaped flower practice is calla lily. It’s best angle is from the side so you’ll have to draw the whole flower.
1. After drawing the circle and dot, draw two lines to shape a cone and split it in half.
2. Calla lily has a single petal that swirls and spike like center. With that in mind, sketch the flower based on the cone.
3. Finish drawing the petal and proceed to drawing clean lines.
Now let’s try drawing another kind of V shaped flower: spider lily.
Spider lily might look complicated at first, but in reality it’s comprised of six small lily-like flowers with extra long pistil and six stamens.
In this section, we’re going to draw one of the small flowers.
1. Draw the circle and dot. Then, draw the curved lines as the guide for the petals.
You might notice there are two circles instead of the usual one.
Because the petals are curved, I find it easier to make the curves look consistent when there are two guide points. If you can draw consistent curves without needing two guide points, it’s okay to draw just one circle.
2. Sketch the flower with a stem with bulb, 6 petals, 6 stamens and a pistil. Then, draw the clean line art of the petals and stem. The petals are a bit wrinkled, like seaweed.
3. Draw the clean line art of the pistil and stamens. I drew them in separate layers because I don’t want to erase the drawn petals (I mask the petals layer).
After done drawing the pistil and stamens, I realized they were too small and used Free Transform to fix their size.
Clustered Flowers
There are some flowers that grows in clusters like spider lily, hydrangea, hyacinth and wisteria. They’re almost never separated because the clusters are what defines them.
1. Spider lily’s flowers grow in six directions. Draw the lines according to the directions, then the usual circles and dots.
2. Sketch, then finish the line art for the petals. We’ll skip the core details for now because it’d look too crowded.
3. Sketch the pistil, stamen and stem. The position of the intersection (the center) is a bit lower than the flowers, it’s going to be covered by the flower at the bottom.
4. Draw the clean line art.
Spider lily, done! For the other clustered flower, we’ll draw wisteria.
Wisteria’s flower has two big parts, the upper part is symmetrical banner and, attached to its bottom, is bean shaped. From the side, it looks kind of similar to butterfly wings.
1. Since wisteria grows in cone clusters, sketch a cone shape with a curved line in the middle of things as the stem. Divide the sketch into rows and columns as guide when drawing the petals.
2. Sketch the flowers. The flower’s banner on the top of the cone will be almost upright and faces downwards little by little the lower the flower is.
3. At the outer edges of the cluster, erase a flower or two and move things around so that it looks less packed and monotonous.
4. Draw the clean line art and add the stem. The stem connecting the flower to the main stem is fairly thin.
You can draw clustered flowers like hydrangea and hyacinth with similar steps. Just pay attention to the individual flower’s shape and the overall cluster shape and you’re good to go.
Flowers with Multiple Layers of Petals
Rose, carnation, begonia, peony, camellia… there are tons of flowers with multiple layers of petals.
When these flowers are in bloom, it’ll look like a dome. The petals on the outer layer is usually wider than the ones in the inner layers.
This section, we’ll cover two flowers: peony and rose. I choose them because they are distinctly different from each other. The basics of drawing peony and rose can be applied to other multiple layered flowers.
Although the top part is curved like a dome, peony still have a round shape when seen from above. We can use the technique we used for sketching flowers on the previous sections.
1. Draw multiple circles as the rough guide for the top part, the bowl shape and (optional) a dot for the invisible core. Don’t worry about the dome shape for now.
2. Peony’s petals are arranged in a certain way that gives it a rounded look (see the picture on the left). Roughly decide the width of the petals with curved lines on every layer.
3. Sketch the petals. Draw the petals blocky at first, then on another layer trace the blocky sketch and turn the top of the petals into curves.
4. Sketch more details and draw the clean line art.
Drawing rose is a bit different compared to peony.
1. As usual, we’ll start by drawing circles. The center of the rose would be the dome’s peak, the further the circle from the center, the lower it is.
2. Rose petals are arranged in a swirling manner. Connect the circles earlier into a seamless swirl.
3. Roughly sketch the rose to make it easier to draw the petals in more detail. Create a new later and draw the more detailed version of the sketch. Adjust the sketch if needed.
I didn’t spend time polishing the petals of the rough sketch (left) so it looks stiffer than the final sketch (right).
Rose petals curves outward and sometimes there’s a little crooked part at the top. By lowering the petals and giving it details in curved lines, the petals looks as if it blooms. Here’s how the process look like:
4. Lastly, draw the clean line art.
Bouquet
How many flowers do you want? How many different kind of flowers? Color varieties? The wrapping design? These are the question you need to answer before you start drawing a bouquet.
For this section, we’re going to draw a white rose bouquet. And, since we haven’t done any coloring in the previous sections, we’ll color the bouquet.
1. Draw the overall bouquet shape first, along with the stems. Circle and dots as usual, then draw the swirls.
2. Sketch and add rose leaves to fill the gaps between the flowers.
3. Draw the clean lineart.
4. To color the bouquet, start with the base colors, two steps of shading and then highlight. Forgive me if the bouquet look like a rose bush instead. I should have drawn the roses bigger.
Done!
Floral Brush
There’s a ton of floral brushes out there, but making your own brushes has its own merits. The flowers you draw will blend into your artwork better because of the similar style. Also, it gives your artwork uniqueness compared to using preexisting flower brushes that other people use. For long term projects with permanent color palette, you can color the flowers beforehand and use it whenever you want without having to adjust the colors.
Also, making brushes is fun! I know a few who make brushes as a hobby.
Note: “Expression color” will be mentioned later. If you’re not familiar with it, I’m talking about the option below.
There are three kinds of floral brush I make and how it looks when you change the Foreground/Background colors:
1. Lineart: Black, Fill: White, Expression color: Grayscale.
2. Fully painted, Expression color: Grayscale.
3. Fully painted, Expression color: Color.
To make my own floral brush, I usually duplicate existing floral brush.
Fill in the menu.
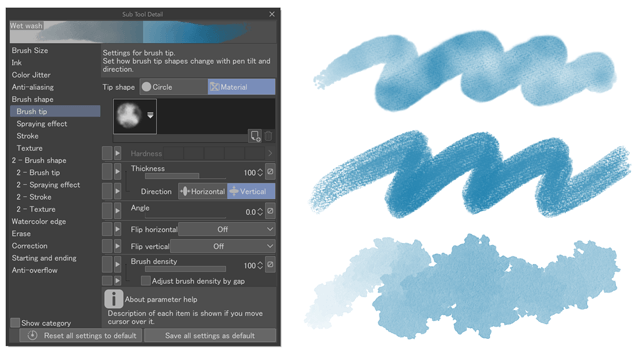
Change the brush tip and voila! You can always tweak the settings to make the brush fits your needs.
If you want to make brushes from scratch, Sunako made a video about it.
--------------------------------------------------------------------------------That's it for now. I hope you find this tutorial useful.
Thank you for reading until the very end.
Have fun drawing!


Comment