
In this tutorial, I’ll be drawing with a digital Pencil in a realistic style in Clip Studio Paint.
Using a modified CSP Pencil tool, I was able to draw the picture below.
The problem with most digital pencil tools
This is the standard CSP Pencil tool. It is a hard line with no ability to sketch softer or create feathered edges. If you’re moving from traditional to digital, there is no way you’re improving — it’s a huge step backward. If you’re starting with digital, you’d be more inclined to use hundreds of brushes and tools that have a more enjoyable effect and amazing results.
The solution is to have a versatile brush that can be soft and feathery when need be, thin and precise when need be.
You can download the modified CSP Pencil tool below.
I won’t be going into the details of the modification because I think most of us would rather just draw than dive into tiny menus!
https://drive.google.com/file/d/11HAUU_5gzFVf_e3tCOyI-P1wrIaMlune/view?usp=sharing
Basic setup check
In order to use this Pencil tool effectively, I recommend a few things:
1. Have a convenient way to decrease and increase brush size. My shortcut for decrease brush size is “1” and increase brush size is “2”.
The reason for this is, when using this Pencil, you will be constantly increasing and decreasing the brush size to create the necessary gradients for realism.
2. Have a shortcut for “transparent color”, or you can just click this spot in your toolbar.
The reason for this is, this will allow your pencil to be a soft or hard eraser, and you will almost never need to switch to the Eraser tool.
3. Practice drawing smooth gradients, starting with a large brush with large strokes, and gradually increasing pen pressure and decreasing brush size to go darker and darker.

4. Then, just to be sure you have the hang of it, draw the basic cone, sphere cube.
Shading and penciling
To start, the great thing about this type of digital Pencil is that you’re not sketching with a sharp instrument! It is extremely counterintuitive to “sketch” (i.e., search for shapes) with a precise instrument.
Instead, we widen the brush and begin to find the silhouette of the subject.
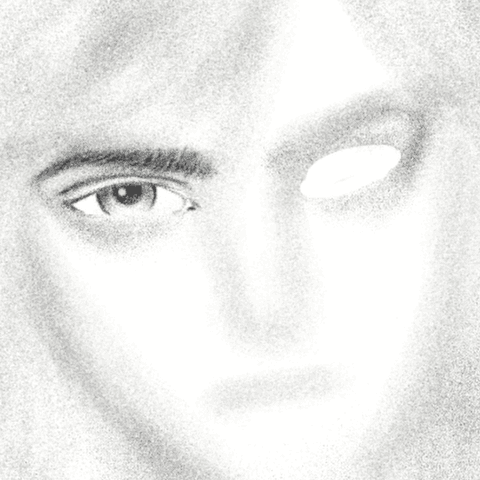
One thing I learned about drawing eyes is actually from Korean makeup. It’s called “aegyo sol”, the puffy part under the eye. I never used to draw it but once I learned about it, now I almost always draw it! See below for the undereye puff.
We’ve decreased the brush size to about half so that we can set up the framing of the eyes.
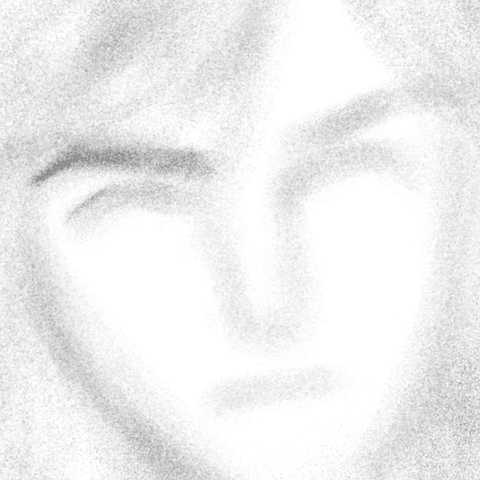
So starting with the right eye, you can see that I decrease the brush size so that I can create some eye outline and eyebrows. Never decrease to a thin Pencil unless you like your thicker strokes! If you don’t like your thick strokes, tap the “Transparent Color” button and carefully erase the area you don’t like, and redraw the thick strokes. Go thinner and darker as you progress.
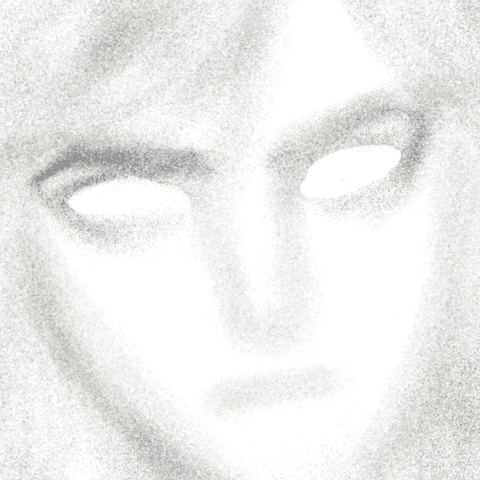
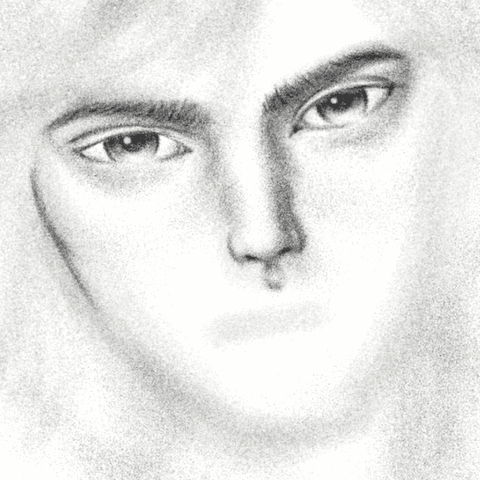
Drawing the nose can be really difficult for some artists because it requires such a soft touch. Here as you can see, it’s no problem getting the right soft touch and contrast from the left, bottom and right side.
And remember…this is only 1 brush!
Lips are another area that many have trouble with. Beginners tend to use hard lines when, like the nose, you should use hard lines sparingly! I ended up with darker lips but later I make the lips whiter.
With a thin brush, we can even do hair strokes.
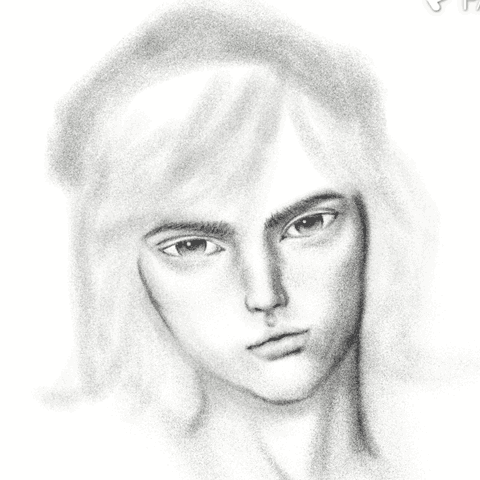
Finishing up the fine hair, and also drawing his chest, white shirt, and dark coat. Note the sharp edge on the white collar, and the contrast of the soft edge on his shoulders. By always starting soft, we can decide where we want to draw the eye’s focus. With the soft edge of the shoulders, we create a depth of field effect.

Now I am not immune to “flip horizontal” horror! I used Liquify to try to correct the unbalanced eyes. Remember to always do as much “flip horizontal” early in your art, or else suffer the regret later. Note that, using Liquify will blur the fine dots in this Pencil drawing so beware.
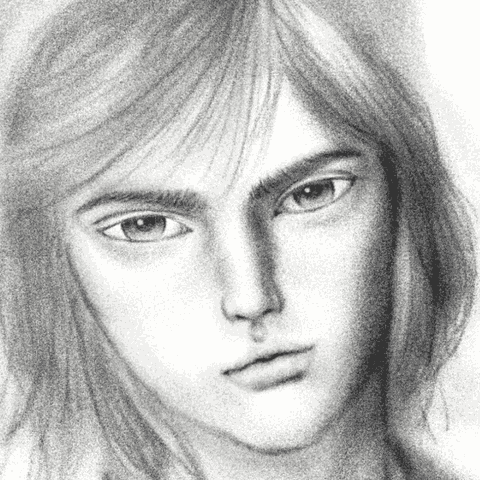
So after some final touchups we are done.
More sketches
Final thoughts and other recommended brushes
I hope this was interesting and informative. Best of luck with your digital penciling journey.
A brush that I highly recommend above my modified Pencil is below.
Users who liked this post


Comment