To start I recommend that you use a new project of 1000 pixels by 1000 with a resolution of 600, unless this does not correspond to your project. However, it is preferable to keep the quality of the image fairly high.
Please note that my tutorial assumes that you already have a character in hand and want to give it worried eyes.
It is important to first decide on the proportions of the face. Since we have big eyes there, they will take up a lot of space.
In your basic guide lines, just decide on the placement and proportions of the eyes.
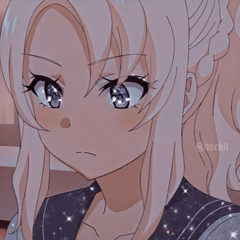
What confers the worried expression are the eyebrows whose center points upwards as well as the irises fixed on the source of apprehension or in the void. Add the draft of these details on another layer, along with the eyelashes and eyelids.
Draw the other details of the face then do the final lines on another layer.
I show you how to draw the skin because it is on this series of layers that will be drawn: dark circles, dark eyelids or eye shadows. It is also on the same layer as the reflections of the skin that I put the whites of the eyes. To do this, I prefer to use my palest highlight color (I don't use white) and fill in the desired space.
Color the skin in four layers: one for the base, one for the soft shadows, one for the hard shadows, and one for the highlights. If you don't want blurry shadows, skip the soft shadows step.
To draw the dark circles, make sure to draw them on the "hard shadows" layer with a tapered brush of your choice then use the "magic wand" tool by pressing "shift". Use a medium blue or pink and a low opacity soft airbrush to add nuance. Correct with the blender. I also advise to start by doing the shadows first, before creating the other hard shadows.
For irises, start with a color palette in one corner of the page.
After selecting your color palette, start by coloring all the pupils with the base color. Then with a masked layer, add the shadings.
Please color the eyelashes and eyebrows on the same layer as the hair. If you want to do the eyelashes as final lines, you can skip this step and fill in the eyelashes at the line inking step.
As you can see, the highlights are at the very end.
I have chosen to give you two techniques for reflections in the eyes. You have to start by gathering all the layers in a single file.
The first technique has a more dramatic effect and allows you to play more with the light.
With the "raw watercolor" tool choose a dark color and fill in the whole shape at once and mask. Erase the bottom of the eyes depending on the light source and draw a circle of a very pale color and complementary to the shadow color in a corner of the iris.
The simple lights technique allows for a lighter style and the quickest to achieve.
Trace in the white eyes depending on the light source.
Users who liked this post


Comment