
Hola! En este artículo llamado Anima escenas iluminadas en Clip Studio PAINT te enseñaré como crear escenas llena de luces ideal para las fiestas de fin de año.
Lo que realizaremos:
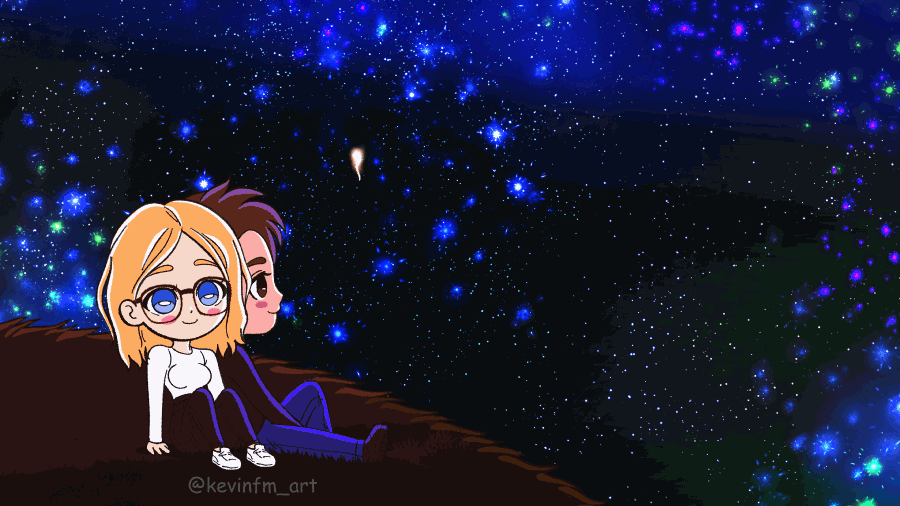
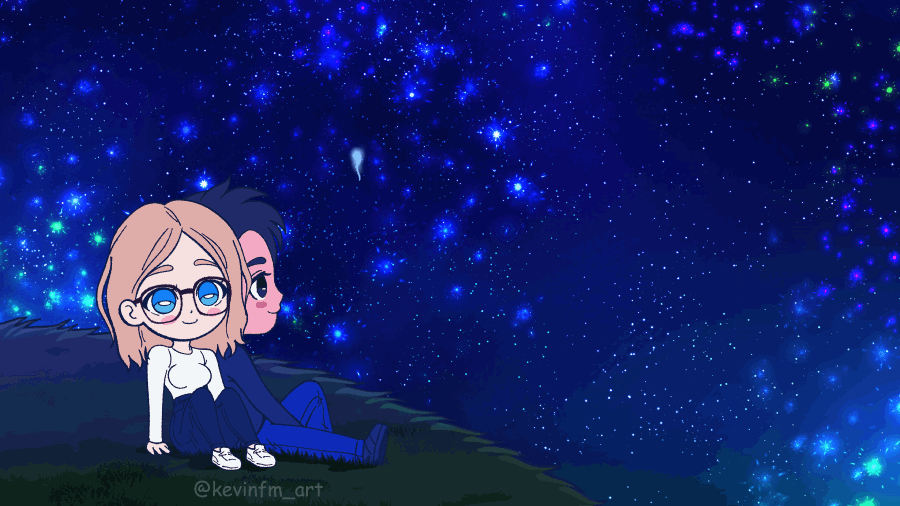
Comenzaremos con esta animación:

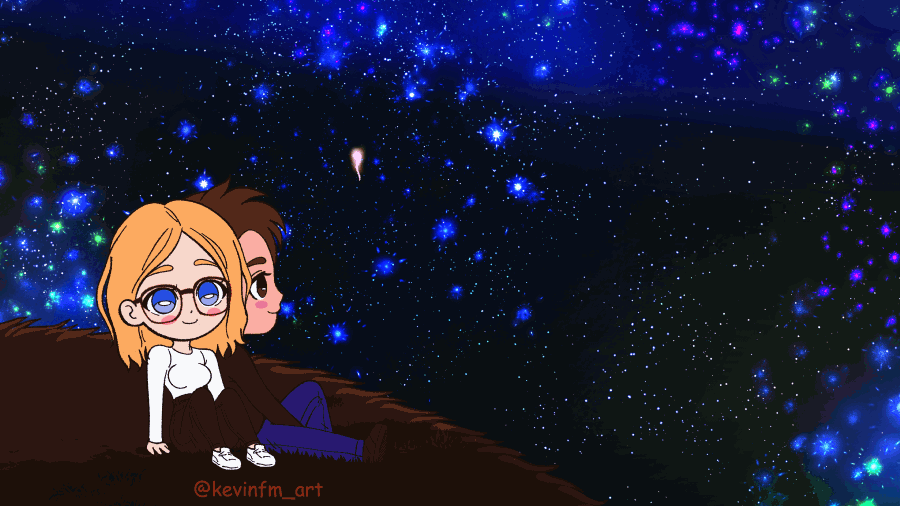
Lo que lograremos hacer:
Entonces te invito a agregar luces a nuestra animación con las herramientas que podemos utilizar en Clip Studio PAINT.
Anima escenas iluminadas en Clip Studio PAINT (TUTORIAL)
Recuerda activar los subtítulos en tu idioma, seguro lo encontrarás :)
¿Qué te pareció el video? Vimos paso a paso como agregar luces y crear un ambiente luminoso en nuestra animación.
Paso a paso del proceso:
Ahora veremos mediante imágenes todo el proceso, así lo entenderás aún mejor.
1. Creación del proyecto de Animación
Vamos a Archivo - Nuevo. En proyecto elegimos la última opción, la opción de Animación.
Tamaño: 3840 x 2160.
600 ppp (Esto lo puedes hacer como tu quieras)
En Línea de Tiempo: Fotogramas por segundo en 8 y Duración en 12 fotogramas.
Teniendo todo esto listo le damos a OK.
2. Línea de Tiempo
Vamos a Ventana - Línea de Tiempo.
Ahora si es visible para que la podamos utilizar.
3. Guardar el proyecto
Vamos a Archivo - Guardar como.
Cambiamos el nombre y siempre debemos tener activado en Tipo: CLIP STUDIO FORMAT
Y elegimos la carpeta en donde queremos guardar nuestro proyecto.
4. Carpeta de Animación con carpeta de capas
Antes de comenzar con la animación del fuego artificial, eliminaremos la carpeta de animación que se crea por defecto. En el panel de capas en la opción: Eliminar capa.
Y creamos una nueva carpeta de animación desde la línea de tiempo.
Le cambiamos el nombre y dentro de esta carpeta de animación creamos una nueva carpeta de capas.
Y dentro de esta carpeta de capas creamos 2 nuevas capas rasterizado, de nombre Base y FXs.
En la línea de tiempo, en el fotograma 1 de esta carpeta de animación activamos: Asignar cel a frame. Elegimos el único cel que hemos creado y le damos a OK.
Y estamos listos para comenzar a animar nuestro fuego artificial.
5. Animación del fuego artificial
La verdad esta animación será bastante sencilla, muy similar a una explosion. Realizaré esta animación lo mas sencilla posible para que tú también la puedas hacer.
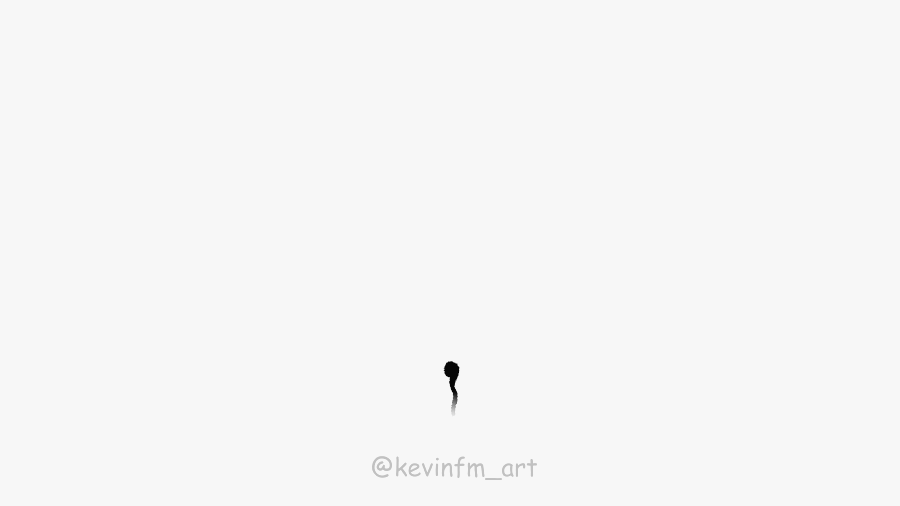
En el fotograma 1 realizaremos este dibujo:
Una vez hemos realizado el primer dibujo, avanzamos al fotograma 2 y creamos un nuevo cel de Animación.
Y como puedes ver, se ha creado en el panel de capas el nuevo cel de animación con las mismas capas creadas anteriormente, incluso con los mismos nombres. Esa es la magia de crear un cel de animación como carpeta de capas.
Nos ahorrará mucho tiempo!
Ahora realizamos el segundo dibujo de la animación, sin olvidar activar el papel cebolla, para poder ver el dibujo anterior y así poder guiarnos.
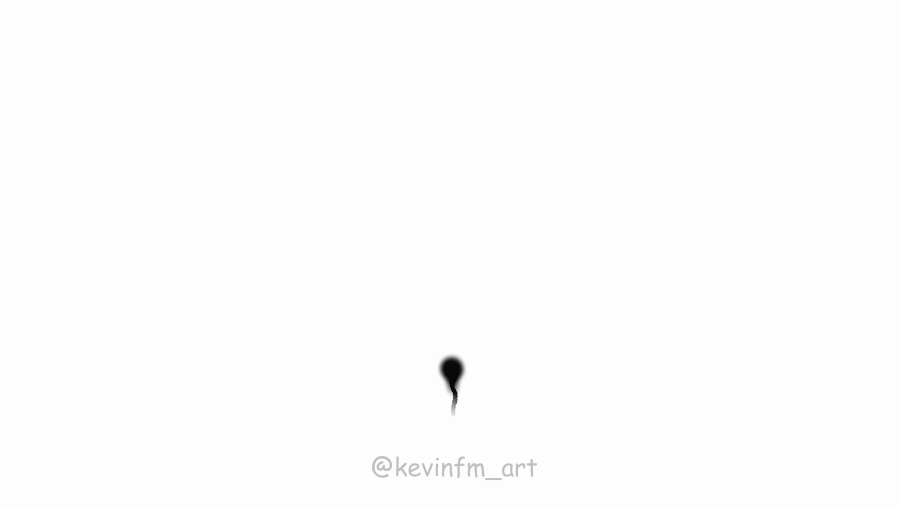
A continuación realizaremos el dibujo del fotograma 3, siguiendo la trayectoria del movimiento inicial.
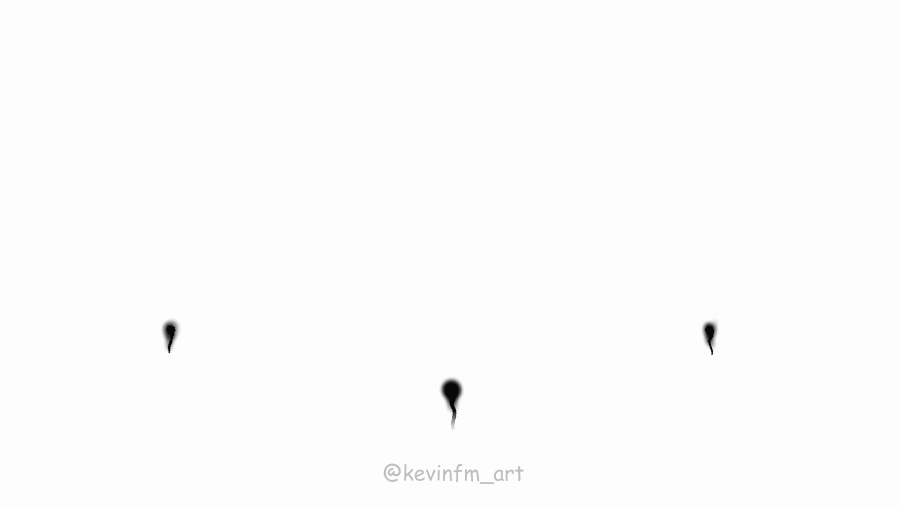
En el fotograma 4 solo dibujaremos un circulo, por que el fuego artificial llegó a su punto máximo y se prepara para explotar. Será el dibujo mas sencillo que realizaremos.
En el fotograma 5 dibujamos la forma en donde ya comienza a explotar.
En el fotograma 6 la explosión comienza a expandirse poco a poco.
En el fotograma 7 el fuego artificial comienza explotar con mas fuerza.
En el fotograma 8 comenzamos a dibujar línea de velocidad producto de la explosion del fuego artificial.
En el fotograma 9 el fuego artificial comienza a expandirse luego de explotar.
En el fotograma 10 dibujamos algunas línea ya que el fuego artificial a explotado.
En el fotograma 11 dibujamos solo unos puntos, creando el rastro que dejo el fuego artificial producto de la explosión.
Y por último, en el fotograma 12 creamos un nuevo cel pero será un cel vacío.
6. Previsualización de la Animación del fuego artificial
Este es el resultado que hemos logrado realizando una animación muy sencilla.
7. Efectos del fuego artificial
Activamos la herramienta Aerógrafo.
En Subherramienta Suave.
Vamos a elegir la capa FXs que creamos anteriormente, y vamos a desenfocar la parte externa del fuego artificial, en cada uno de los dibujos de la animación.
8. Animación del fuego artificial con efectos
Aplicando lo anterior podemos lograr el siguiente resultado:
9. Fuegos artificiales
Como puedes ver, con el mismo método podemos variar en los dibujos y podemos lograr resultados distintos.
10. Integrar fuegos artificiales a una escena
Para usar los fuegos artificiales en una escena es bastante simple, tenemos el proyecto de los fuegos artificiales, seleccionamos el que queremos usar, comenzaremos por el que enseñé anteriormente.
Vamos a Edición - Copiar
Y vamos al otro proyecto, a la animación donde integraremos el fuego artificial.
Y vamos a Edición - Pegar
Con la herramienta Mover Capa podemos seleccionar la animación el fuego artificial y moverla dentro de la escena.
En un inicio no se verá muy bien por que hicimos la animación de color negro, pero en Clip Studio PAINT tenemos una herramienta muy útil, la cual utilizaremos a continuación.
Seleccionamos la animación del fuego artificial y activamos: Cambiar Color de capa.
Por defecto pintará la animación de color azul, pero si hacemos clic sobre: Color de capa, podremos cambiar el color.
Y para este primer fuego artificial elegiremos un color claro, puede ser blanco o amarillo.
Y podemos hacer que se vea de la siguiente forma:

Ahora vamos a usar el segundo fuego artificial, volvemos al proyecto de las animaciones de los fuegos artificiales, seleccionamos la animación, la copiamos.
Y la pegamos en la escena de animación. No olvidar activar: Activar color de capa.
Y cambiamos el color a un azul mas claro.
Por último usaremos la ultima animación, la seleccionamos, la copiamos.
Y vamos a la escena de animación. La pegamos y activamos: Cambiar color de capa.
Está vez elegiremos un color rojo.
Y logramos por el momento tener la siguiente animación:

11. Timing de la Animación
Ahora vamos a mover las animaciones de los fuegos artificiales para que aparezcan en diferentes tiempos durante el transcurso de la animación, eso lo podemos hacer tomando la animación en la línea de tiempo y moviéndolas en diferentes posiciones.
Logramos que se vea algo mucho mas natural y no tan mecánico.
12. Duplicados de los Fuegos Artificiales
Creamos una nueva carpeta de capas por sobre las animaciones de los fuegos artificiales.
Tomamos las 3 animaciones y las incorporamos dentro de esta nueva carpeta de capas creada.
Seleccionamos esta carpeta y con botón derecho: Duplicar Capa. Duplicamos esta carpeta.
Y tenemos los fuegos artificiales duplicados, ahora tenemos 6 en total.
Ahora iremos seleccionando cada una de las animaciones de los fuegos artificiales y los vamos a editar, tanto su tamaño como su posición en la línea de tiempo.
Comenzaremos por el de color rojo.
Luego el azul.
Y finalizamos con el amarillo.
Logrando el siguiente resultado:

13. Color con Degradados
Otra forma en la que podemos pintar nuestros fuegos artificiales es a través de degradados, lo cual te muestro a continuación.
Comenzamos creando una nueva capa rasterizado por encima de la primera carpeta que contiene los fuegos artificiales originales.
Le cambiamos el nombre a Color y activamos: Ajustar a capa inferior. Así todo lo que hagamos en esta capa sólo afectará a la carpeta con los fuegos artificiales originales.
Seleccionamos la herramienta Degradado.
Seleccionamos el Degradado del cielo, para lograr un color azul.
Y creamos una nueva capa por sobre la carpeta de los fuegos artificiales duplicados y aplicaremos un color mas intenso, amarillo y rojo. Logrando un contraste genial entre los fuegos artificiales.
14. Luces de Ambiente animadas
Ahora vamos a hacer unos destellos de luz en toda la escena, para que podamos lograr un impacto para integrar de la mejor forma las luces de los fuegos artificiales.
Comenzaremos creando una nueva carpeta de animación en la línea de tiempo.
Luego en el panel de capas crearemos una nueva carpeta de capas dentro de esta nueva carpeta de animación.
Automáticamente adquiere el nombre: 1
Ahora utilizaremos los mismos degradados creados anteriormente, para ello con botón derecho activamos: Duplicar capa.
Tenemos ambos degradados dentro de esta nueva animación.
Activamos Asignar Cel al Frame en el fotograma 1 de esta animación, para hacer visibles los degradados.
Y a esta nueva carpeta de animación le cambiaremos el modo de combinación a: Superponer
Logrando que el primer fotograma se vea de esta forma, en mi caso, desactive el degradado de color azul, dejando solo el de color rojo.
Ahora voy a duplicar el cel de animación que contiene los degradados, en el panel de capas con botón derecho: Duplicar capa.
En este segundo cel voy a hacer visibles ambos degradados, el de color azul como el de color amarillo.
Y en la línea de tiempo vamos al fotograma 2 y activamos: Especificar cels.
Y seleccionamos el Cel de Animación número 2.
Y duplicaré nuevamente ambos cels, pero a los nuevos le bajaré la opacidad a 50%. He iré agregándolos cada 1 fotograma en la línea de tiempo, logrando una animación sencilla pero que tendrá un impacto por el cambio de luces producido.
El resultado es el siguiente:
15. Luces animadas sobre los personajes
Por último y para integrar de mejor forma a los personajes a la animación, realizaremos una sencilla animación de luz sobre ambos personajes, podrás ver que la animación se verá aún mejor.
Comenzaremos creando una nueva carpeta de animación desde la línea de tiempo.
Está nueva carpeta de animación se llamará Luces. A continuación crearemos un Nuevo cel de Animación.
Elegimos la herramienta Plumilla y cambiamos el color a un tono mas claro.
Y pintamos ciertas zonas de nuestros personajes.
Ahora seleccionamos la carpeta de animación en el panel de capas y cambiamos el modo de combinación a: Superponer.
Logrando que se integre mucho mejor.
Y hacemos la animación de ciertas zonas del cuerpo de los personajes en donde se proyecta luz por los fuegos artificiales, una vez hagamos la animación de 3 o 4 dibujos, duplicaremos esa animación en la línea de tiempo para extenderla.
Es importante que esta sencilla animación de luces sea un ciclo animado.
Vamos copiando y pegando esta animación hasta completar todo el espacio de la línea de tiempo.
Y listo, hemos finalizado con todos los detalles de nuestra animación.
Logrando este sencillo pero genial resultado:

16. Exporta tu Animación
Vamos a Archivo - Exportar Animación - Película
Le cambiamos el nombre y elegimos el formato MP4
En la ventana de ajustes de exportación de película lo dejamos en 4K. 3840 x 2160. En 24 fotogramas por segundo.
Y se exportará nuestra animación.
Animación Final
Este es el resultado que logramos realizar con nuestra escena iluminada, espero te hayan ayudado todos los TIPS que te enseñé durante el tutorial y el artículo.

Nos vemos en el siguiente TIP.
Users who liked this post


Comment