
Hey guys in this video we're going to talk about backgrounds not just any bgs but the complimentary background that puts your character in the spotlight. In this video, I'll be sharing 5 ways l make my character Stand out from the background.
--------------------WATCH VIDEO FOR VISUAL VERSION -----------------
1. BLUR
An easy but effective way to make your character stand out. Using the blur effect we can take away attention from one thing and give it to other. In this case, we will blur our background, when you blur the background it smooths the sharp edges and makes it out of focus, and our eyes tend to pay attention to the sharp object which will be our character.
For example: take a look at this drawing, we have a character and a background. It looks good but to make our character catch the eye we can blur out the background.
For that make sure you're on the background layer, then go to Filter (menu) > blur> Gaussian blur. A gaussian blur dialogue box will appear where we can adjust the Strength of the blur, once done click on OK.
Now as we can see the background is blurred smooth giving the character full spotlight.
Not only background, even if you have a foreground we can blur that out using the same gaussian blur tool to bring focus toward the character.
But now let's say you have a character in action pose or in movement instead of using the gaussian blur try using the motion blur.
It will not only make your character pop out but will also give more movement to the pose
For example, I have this character in an action pose. Make sure we're on the foreground layer
then go to filter > blur> motion blur. A motion blur dialogue box will appear.
Using the strength, we are able to adjust the strength of the blur.
Using angle, we can change the angle of the motion.
And I’m gonna set the direction as forward.
then click on OK.
There is one more type of blur that will again help your character stand out, called the radial blur which blurs everything surrounding its target point. especially if your character is in motion of throwing something [oustward] or receiving something [inward].
For example: Here I have a character in motion throwing a ball, to make the character stand out and to make this action much for impactful we can use radial blur .
For that will make sure that we're on the background layer. Then go to [menu] filter > blur > radial blur.
I have selected ‘outward’ as the direction since the character is throwing the ball toward the camera.[note: We can move the target point anywhere just by dragging and the blur direction will act according to it ]after setting the strength click on ok.
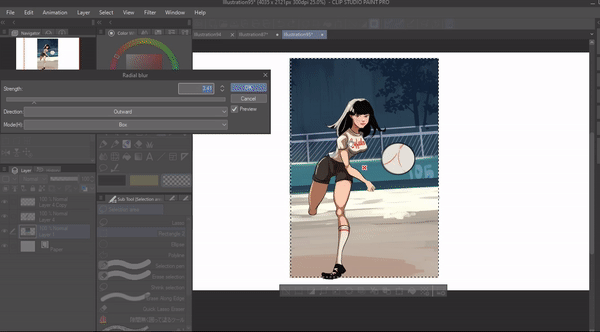
As you can see the whole attention is on the character now.
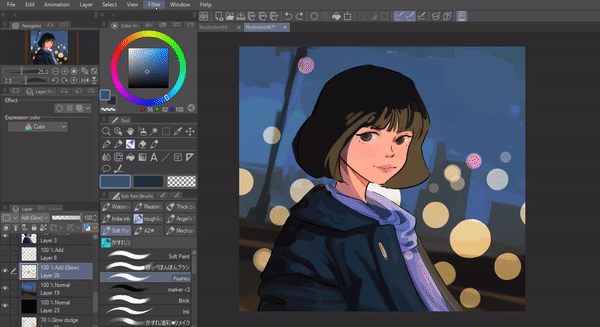
we can also create bokeh effects using blur. It’s a basic and easy way to draw a background, It's basically out-of-focus light that you can draw in a plain background or fit into a concept like city lights or many more. It will enhance your character especially if the lights are drawn around the character.
To do that create a new layer below the character then using any round brush create a circle on the places we want the bokeh effect to be
.then go to FiIter (menu) > blur > gaussian blur and adjust the strength. finally, click on ok. Now on top of that, I will add more circles. and we’re done.
2, CIRCLE
Yes, circles it's almost an old trick. If you scroll through the internet you can find plenty of artwork that has circles as its background, from old paintings to modern art it's everywhere.
These circles are mostly placed on the top half behind the character, when you do this it instantly brings attention to the character. No matter how many objects or characters are in a frame, the circle can make the main character stand out.
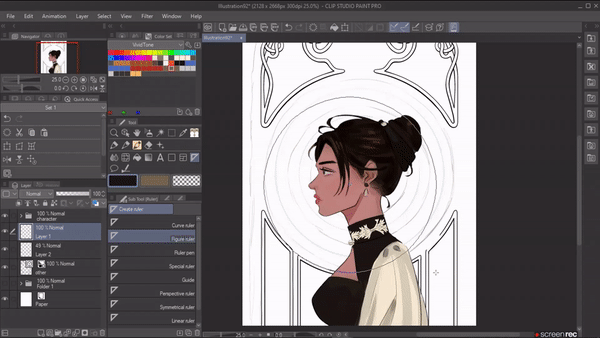
The circle can be drawn in different methods or ways. to give you some examples: It can have some detailed artwork in it like art nouveau style which we can draw easily using the figure ruler and symmetry ruler. there are also many brushes available in the assets store that you can use to create a similar look
Or it can be just a plain circle that can be quickly drawn using the ellipse lasso tool
For a basic example, I’ll be drawing a circle as background for this character. I have both the character and background in the same layer, now I’ll create a new layer above and convert its mode to “ multiply “.Using a dark color I’ll color the whole canvas. Then using the ellipse lasso tool I'll mark the circle on the character and erase it. Finally, using the same pen and color, I’ll draw the shadows. and that is it.
We can also construct the whole background based on the shape circle. Think of an object which has the shape circle like a tunnel . now lets draw a background where we peep through the tunnel and we will place our character at the end of it .
-------------------------------------------------------------------------------------------------
3 . LIGHT
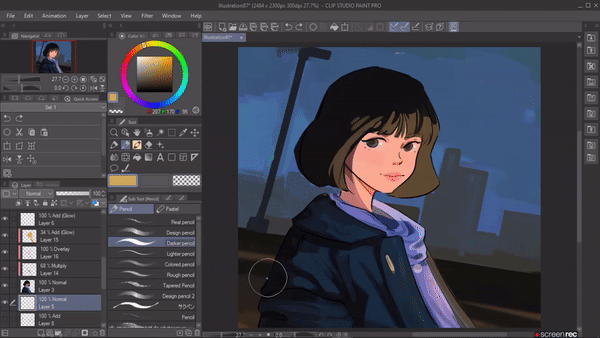
To put your character in the spotlight give them the light they need. Basically, draw a background that has some rather light source in it. Like sunlight peeping through the window and reflecting onto your character,
I think light source from behind the character that peeps through their silhouette makes the character stand out more and brings a lot of attention towards them, but it's just my personal favorite you can draw your light source from any direction you want
If the character is outside give them the natural sunlight and shadows or if the situation takes place at night draw some street lights hovering over your character.
You can try all these light sources by drawing a bit complicated background but if you’re looking for an easy and simple way to make your character stand out just draw a spotlight from the top.
For that create a new layer below your character layer, and color it with any dark tone I’m going for black here. Now I’m gonna pick a soft airbrush choose a lighter color like yellow and start painting the spotlight I am starting narrower and making it wider as we go down.
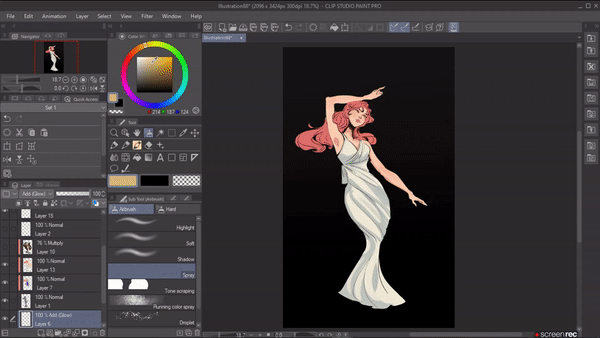
Now create a layer on top of the character and convert its mode to “ add glow “. Using the same airbrush I'm gonna draw some soft light, then using a paintbrush I’ll add some strong lights on the body parts where the light reflects, and finally ill create another layer and convert its mode to “ multiply “and draw some shadows. You can add in some sparkling stuff if it goes with your theme. or than that, it's done.
------------------------------
4 , OPPOSITE EFFECT
You can see a lot of professional artists using this method. The opposite effect is the contrasting color which is achieved when opposite-colored elements are arranged together. like in this case light and dark.
Light and dark are considered Strong tonal valves. The viewer's eyes are naturally drawn to areas where light and dark are contrasted -This is a very easy way to make your character stand out. This whole method is based on creating a strong outline for the character’s silhouettes.
To give you a basic example: If you look at this piece, the character stands out because the character is drawn in dark values mostly taken from this side of the color wheel, and in contrast, the background has light values which accentuate the character’s silhouette and makes it pop out. So when we look at this piece we know exactly where to look and who the main character is.
These same values can be switched, for example, you can make the background with dark values and draw the character in light value again which makes the character pop out.
This is a very easy technique once you understand it, it’s all about planning the placement and framing it properly. Even though I gave you a very basic example the same concept of contrast can be used in complicated backgrounds and perspectives, if you’re a beginner start by practicing in grayscale so that you know how different values works and eventually move to colors.
--------------------------------------------------------------------------------------
5. CENTER OF INTEREST
The final way to make your character Stand out is by placing them in The center and drawing a background around them. This method is pretty straight forward a central interest is the part of The picture or a Subject that Attracts the mind and is an attention-getter. When we Scan an image our attention is naturally drawn towards these objects .so to give you some examples the center of interest can be an animal, objects, or in this case, a human figureS.
.l will draw some characters p0sitioned in the middle of the canvas, remember that in this method it iS better when we have a Strong Silhouette and a good pose it will help your character Stand out more.
I have drawn some characters in different poses let me give you some different background ideas
we have our character in this triangle shape we can use the same shape for the background leaving the sides as negative space and drawing the background element inside The triangle like a cloud.
or we can do the opposite by leaving the inside of the triangle as negative Space and drawing the background on the sides for example tree and its branches.
This method as l said is pretty Straightforward even if you're background is Simple or plain as long as your character is in middle it will Stand out. Moreover, a simple bg will draw more emphasis to the subject by forming a clear contrast between the subject and the bg.
This method works even better when combined with other methods like The opposite effect and light . when you have good contrast color between your character and background combined with good lighting, the character will automatically receive The spotlight .
-------
Users who liked this post


Comment