Create dynamic scenes with the fisheye perspective ruler -Ver.2.0-

-
 MVP ◆This user has contributed greatly to the management of the community, by posting many great responses to the questions asked. Once every three months, MVPs are determined based on the points earned during that period and will be recognized accordingly.
 -
 New Valuable Player (NVP) ◆These are the next-best contributors to the community after MVPs. This is awarded to users who have not yet won an MVP award, based on the number of points they have earned.
 -
 Official Expert ◆Chosen out of all MVP awardees, who are already proof of excellence, this is a testimony of outstanding correspondence in the community. After careful screening, they are appointed by CELSYS and assume their position.Note: Formally called “Evangelists”
 -
 CELSYS official moderators ◆Moderators are official CELSYS staff members who are fluent in Japanese as well as various other languages. As moderators are not experts on software or creative work, they will not be able to directly answer your questions. However, moderators will provide communication and language support to ensure that everyone can smoothly communicate with each other.
 -
 CELSYS officialThis is the official administrator account.
From Clip Studio Paint Ver. 2.0 onwards, you can use [Fisheye perspective] in [Perspective ruler] with the [Ruler] tool.
[Fisheye perspective] off > [Fisheye perspective] on
With fisheye perspective you can show distortion as if the scene was being viewed through a fisheye lens, giving a more dynamic scene. It also can give the scene a more cinematic quality.
1. Creating a Perspective Ruler
In Clip Studio Paint, you can draw accurate perspective lines freehand using the [Perspective ruler].
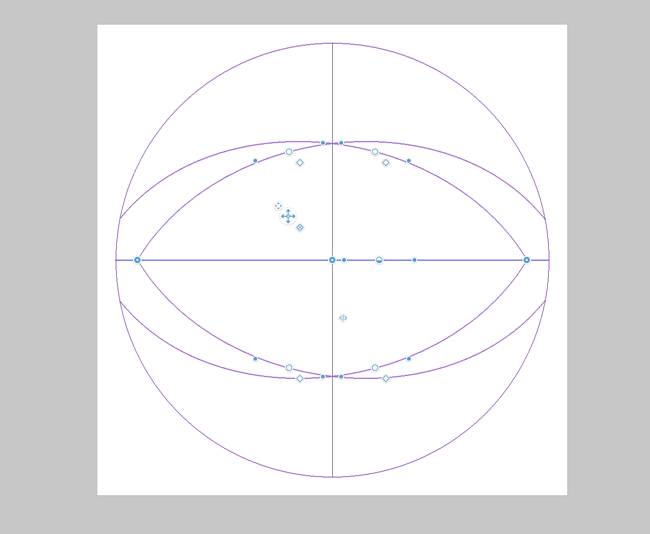
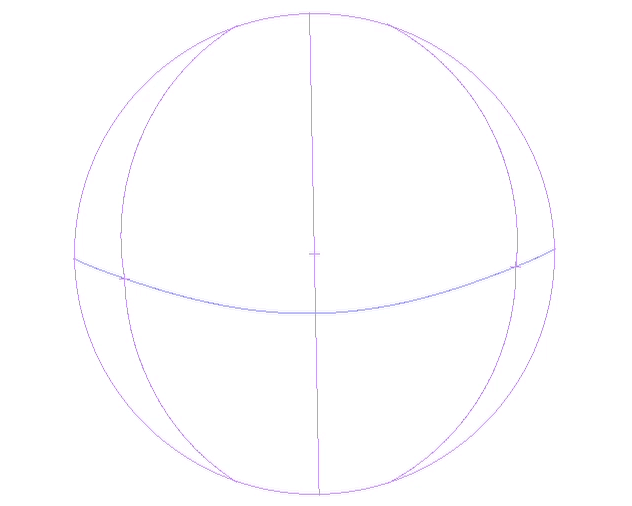
With a perspective ruler set to [Fisheye perspective], you can specify two curves and add a vanishing point at their intersection.
Create the [Fisheye perspective] ruler or turn on the distortion to see the center point of the lens (pictured as a red circle) on the canvas.
You can move the vanishing point, guide lines, and add a vanishing point, just like you can with the basic perspective ruler.
To learn the basics of the perspective ruler, check out the following TIPS article.
There are three ways to create a fisheye perspective ruler.
Add fisheye settings to the ruler
Select the perspective ruler on the canvas with the [Object] tool to open [Tool Property] palette > [Fisheye perspective].
Create a fisheye perspective ruler from the menu
Create a fisheye perspective ruler from the [Layer] menu > [Ruler/Frame] > [Create Perspective Ruler].
Check [OK] in [Fisheye perspective] to create a fisheye perspective ruler on the canvas.
Create a [Perspective ruler] sub tool
In the [Perspective ruler] sub tool [Tool Property] check [OK] in [Add fisheye] to create a fisheye perspective ruler on the canvas.
You can create a fisheye perspective ruler with the following steps.
1) Drag to create the straight lines.
2) The second drag motion will create the lens circle bend in the lines with the lens circle.
3) Dragging inside the lens circle will add a vanishing point, and will complete the fisheye perspective ruler.
2. Adjusting the fisheye distortion
You can adjust the scale and distortion level after creating the fisheye perspective ruler.
You can change the fisheye curve with [Distortion strength].
When the value is decreased it will make the curve closer to the way it was before applying [Fisheye perspective], and if the value is increased it will result in a stronger curve.
You can change the size of the entire fisheye perspective ruler with [Field of view]. This is useful when you can’t change the size of the lens circle with just [Distortion strength].
In addition to the slider, you can also use the lens circle adjustment handle to change the size.
3. How to use the controllers
There are five controllers you can drag to move on the fisheye perspective ruler.
1) Vanishing point controller
Drag this to change the position of the vanishing point.
If you try to drag the vanishing point closer to the eye level, the vanishing point will snap to it.
Snapping the vanishing point above the lens circle will cause the vanishing point to be displayed on the opposite side as well.
You cannot move the controller outside the lens circle.
2) Guide line controllers
Drag and move the middle white circle to move the guide lines.
You can change the slope of the angle of the guide line by dragging the blue circles at both ends.
The snap function can be switched on and off with the square controller on the lower right of the white circle.
You cannot move the controller outside the lens circle.
3) Lens center controller
Drag the controller to change the center of the fisheye lens.
4) Eye level controller
You can change the position and angle of the eye level (blue).
Change the position of the eye level with the central controller and change the angle by moving the small controllers on the sides.
A vanishing point snapped to above the eye level will also be moved if you move the eye level.
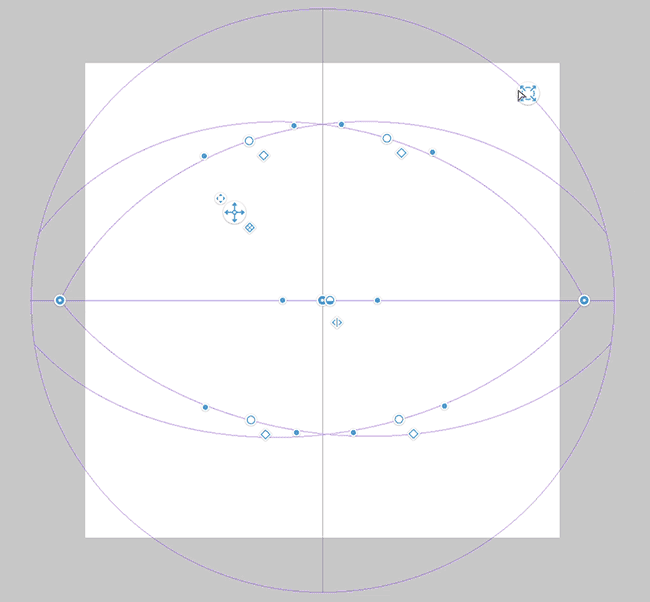
5) Move controller
As outlined in “Adjusting the fisheye distortion,” you can move the entire fisheye perspective ruler position.
The upper left controller changes the position of the controller to move the entire ruler.
The lower right controller lets you turn the snap function on and off.
6) Lens circle adjustment handle
You can drag this to resize the entire fisheye perspective ruler.
4. Mastering fisheye perspective
You can adjust the guide lines and vanishing point according to what you want to draw. You can also enable snapping to the ruler or grid to help in your drawing.
Add vanishing point
You can add a vanishing point to the ruler to match the shape of the fisheye.
1. Choose the [Perspective ruler] sub tool and then [Add vanishing point] from [Process].
2. Drag inside the lens circle to make two guide lines.
The first drag specifies the first curve, the second drag specifies the second curve.
The vanishing point will be created where the two guide lines intersect.
Add guide line
Choose the [Perspective ruler] sub tool > [Tool Property] > [Process] > [Add guide].
With [Add guide] selected, drag on the canvas to draw an auxiliary line that snaps to the nearest vanishing point/lens center.
If the starting point is outside the lens circle, it will not be drawn.
You can add guide lines to all perspective ruler vanishing points on the canvas, not just the fisheye perspective ruler.
Move guide lines while keeping it horizontal
Choose the [Perspective ruler] sub tool > [Tool Property] > and turn [Fix eye level] on to fix the eye level. Tap [Horizontalize eye level] to horizontally align the projection plane of the camera.
Snap brush
Follow these three steps to draw along the guide lines with a brush.
1) Turn on [Snap to Special Ruler] on the command bar
2) Turn on perspective ruler snapping
If the guide line is displayed in green, it means it is set not to snap towards the vanishing point attached to the controller or towards the lens center.
Click on the controllers that are crossed out to enable snapping.
3) Select the brush you will use snap on and go to [Sub Tool Detail] > [Correction] and check [Enable snapping].
Once you have completed the steps 1 ~ 3 then you can start drawing along the fisheye guide lines.
Lines started outside the lens circle will not be corrected.
Snap to figure
Once you have fulfilled all conditions necessary to draw with the guides you can also use Straight line, Rectangle, Ellipse, and Polygon in fisheye perspective.
Tools for vectors (Linear ruler, Figure ruler, Rounded balloon, Ellipse balloon) can also be snapped to.
By dragging, you can specify the diagonal line of the rectangle that encloses the shape to be drawn.
If there are multiple possibilities, additional taps can be used to determine the shape.
Show grid
You can draw using a grid based on the shape of the perspective ruler.
Select the perspective ruler from the [Object] tool, and select one of the three grid types in the [Tool property palette].
1. XY plane: The plane (red) where the second and third added vanishing points converge
2. YZ plane: The plane (green) where the first and third added vanishing points converge
3. XZ plane: The plane (blue) where the first and second added vanishing points converge
You can change the size of the grid from [Grid size].
By turning [Snap to Grid] on from the command bar, you can draw lines that snap to the grid.
In addition to being able to draw with brushes, you can also create basic shapes.
Note:
3D objects can be snapped/linked to normal perspective rulers, but not to fisheye perspective rulers.
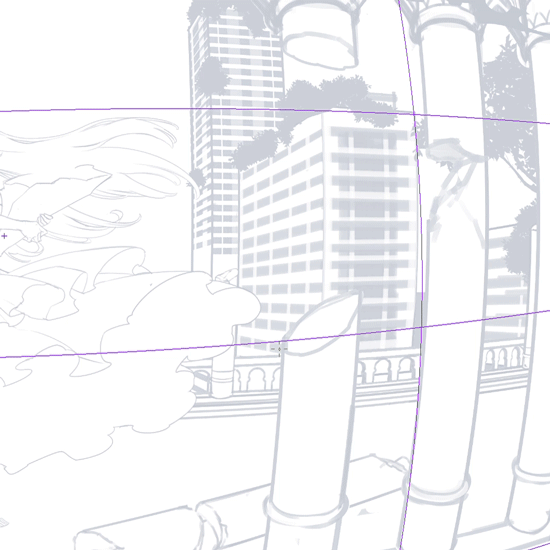
5. Techniques for using fisheye perspective
Here is a piece of concept art drawn by illustrator Zounose.
Using a fisheye composition, he portrays a character standing in a castle garden with a desolate atmosphere.
By using the fisheye to make the columns curved it draws more attention to the character in the center. This is a good way to center focus on a character.
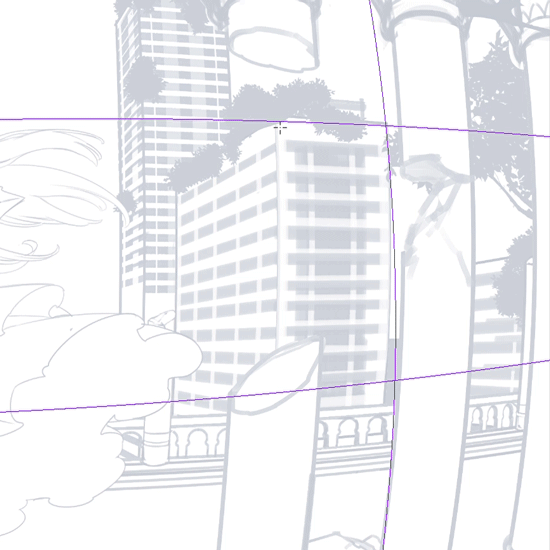
Here are three different ways that this illustration is making use of the fisheye perspective.
1) Using the grid the artist could measure equal space between the columns.
For objects spaced out in a similar fashion as these columns you can use the grid to correctly keep distances accurate while seeing it in a distorted fashion.
2) Using duplicate and transform the artist is able to easily embellish the columns.
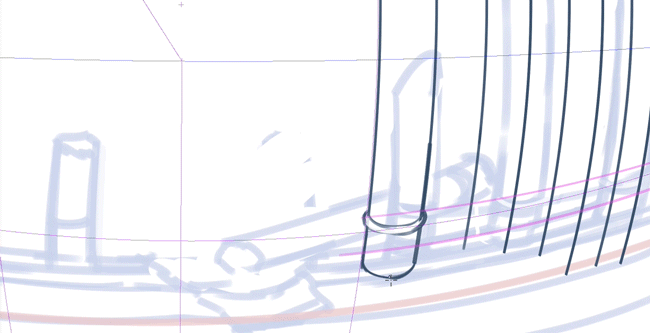
This technique is a timesaver in that you just draw the decoration once and then copy and transform it.
In this illustration, the pink lines were drawn snapped to the ruler so that the artist could use them as a reference to transform the decorations at the right position.
3) Accurately distort linear buildings

In this image the buildings in the background are getting detailed with a brush. By enabling snapping to grid, the artist can create the appropriate curve.
Please try out the perspective ruler for yourself, we cannot wait to see how everyone uses it to create!
Users who liked this post


Comment