
Intro
Hello there, this is Tamil. Today I wanted to go over new align tool in Clip Studio Paint 2. Make sure to update before starting. It is a very useful function that allows for better art presentation on social media and making patterns.
Watch my video if you prefer visual learning over reading ~(˘▾˘~)
My socials:
Overview
Let's go over the basics if you never used align tools before. To start we will need the align window.
Window -> Align/Distribute
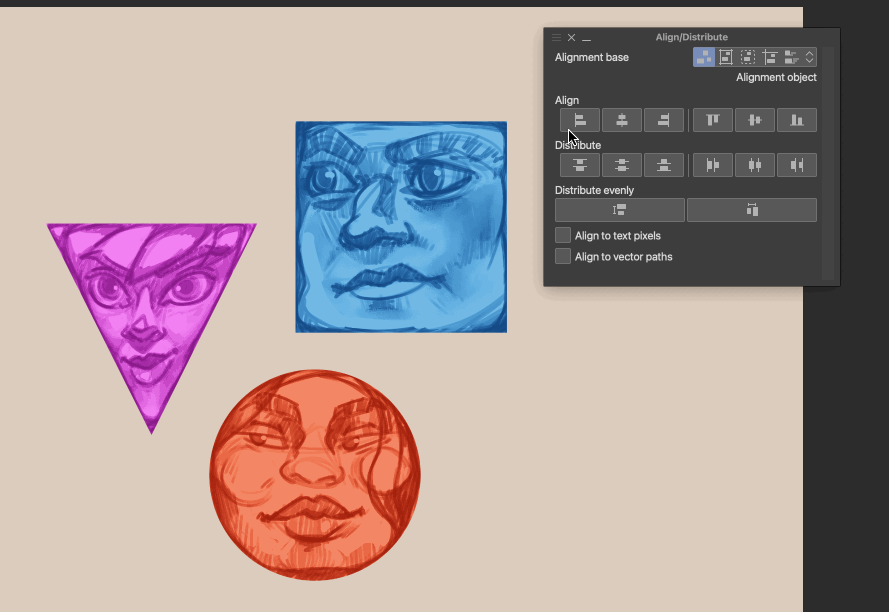
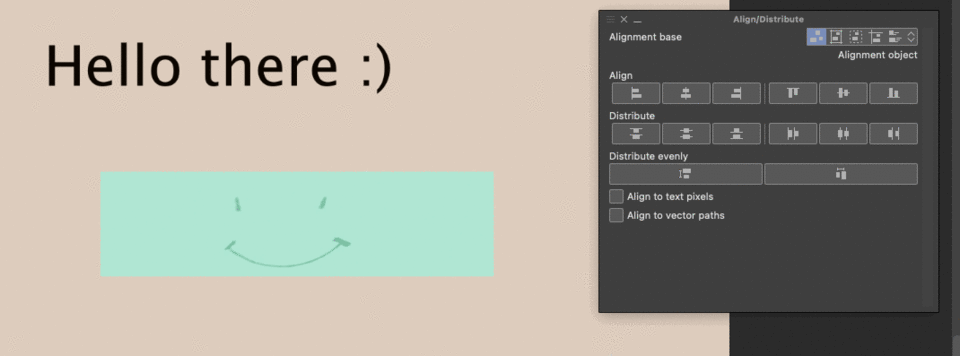
A window should pop up.
There are a lot of buttons. Very scary, but the best part is that most of them are self explanatory. Icons are very easy to read.
1) These are different mods in which align will work. For example, if you want to align between objects or only for canvas. We will get into it in a bit.
2) Align tool. Which is the main button that I usually use. This will pull objects to the middle or to the right/left side.
3) Distribute will try to move objects, so that they have equal space between each other. That way it looks more presentable and symmetrical ( Hello cute social media posts :3 )
4) Distribute evenly is a more simplified version of 3. Unless you do precise work, this should do fine.
5) These are extra options in case you are working with text or vector layers.
Alignment base.
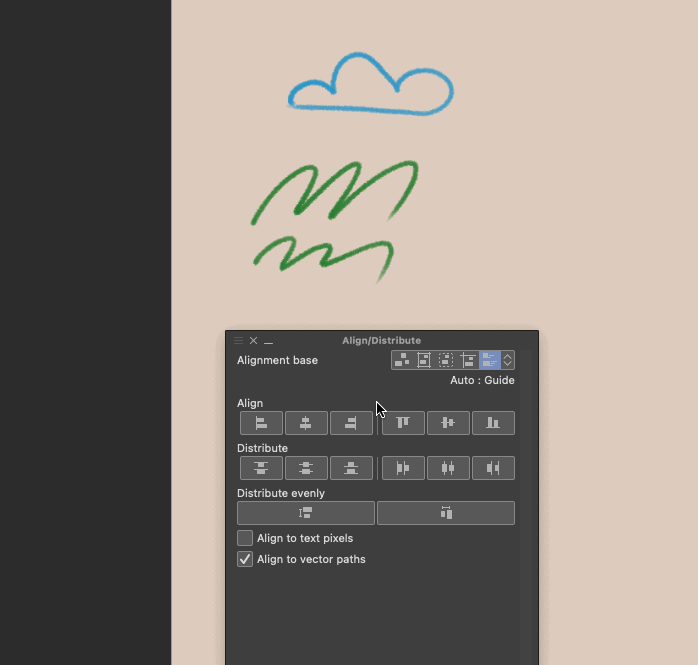
Different mods for align! I will show you with examples which mode does what. Some are more important, while some I like to use a lot.
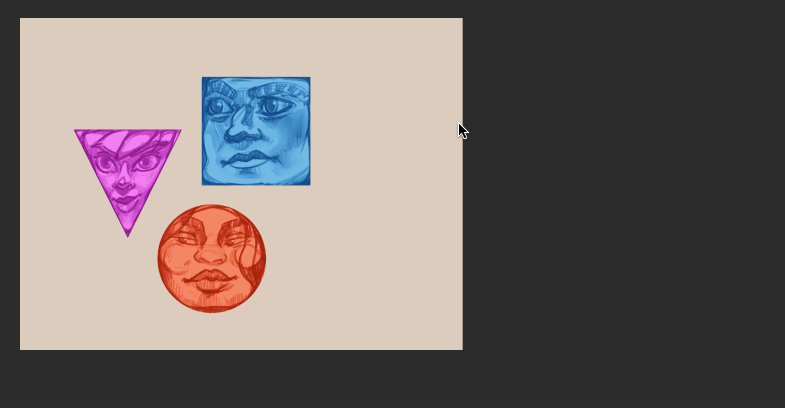
Alignment object is the most basic ways to align things. Let's say you have different objects on different layers. Just select them and we can start using this mode.
In this case I will be using these quick face practices to move things around. It's great practice to try to draw a face inside a shape.
( Make sure to select all layers ! You can do so with Ctrl + Shift + Left Click names )
As you can see, using align tool, it will move things around based on the closest object. For example, everything aligned to purple left edge, when I clicked left side. It all aligned to blue face, when I clicked right.
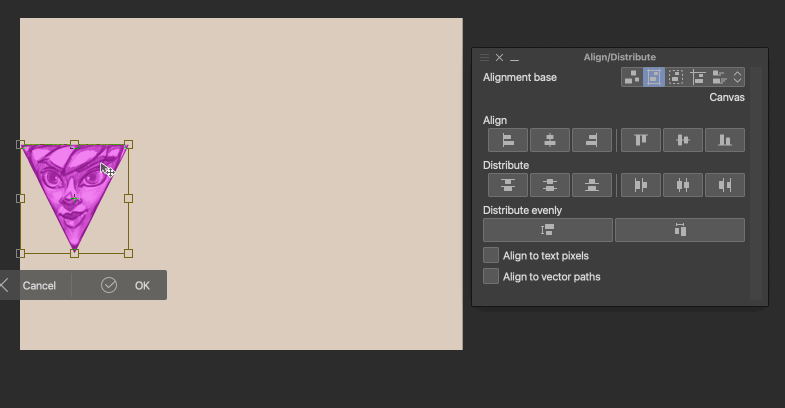
Another way to align is to do it according to canvas. This is a very different way to arrange images.
This will work amazing if you want to snap your object to canvas only. I love to use this if I want to make a symmetrical social media post for example.
Don't forget that you can also combine different buttons. In the end you can see that I used align the middle and distribute evenly button. It pushed everything in the middle and put it in a row. Made everything very symmetrical.
Distribute evenly will make distance between layers the same. Because we were in Canvas mode, it will use our canvas to distribute things. If we were not in that mode, the it will look at the objects that are the most far apart as edges.

Another thing to point out is that align will work in canvas mode if you have one object too!
It will not do anything at all if you have "Alignment object" and only have 1 layer selected.
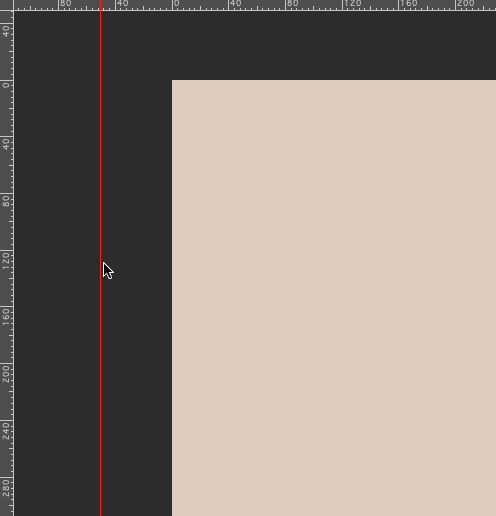
Another mod that is pretty cool is "guide". It will snap objects based on rulers you have set up in your project.
A simple way to make guides is to use ruler tool. Just do Ctrl+R and guides will show up. Drag from either side, and it will automatically make rulers for you.

You can also move the ruler layer by clicking Ctrl+T in the layer panel. It's very easy to make adjustments to your rulers with operation tool as well.
If you feeling like making a quick align, then you can also use selection mode. I never seen this feature before, which is a big surprise to me.
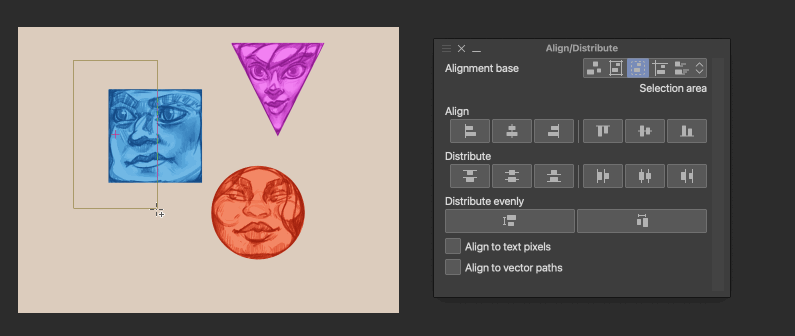
You can use any selection tool that you prefer. In this case I used square selection. No matter where you put the selection, objects will snap to edges of that selection. It's very handy when you do not want to make rulers/guides too much. It's very quick.
A cool thing to note is that if you select around canvas, it will finish the selection on the edge of the canvas. Which is very versatile.
Align / Distribute
The buttons on align and distribute are very well made. It's easy to read and understand. I will quickly show how to read them.
Each line will show how where the snapping is occurring. Each object has invisible edges that you can find. They will align with the further part of the edge.
If you divide the image by 3, this should the the invisible line that the program is using. The same goes for horizontal divide as well.
A thing to watch out for is transparency or small lines that you barely notice.
If you have even a very very small line on the same layer, it will treat that object differently. If you hit Ctrl+T for free transform, you can see how big is the box of the object.

You can see that if I add more dots, it keeps changing the bounding box. This will also be true for very thing transparency layers. Keep that in mind.
As you can see in the first example, the distribute worked based on the left side. The second example we can see that distribute evenly was taking the middle image approach. It's very little, but you can still see a difference.
My suggestion is just using distribute evenly for most cases.
Text and Vector
Two final extra boxes help in case you use a lot of vector shapes or text. In most cases CSP will use the bounding box to align things. In some cases it's good to have more control.

In the first example you can see that there is still some space. That's because CSP uses the general text box. A lot of time there will be some extra space in case you need to edit. If you want to align it very close, then make sure to turn on Align to text pixels.
If you use vector shapes, it's also good to keep in mind about the vector path option.
In this case, the box is aligned to pixels of the box. It's fine, but sometimes you want to align it to the vector path (small red line inside of the box).
If you turn on align to vector path, it will snap to the red line instead of pixels. The outer edge can be very very thick, but vector path will always stay the same size.
Let's make a pattern!
There are many ways you can use align tool. For me, it was very useful to use it for patterns! Let's see how we can use it to make this.
You can use patterns for room environments, clothing designs and more! I decided to go with something simple.
Start with making a file. It's good to have a 1:1 ratio (square) to make an easy pattern.
After that, you can start doodling images for your pattern. It can be anything you would like. For example different cat sketches or food.
It's good to have each object a separate layer. We can group it and duplicate it just in case anything happens.
To make a pattern we want our objects to be in the middle of the edge of the canvas. Then stick out the other half on the other side. I know it sounds complicated, but it's very simple once you put it together.
This is how it is supposed to look like in theory to get started. If there is an object on the edge, it should have the extra part sticking out on the opposite side basically. So how do we do that?
First we can create ruler/guide on the edge of the canvas for ourselves. Ctrl + R will show rulers.
Once you have that guide, you can always zoom in and double check if it is right at the center of the canvas edge. Very important step. If it is a little bit off, the pattern will not look right.
Use guide mode to move. Make sure to select the layer you want to move. Click align to center. Done!
Our goal now is to duplicate that same layer. Create the same guide on the opposite side. Move it to the other side. It should be on the same height.
We get ourselves a nice base for our pattern. To make sure it works good. We can create a layer from visible.
Right click on any layer, and a window will pop up.
Merge visible to a new layer. This will give us a new layer from everything as a back up. After that we can go into making a test pattern.
This will allow us to create a pattern.
Make sure to turn on Tiling and chose a save location you will remember. After that we can go to the folder you saved it to and drop it on canvas.
In case your folder is not open, then you can just go to window and find materials.
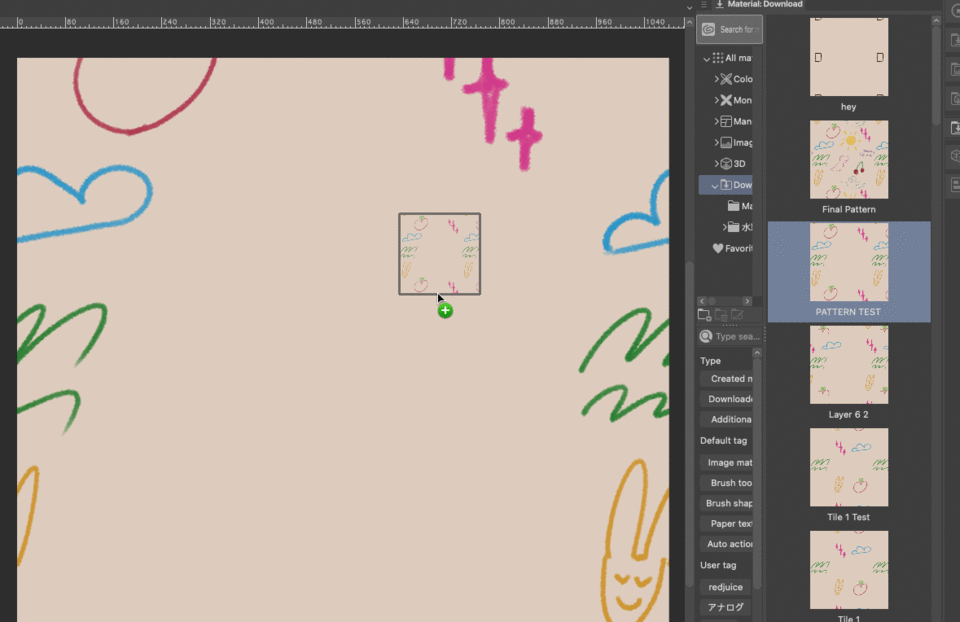
After you add it, make sure to zoom in and check the edges. The blue line is where the pattern connects. Most problems will come from there.
After you have your pattern set up, we can draw more in the middle to add variety to our pattern.
Finish the pattern. If you are happy with it, just create the pattern again from the method I showed you before.
To apply texture to anything, it's good to use a mask. It's very simple.
Start with a simple sketch.
Drop the pattern on canvas.
Use selection tool to get what shape you need. Then mask it.
Make sure to click the little check mark! This way, the mask will stay the same, but the pattern can move!

We can add more shadows and colors to make it more dimensional.
We done!
Patterns can be applied to walls/t shirts/or carpets. Anything can be a pattern.
You can get the PNG for the pattern from here if you want. Up for grabs.
If my tutorial was a bit confusing or not enough, it's very understandable. Some people prefer more straightforward approach. I suggest checking out the official clip studio paint tutorial if you wanted to see more examples.
The end
Thank you for reading. I really appreciate you spending time with me. Hopefully you learned something.
As usual, you can check out more video for more hands on experience. Comment in case you have any specific questions. I try to help people when I can ^-^
Users who liked this post


Comment