
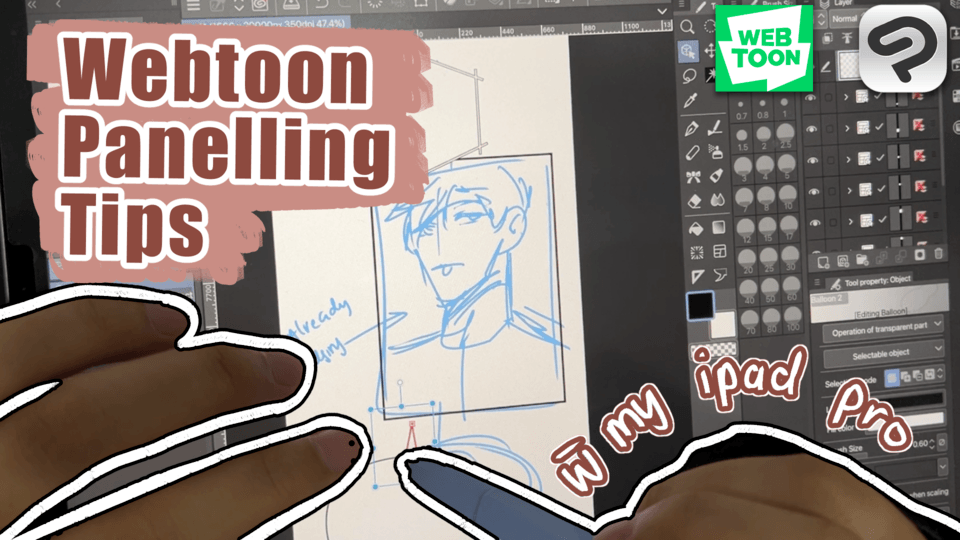
Detailed Tips and Tutorials using Simple Mode
Hi everyone! In this tutorial i’ll be sharing with you how I use Simple Mode to draw in my smartphone.
Note: If you’re already familiar with the basics, you can proceed on “Let's draw using Simple Mode (Smartphone Version)”
CSP is compatible with Windows/MacOS, Tablet, and Smartphone (Android/iOS). I’m using an android phone and it’s really a huge help that Simple Mode is here to help us the beginners to understand more about the basics of the platform, and start drawing digitally with a user-friendly interface!
Yeah I know it’s cool!
I’ll be sharing on how I use the basics and my most used tools and favorite feature in Simple Mode.
For more detailed and understanding about Clip Studio Paint and Simple Mode, you can visit these links! Lots of awesome artists and illustrators blessing us with their best tips, so check them out also! A very helpful tips and tutorials.
For Tablet, Smartphone, and Windows/MacOS
Simple Mode using my Android Phone
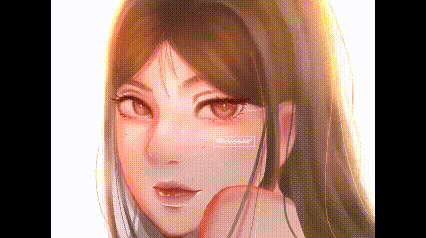
I will share to you how I draw an illustration of a girl with a sunlight effect or lighting using Simple Mode (Smartphone Version).
Note: All pictures are mine :)
Basics
Layout/Interface in Smartphone
So let’s start here. This is the usual layout/interface of your CSP after downloading, and since we’re beginners, Simple Mode can help us how to understand the basics first.
Here’s how to switch from Studio Mode to Simple Mode as easy as 1,2 3!
Note*: Disregard this part if you’re already in Simple Mode after downloading and opening the app, you’re good to go!*
Guide:
(1) Click the burger button/3 stacked lines
(2) Tap the “Switch to Simple Mode” and you’re ready to explore CSP easily and smoothly!
Great! Now let’s proceed to what’s inside and what they are used for!
Guide:
(1) Here contains (From left to right) the Undo and Redo, Materials, and Menu buttons.
(2) The canvas and canvas area
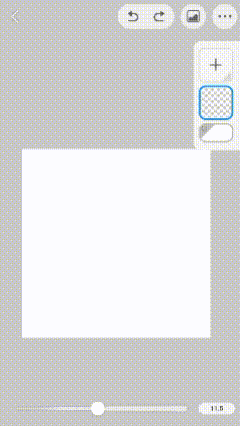
(3) Indicator for the brush size and opacity level
(4) Tool bar
Let us start first on the bottom part which is the Tool Bar.
(1) Switch to eraser button where you can easily switch the eraser and the brush or tool you are currently using.
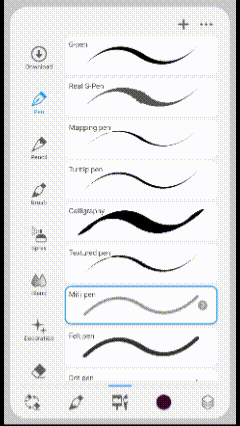
(2) Here you can can find tools such as the move, lasso, liquidify, figure, fill and eyedropper.
(3) Brush selection where even you are in simple mode, Clip Studio Paint did not limit the access of choosing the brushes you need. There’s a bunch of them for you to choose, and you can also download brushes from the vault!
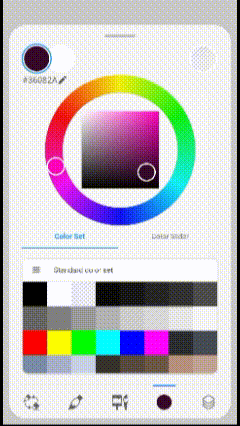
(4) Color Palette or the color wheel
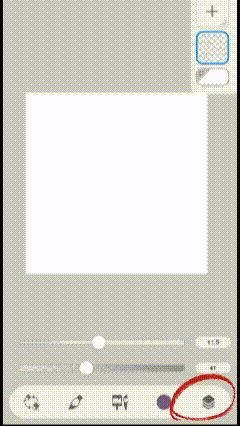
(5) Layers, you can swipe left and right to maximize the area.
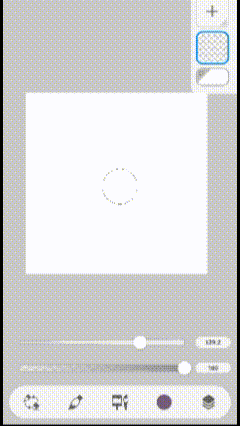
Now let me show you how to change brush size and opacity
The first line for the brush sizes
And second line for the opacity level
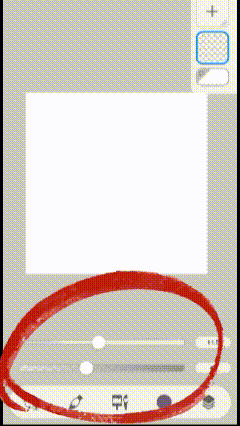
Here’s how it works
Undo and Redo buttons
You can simply tap the buttons or tap your screen with two fingers for Undo and three fingers for Redo.
Materials
This is where you can find all your downloaded materiels such as 3Ds, images, patterns, and many more.
Export Image and Timelapse
Share your awesome works by exporting them in high quality.
I hope you guys liked this mini tutorial. And now we’re done with the basics, let us now draw!
Let's draw using Simple Mode (Smartphone Version)
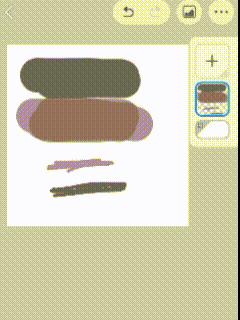
I started with some sketches, and lowered the opacity. Just click the layer and the indicator will show up. As you can see I also have the colors on the left side. I chose them for the colors that I want to use in this piece.
I used the thick oil paint brush for the lineart. You can choose any brushes that you want to use, it depends what style of illustration you are making.
By the way, I created a new layer for for the lineart. Just tap on the “+” sign, easy right?
As you will notice, I did not make the lineart so fancy and detailed because we will add the details later.
Now that we’re done doing the lineart, let’s proceed to the base colors. I used the mili pen brush because it gives me the solid color that I want, but like what I have said earlier, you can choose any brushes that you want.
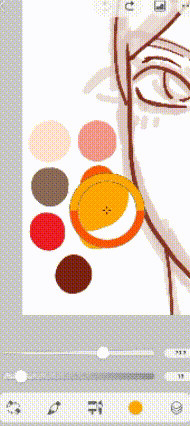
Since I have my color reference on the side, I will use the eyedropper to get that color that i want to use. Just long press on your phone screen and the eyedropper will do the job, of course you need to control where your eyedropper fall.
Just like this.
Now I created new layers for the base colors. It’s for the safety though. In case I made a mistake just to be sure :)
Picture below I duplicated the lineart for spare in case I made a mistake when something came up. But mistakes are everywhere throughout the process, this is only for spare but trust me even you made some mistakes in the middle, there’s always a way. Just trust the process and yourself.
Now that I’m okay with the bases, we’re going to merge these three layers and will start to add shadows using gouache and blend it out using blend brush.
Kindly see pictures below for reference on how I merge layers.
Do the above again when merging more the one layer.
Time for shadow and blending! Gouache and Blend brushes I use. Don’t be afraid to make a mistake in this process, in order for you to achieve this kind of style it is necessary to color and blend the base layers with the lineart layer, that’s why I merged them before.
And as you can see the lineart was blended well and it turned out like this.
For the eyelashes and brows, I still use gouache but in higher opacity and smaller size of brush to create strands.
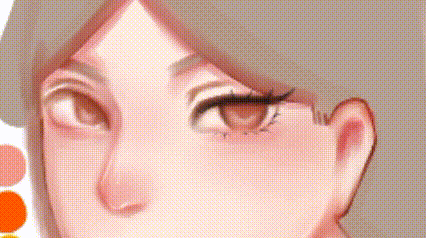
Moving on to to her hair this time, I put darker color for the hair base then added light color for some thick strands. Don’t forget to blend, blending is so important to create smooth lines and shades.
After doing the entire hair base, I added some solid lines and blended them well to create shadows for the hair.
For the primer of highlights I added new layer and put some “peach to pink” color and made the layer blend mode to “Add” for more vibrant and light color.
This is one of my favorites in CSP simple mode, you can easily access the layer’s property with just few clicks! Saves time and easy to remember, right?
Video below on how to set the layer’s blending mode. You can check how each blending mode works, don’t be afraid to have some time to check them out. You’ll be amazed once you know them!
I added pink color where I wanted to have the lights. Since we’re in add blending mode layer, it will give you a brighter and saturated color of pink. Don’t forget the bounce light.
Then I blended them with higher opacity to create a strong blending.
And as you can see the hair got darker and with a touch of red, don’t be afraid to experiment. Sometimes the unexpected touch can bring more life to your work :)
Here’s another tip when doing hair, put some lines in different sizes to create some strands. It can lift up the emotion of the hair and can make your hair more realistic.
Try it!
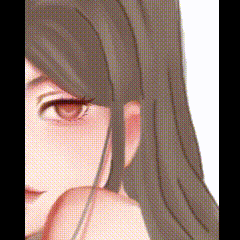
My favorite part, highlights! I’m sure soon this will be your favorite too.
I put more pressure of highlights on the parts where there’s light’s touch. Tip, it’s alright to use white color but I suggest you use peach to pink to light pink to compliment on the subject and lighting.
See where I put the highlights below
Ofcourse don’t forget to blend!
Now that we’re done on the subject, let us now proceed on the lighting. Lighting is also my weakness as of this moment since I’m still a beginner and just starting to draw digitally. CSP is really a good shot if you want to explore how to draw digital art!
Picture below, you will notice that the other side got darker. This is where some shading starts since our girl will be exposing to sunset lights from her back to her eyes and face, we will shade her some brown to maroon solid color.
Don’t forget to set the new layer to multiply then adjust the opacity.
Now let’s erase some to parts for some lighting, and don’r forget to blend. Adjust the opacity of blend brush when needed. Tip, higher opacity if you want a strong or more visible blending, and lower opacity if you want to have a smooth like airspray brush effect.
Back to her hair, I also created a new layer in add blending mode for the strong lighting on the edges. I use yellow color on this then blended
Now for the sunset lighting, I added another layer and set it to add (glow) blending mode to create a glowing effect. Adjust the opacity if needed. I use saturated orange and airspray brush.
Don’t forget to emphasize the lights on the edges of her hair and face. Also put some glow on her eye and cheek part to compliment the lighting.
Kindly take a look on the video below on how I apply and render the lighting.
Now for the final touch, I added some hair strands in the same layer add (glow)
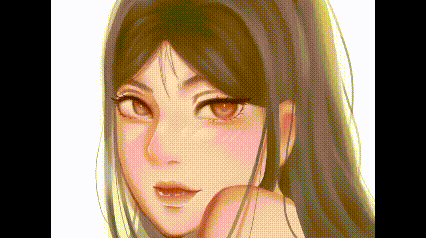
Once done, you can export your beautiful artwork and share to everyone! If you want to share the timelapse, just click export timelapse.
And we’re done! This is how I use the simple mode and it really helps me on how to understand more how to use the platform. If you are comfortable now to explore studio mode, just follow the steps below!
Timelapse
A speedpaint of the entire process, enjoy!
Users who liked this post


Comment