Fill Base Colors Fast and Easy
Intro
Hi everyone! I’m Rina!
I've been asked a lot about why I don't include the base coloring process in my timelapse videos. I just don't think I do anything special during that part of the drawing and it only makes the videos more tedious to watch, but since I still remember how much I struggled setting up the Fill tools back in the days, I understand where your curiosity comes from. So I'm gonna share with you all the important aspects you should keep in mind to be able to base color fast and easy on Clip Studio Paint!
You can also watch my video tutorial for a more in-depth and dynamic explanation, as well as a practical demonstration.
CSP has 4 different default Fill tools, or bucket tools, whatever you wanna call them. They’re located inside the Tools panel, in the little bucket icon.
I mostly use the second one (Refer to Other Layers), but also the bottom two (Enclose and Fill, and Paint Unfilled Area), depending on what I’m drawing. So these are the ones I’ll be covering today.
Refer to Other Layers
The Refer to Other Layers fill tool is the simplest one. You can just click and drag across the lines to fill an entire space. No need to exhaust your hand by constantly clicking on every blank space!

Enclose and Fill
Enclose and Fill is super fun to use! I love it for when I'm doodling! It works like a Lasso tool. You make a selection outside of the lines and once you close it... Ta-da! Everything inside is now filled with color! It's great to cover parts that have many lines inside, like some complex clothing or hair.
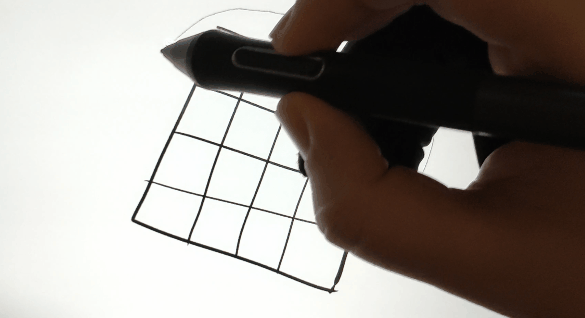
Paint Unfilled Area
And lastly, there’s the Paint Unfilled Area tool.
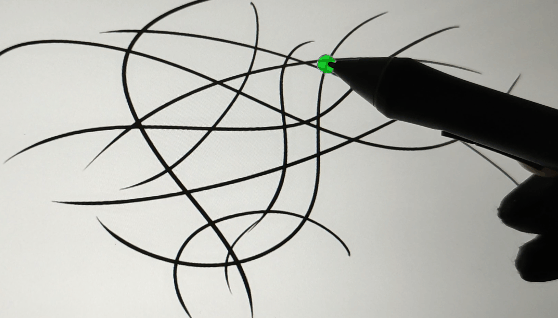
It’s sort of like a brush, but this one is smart enough to know it should only color inside the lines. I wouldn’t recommend this one to create big spots of color, but it is great to go over blank pixels that usually happen around tiny spaces of the lineart.
Before I would have to do that “manually” with a brush and carefully try to stay inside the lines while I fix those spots. But with this fill tool, you can just quickly paint over those spots and be done in a moment without worrying about staying inside the lines!
Okay, you've met the tools!
How do you set these awesome friends to fit your lines?
Most of their settings are common to each other, but others have a few specific options. Let's see the most important ones.
Refer Multiple
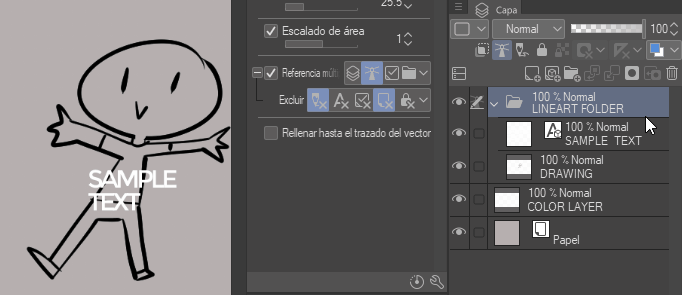
Set your lineart layer or lineart folder as the Reference Layer with the Lighthouse icon. Do the same on the Refer Multiple option of any of the Fill tools. This will command the Fill tool to fill our canvas, taking into account what’s in our reference layer (aka, the lineart here).
You can also exclude layers automatically.
Let’s say you’re working on a webcomic and your lineart and text layers are all in the same folder. You can tell the bucket to ignore the text layers so it won’t use them to create its selection.
You can exclude sketch layers, blocked layers and more.
Tolerance
This refers to the number of similar pixels the bucket will fill.
Imagine a gradient. If I click on the white side with a low Tolerance, the selection will only cover a small part of the gradient. Whereas with a High tolerance, we can cover a larger space.
How does this apply to base coloring?
Usually, the thinner your lineart is, the lower tolerance you wanna chose. While the thicker your lines are, the higher the tolerance bar can go.
Area Scaling
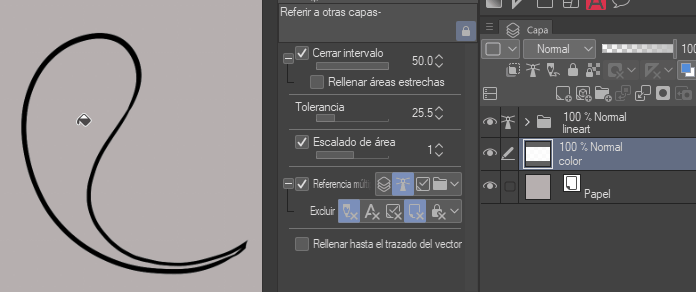
Sometimes, though, if you do rather thin or open lines like me, a low tolerance will leave ugly unpainted pixels or not cover all the parts properly. This is where Area Scaling comes in handy.
With this option, we can make the color selection automatically go a few pixels further so it can reach our lines completely and even color beneath them.
I usually keep this at 1 for my fully rendered illustrations, and -1 for doodles. Because, yes, it can go the other way around and make the selection smaller too! If you do thick lines, you may wanna use a negative number here with a high tolerance for example.
For the sub-option "Scaling mode" you’ll wanna keep this at “Up to darkest pixel”.
This means that the extra selection will stop at the darkest point of the line.
Choosing any of the other two will cause the colors to overflow the lines. Although they might be useful if you purposefully want your colors to do that.
Close Gap
Last, the third key aspect for layering our flat colors would be the Close Gap option.
As it suggests, if you enable this option, the bucket tool will detect the parts of the lineart that are slightly open and treat them as if they were a continuous line. The higher the number, the more it will close the lines.
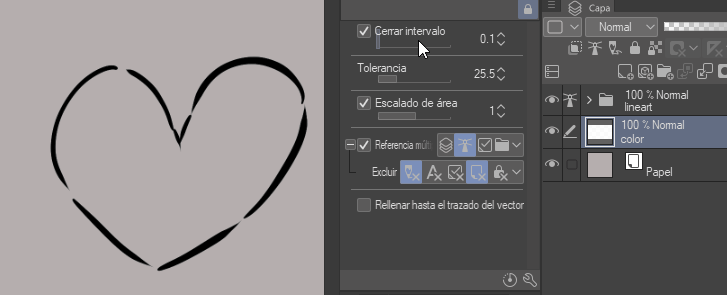
Enable the sub-option “Soak into narrow area”, to be able to reach tiny spots too. Pretty useful to avoid blank pixels around the tips of the hair in your drawings or any other sharp edges.
Antialiasing
Antialiasing will give the edges of the base colors a softer look. While if you turn it off, the edges will be a lot crisper. It is up to you if you want to use this option or not. I prefer to have it on, but perhaps you need cleaner edges for your art.
Fill up to vector path
Vector layers are great to do lineart as they have these invisible points inside them that you can use to edit their form, shape, thickness… These points are part of a path. Think of it as the skeleton of every stroke you make.
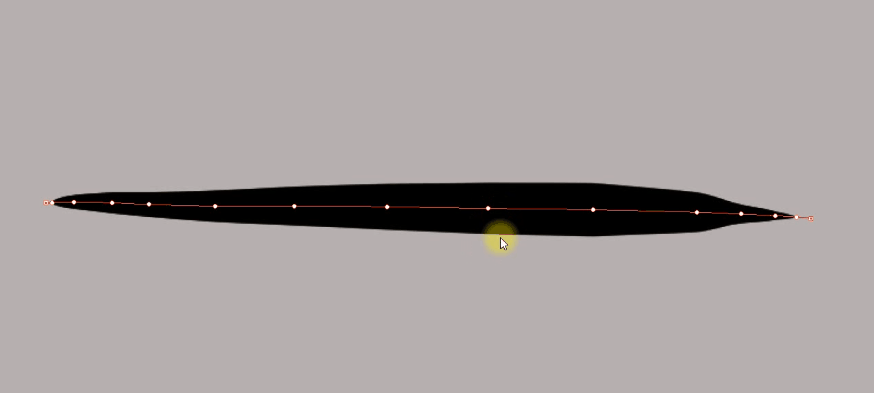
So Fill up to Vector Path means the base color will reach up to the inner path (or skeleton) of the line/stroke. So if you use vector layers for your lineart, and you wanna make sure the colors reach underneath the lines, you’ll surely love this option.
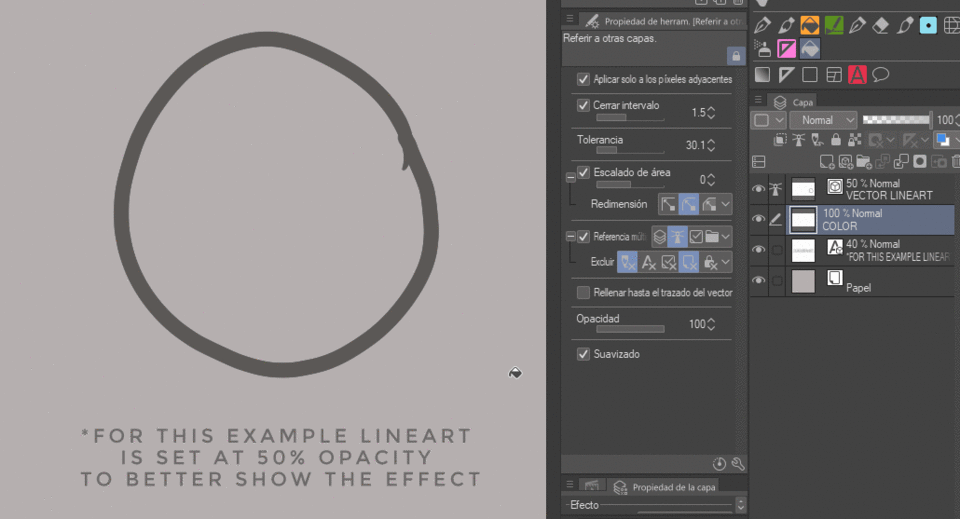
However...
I use vector lines for my linearts usually, and I prefer to keep this option disabled.
Why?! It looks pretty handy, right? Anyone would like to use it. But you see…
When I erase parts of the lineart, instead of the eraser tool, I tend to use the same brush I’m drawing the lines with but in transparent color. As I am using a brush, the program registers every movement as a new invisible stroke (as if I was still trying to draw). Therefore it creates a new vector path with every stroke I make.
Even though I can’t see them, they are there, just in the shape of transparent lines.
So when I use the fill tool later, it leaves random blank spaces because the bucket recognizes the transparent vector strokes I did while erasing, and uses them to delimit what should be filled.
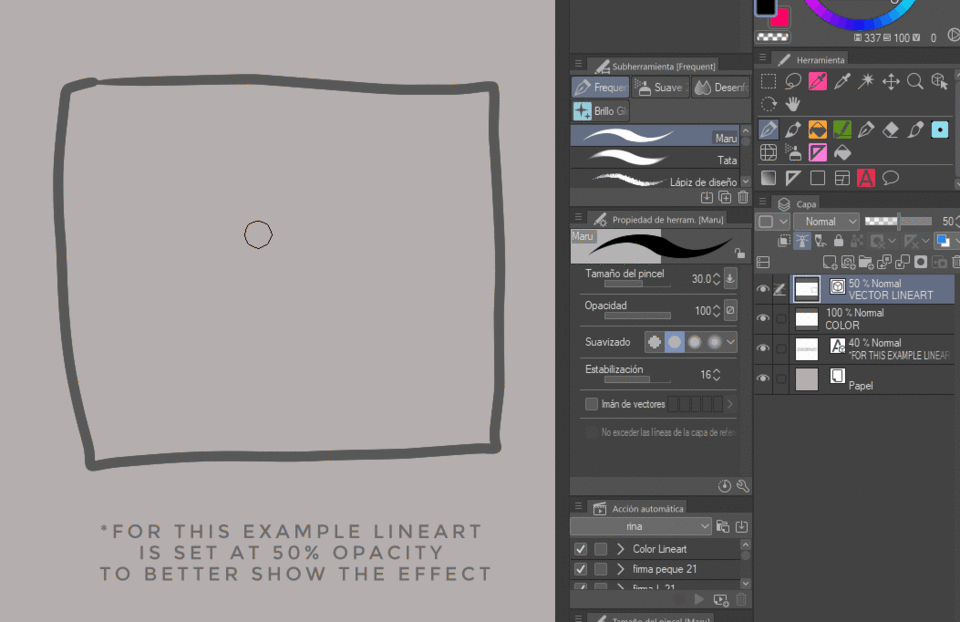
It’s troublesome so I just prefer to not use that option in the end.
Keep it in mind if you erase with transparent colors too!
(You could always try to fix the blank spots with the Paint Unfilled Area tool tho.)
Color Target
For the Enclose and fill, you wanna keep the Color Target option at Only Transparent or Closed Areas Including Transparent, most likely. This is basically to control what the Enclose and Fill tool should fill.
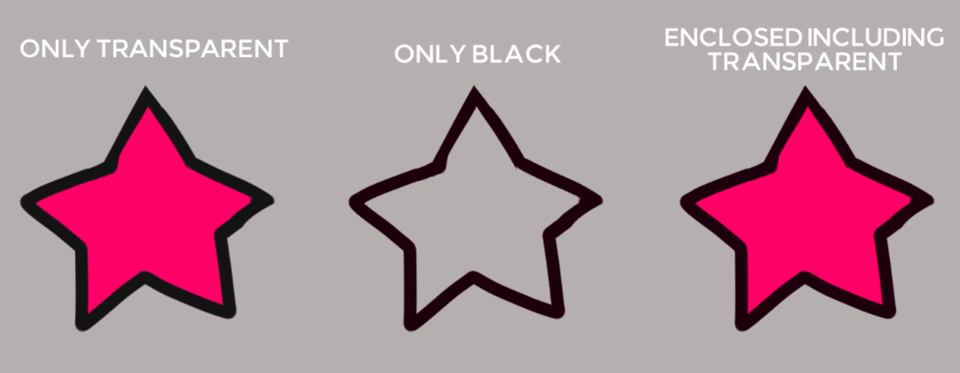
For example, if we set it to Only Transparent, the bucket will only cover the transparent pixels of that spot. It will not paint underneath the lines.
If we set it to Only Black instead, it will only paint underneath our lineart (as long as the lines are pure black, of course).
With Closed Areas Including Transparent, you’ll cover both things. So test this a little while your’re playing with the Area Scaling bar to find what works best for you.
My settings
In case you're still struggling here are the settings of my main “Refer to other layers” Fill tool. You may use them as a guide to find the best values for you!
-Close Gap is usually set between 7-15.
-Tolerance also ranges from 10 to 20 most of the time.
-Area Scaling always stays at 1.
I do pretty thin and open lines and these values work well for me.
Eraser Bucket
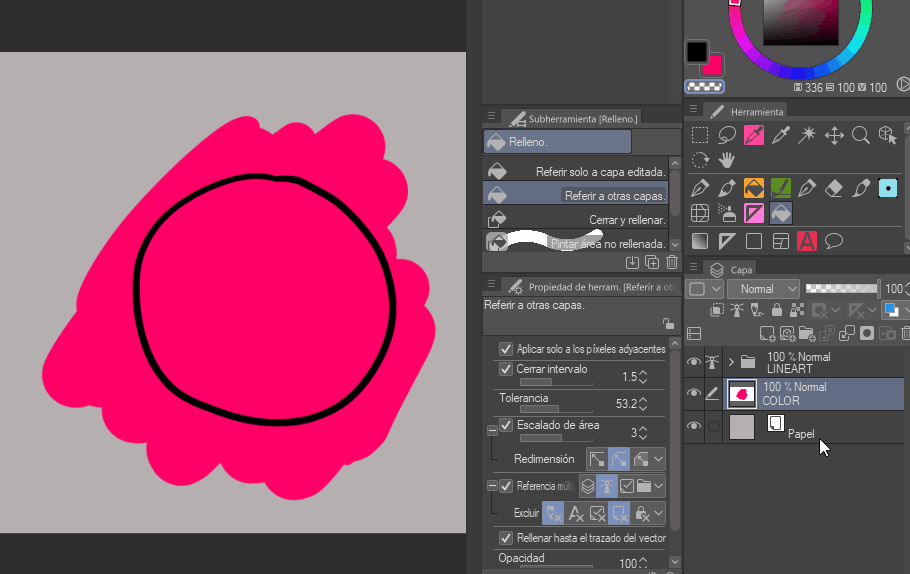
The Fill Tools can also be used with transparent color. AKA, you can turn them into an eraser.
It’s pretty useful if, for example, you make a big blob of paint, and you wanna erase what’s outside of the lines. Simply grab the Refer Other Layers fill tool, set it as transparent color, and click on the excess. And it will be gone.
I do this sometimes to color a big mass of hair.
4 Tricks to work faster and smarter
- Organization is key!
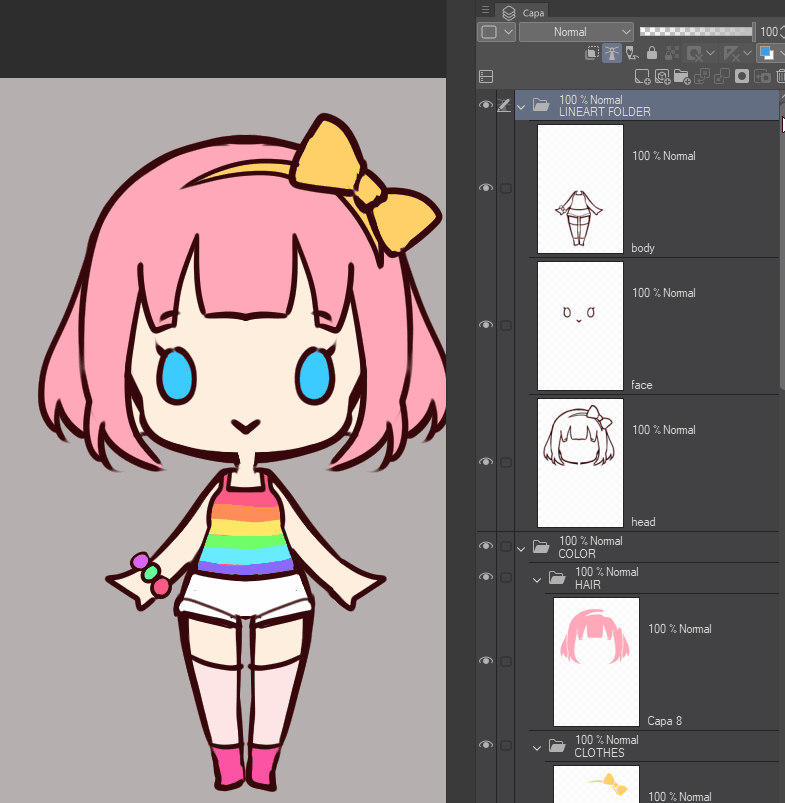
I like to keep my files organized for the most part, so I separate my base colors into different sub-folders.
Every element (skin, eyes, clothes, hair, extras) gets a sub-folder, and every color usually gets its own layer inside those folders.
This makes editing every different part very easy in later stages of the coloring.
- Use shortcuts!
You can speed up the process a lot if you make a keyboard shortcut to create a new layer. That way you can just focus on filling in the colors without going back and forth to the Layers Panel to hit the New Layer icon.
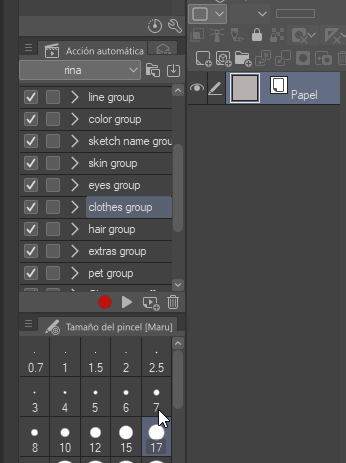
- Auto-actions
You can even make automatic actions to create and name every folder with just one click. Every second counts when you're working, so economize them as much as possible!
- Different tools for different styles
If you're an artist who does varied artwork or someone who has many different art styles, I'd recommend making as many duplicates of the Fill tools as you need and having them work in different ways to fit each case.
It's way faster switching to different tools for each specific type of art than constantly adjusting the settings of your main one back and forth.
For example, you can have one Fill tool for when you make thin linearts, another for thicker lines, another for sketches or textured lines. You name it!
Overall, if you come up with a way to make the process smoother for you, no matter how weird or lazy the solution seems, go for it! Take advantage of all the digital tools you have at hand!
Conclusion
There are a few more options for every Fill tool, and CSP keeps adding more with every new update, but these are the ones I find most useful. Feel free to play with the rest and experiment!
(Don't worry, the settings just look scarier than they actually are. They're not that bad once you get to know them 😂)
♥ For more tips to improve your drawing skills, come join my Patreon! I offer exclusive tutorials, brushes for CSP, and layered files to learn all my tricks!




Comentario