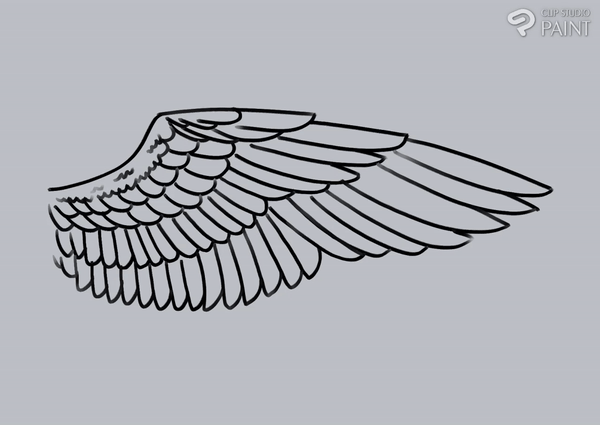
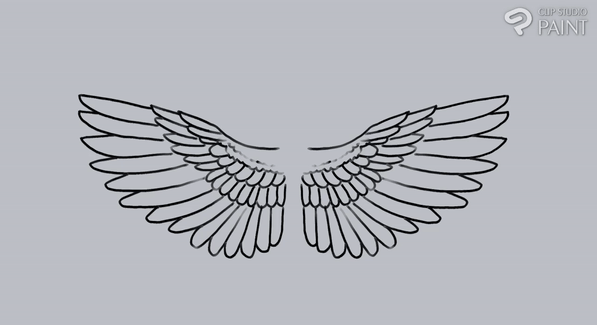
How to Draw Wings
About This Tutorial
Especially in fantasy illustrations, characters with wings are very popular. Since I like to draw them myself, I would like to show you a simple way to draw different types and shapes of wings. I will cover bird wings as well as bat wings.
First we will look at the general structure and then we will draw some wings together.
Then I will explain how to use Clip Studio Paint's Symmetry Ruler to make drawing wings faster and easier.
Bird Wings: Shape and Structure
Wings can have various shapes and the exact shape depends on the environment a bird lives in. Each shape adapts to a certain lifestyle and serves a specific function: e.g. birds that live near the ocean and fly long distances above water, like the albatross, have long and flat wings. On the other hand, birds that navigate through the woods have very short wings.
Still, the structure is always the same: there are three major layers of feathers that all birds share, which you should keep in mind when drawing them.
Bird Wings: Different Layers
These three main layers are, however, further separated into more sections.
We differentiate between primaries and secondaries.
On the inner part of the wing there are:
secondary feathers
secondary coverts
marginal coverts
On the outer parts of the wing are:
primary feathers
primary coverts
alula.
Bird Wings: Shape and Direction of Feathers
The primary and secondary feathers as well as the primary and secondary coverts only have one single layer of feathers. The marginal coverts, on the other hand, have many layers of feathers which get smaller and fluffier towards the top of the wing.
The feathers of the primaries (red section) always point outward, while the secondaries (blue section) point inward.
The primary and secondary feathers (lowest layer) have pointed tips, while all other layers have more rounded tips.
Bird Wings: Step by Step
First, lets draw the base shape with all the sections that we will use as a template for our wings. We will put this layer on a lower opacity later on for guidance.
Step 8: The feathers of the marginal covert, the primary covert as well as the secondary covert have rounded tips.
Step 10: The marginal covert has many soft and fluffy feathers.
Remember that the outer feathers point outwards (step 11) and the inner feathers point inwards (step 13).
Step 15: Primary and secondary feathers have sharp edges and pointed tips.
Done! Now you can clean your sketch and erase the base shape underneath.
Bird Wings: Timelapse (Sketch)
I made a quick sketch timelapse video to show you the process again:
From top to bottom, outside to inside.

Bird Wings: Common Mistakes
[From top to bottom]
1: In this example, the secondary feathers are missing. Your character or bird would not be able to fly like this!
2: Avoid drawing a mix of long and short feathers. Wings have a systematic order.
3: The wing in this example looks more as if it was made out of hair. Feathers are not as flexible as depicted here and cannot bend in every direction. Sometimes they bend at the tips when there is a lot of pressure from the air, but when relaxed, they do not bend that much.
4: The wing in this example has four joints, but in reality, wings have less joints.
Bat Wings: Structure
Bat wings are very similar when it comes to the base structure. A bat wing is also very much like a stretched hand with very long fingers. There are three to four fingers on each hand that are covered by skin. The fifth finger is on top of the wing and points outward.
Bat Wings: Step by Step
Step 1: Start with the upper part of the wing. Don't forgt to only add two joints.
Then, draw the fingers: either three or four.
After that, connect the fingers with slightly curved lines.
Now add the bone of the arm and connect it with the hand and the fingers.
You can now add more details, like a little patch of skin above the arm near the body or the fifth finger on top of the hand that points outward.
Bat Wings: More Shapes
Bat wings are a lot of fun because you can draw them in so many various shapes and sizes! Just experiment a little.
You could
add more fingers than usual or less fingers than usual
make the wing flat or big, long or short
leave more space in between the fingers or make the space in between very small
make the surface of the skin that connects to the body very big or very small
Quick Tip: How to Draw Bent Wings
Sometimes, birds or bats fold their wings or they bent because of strong wind. Drawing bent wings is easy when you use a base shape at first.
Let me show you how I do it step by step.
1. Start with a curved line, which is the line of the lowest layer of feathers for your wing (bird) or just your lower wing part (bat). The wingsin this example bent inside, so we can see them from the front.
2. Draw a slightly curved line upwards from the tip of your first line.
3. Now we add the joint. This is the point at which our wing bents inwards. Slightly curve it and connect it to the body of your character or animal.
4. Finally, we connect the outer curve of our wing with the joint as well. You can now erase the parts that won't be seen later on and we're done with the base shape. As a next step, you can either draw the three sections of bird wings as a guide, or start with adding the fingers for your bat wing. From there on, adding the feathers (bird) or the skin (bat) is as shown in the step by step tutorials above.
The next wing shape also bends inwards, but upwards as well. Here, the single steps are a little different. Let me explain again how to do it.
1. You start with a curved line as well, but this time it goes upwards. The upper tip of your line is the end point of your wing, so either the last primary feather (bird), or the last finger (bat).
2. Let's start with the back side of our wing by drawing a rather straight line from the lowest part of our curve upwards. It should end almost on the same height as the main curve.
3. Now connect the two lines at the top tips.
4. Now we need to draw the upper part of our wings. We start at the upper right corner that we created by connecting the two curves. Draw a line from there which follows the same direction as the lowest part of our main curve. They should end parallel.
5. Finally, we remove the lines that are hidden by the curved wing part. Our basic shape is now done and we can again draw in the feathers (bird) or fingers (bat).
Quick Tip: Symmetry Ruler
When I draw characters from a front view, I love to use the symmetry ruler to draw their wings. That way, they look the same and it is also a lot faster compared to drawing both separately.

1. You can find the [Symmetry Ruler] in your [Tool] palette.
2. Make sure that you set the [number of lines] to "2" and activate [line symmetry]. You can find these settings in the [Tool Properties] of your [Symmetry Ruler].
Another tip:
Using the eraser doesn't work with the symmetry ruler because it will not mirror the action. But there is a way to erase on both sides of the symmetry ruler simultaneously! Simply select a transparent color for your regular pen and use it to delete your mistakes. It will mirror the action and erase on both sides.
Here are two examples of how I use the symmetry ruler when drawing characters with wings.
for bird wings, I always start with the top layers of the wings (marginal coverts, alula) and end with the lowest layers (primary and secondary feathers), while drawing the feathers from the outside of the wing to the inside.


Conclusion
By simplifying the wing shape, you can quickly draw different types of wings. Following the structure of real wings makes your drawing look more realistic, but if you want to emphasize the fantasy aspect, you can of course experiment a little with shape and structure and create something completely new!
I personally love to draw wings and hope that my instructions could help you a little. Thanks for reading and see you soon!
- Chevistey


Comentario